Introduction
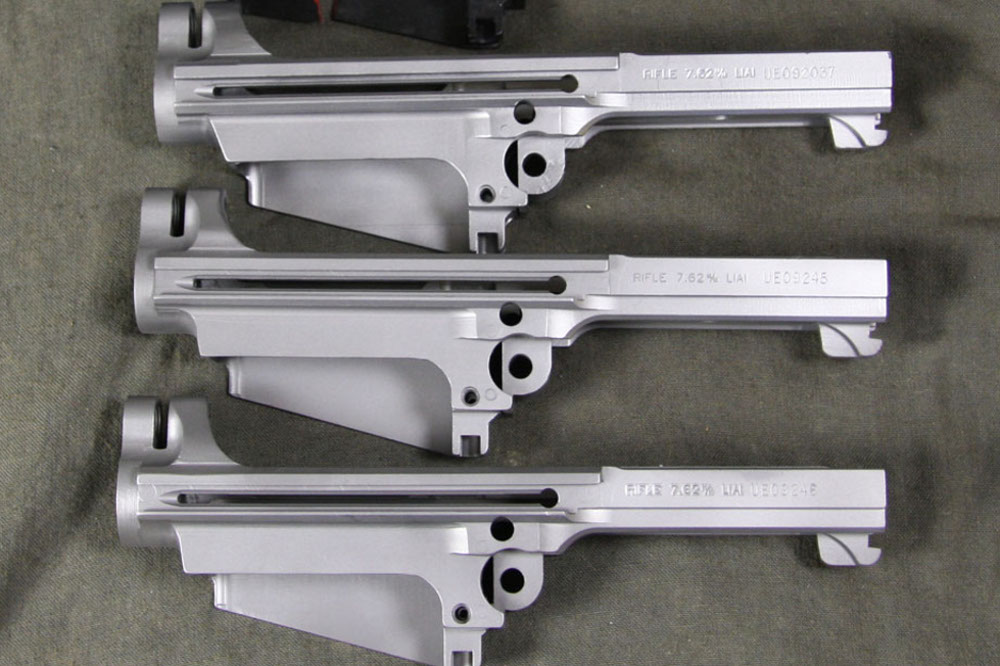
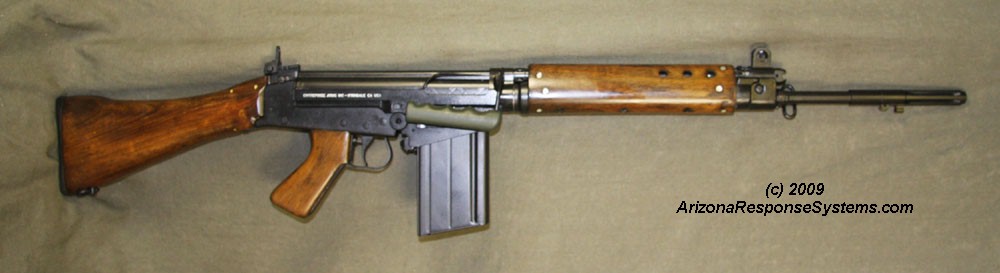
Entréprise Arms sent me pre-production L1A1 receivers for review and comment. Over several months I evaluated their changes and recently received a fourth production receiver. It is of the British pattern, which makes it unique, as no other companies have released a British pattern receiver. (Update: Coonan Now offers UK cut). Entréprise Arms had previously released an Australian Pattern.
I wanted to determine if it was suitable for the typical home builder, or if it would require significant adjustment, best left for the professional or experienced home-builder. If there are flaws, what will it take to correct them? I started with initial observations, then test fitted parts to the receiver. Then I did a complete build and testfire. When I found issues, I determined what the most appropriate fix would be and the level of complexity. I hope this commentary is of value in making your buying decision.
I used a 1958 pattern British rear receiver section, an Australian front receiver section, and original blueprints as a guide. While the lightening cuts are different on the Australian and British, the critical dimensions are the same. I acquired four inch pattern parts kits for the evaluation, with most parts Australian. If a part didn’t fit as expected, I tried to duplicate the problem with other samples of the same part – thereby determining if the receiver or the part was at fault.
Initial Inspection
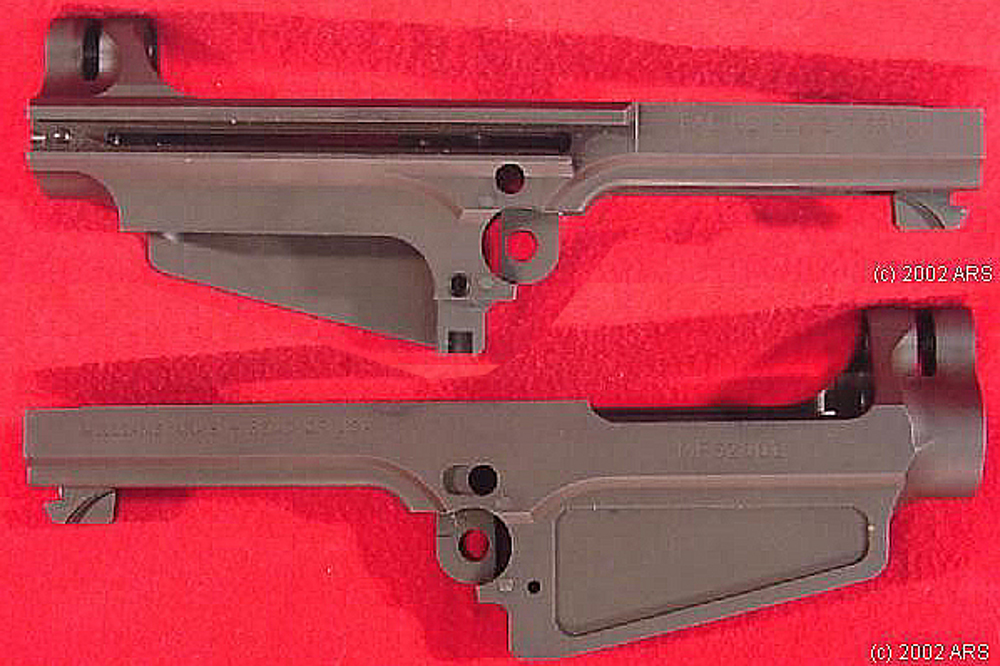
The first receiver came with a dark gray manganese phosphate finish. I found that removing the phosphate finish and using a fine bead-blast made it easier to photograph different aspects for my long discussions with Matt at EAI. After mentioning this to EAI, I received subsequent receivers in the white, and bead-blasted them to accentuate the detail. Receivers shipped to the customer will be phosphated.
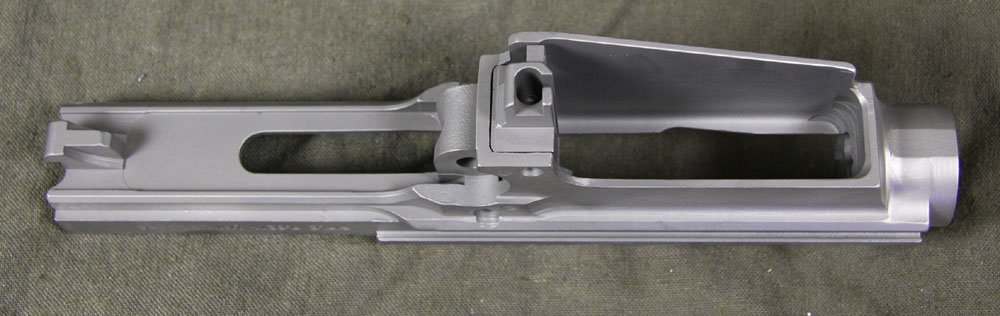
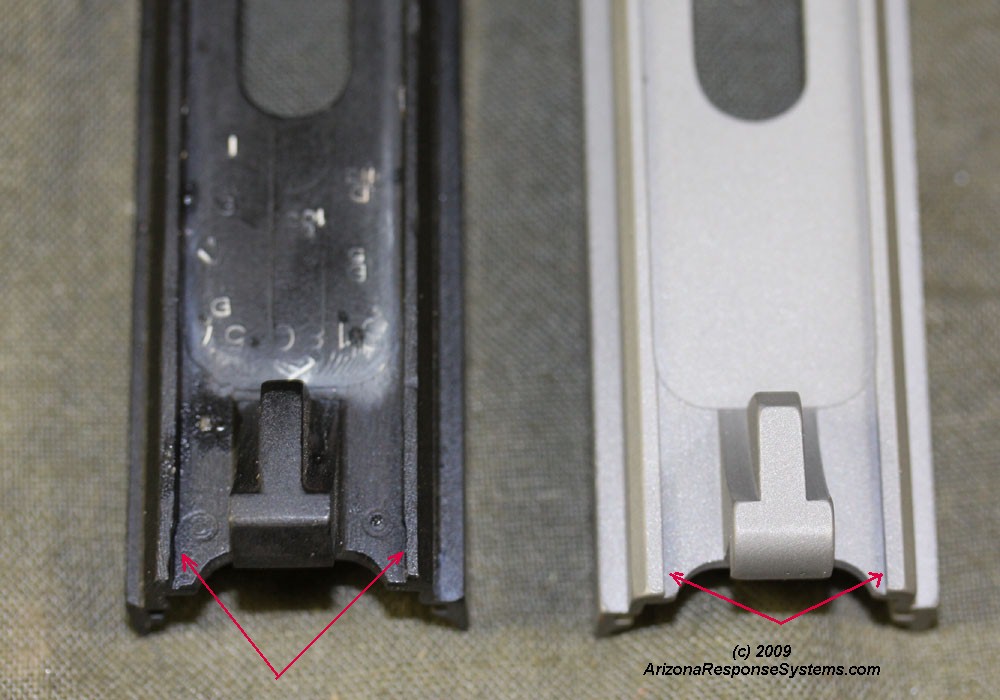
The receiver is machined from a casting. Hardness test marks on the underside of the receiver suggest it was hardness-tested after heat treatment.
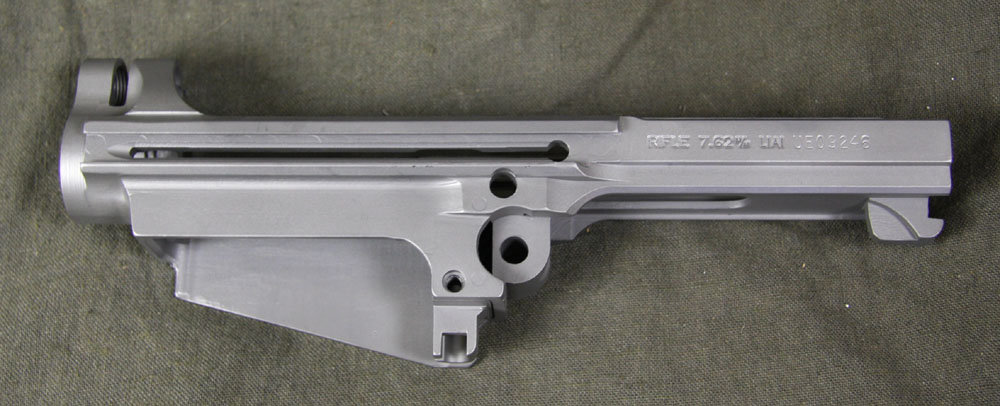
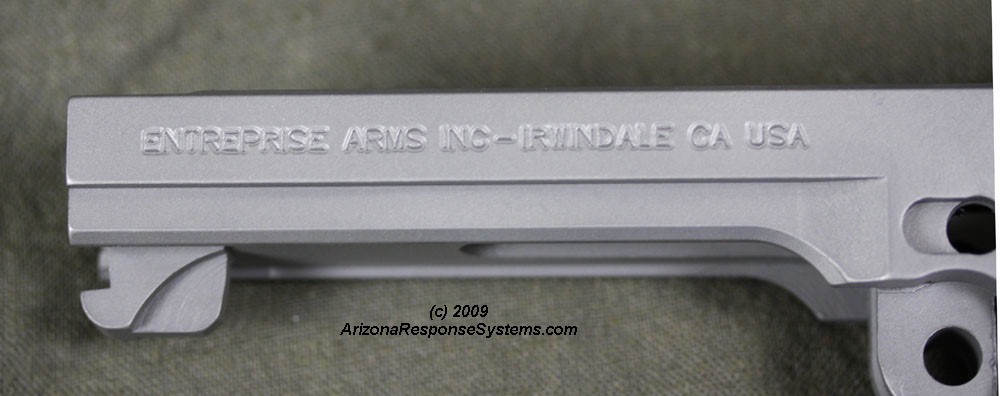
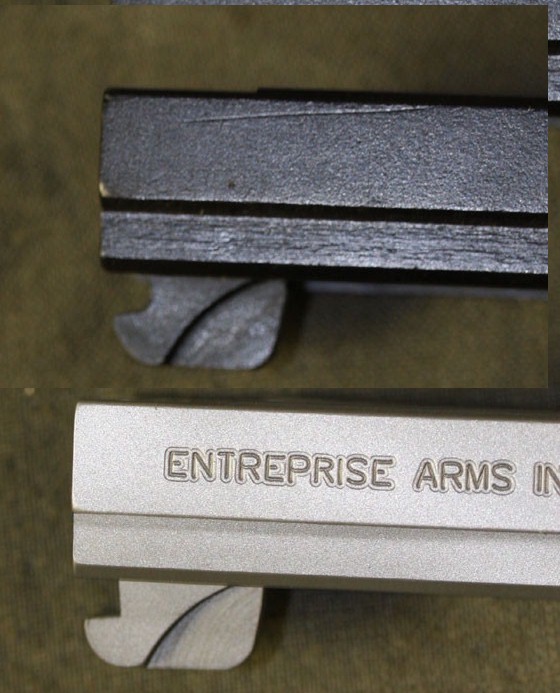
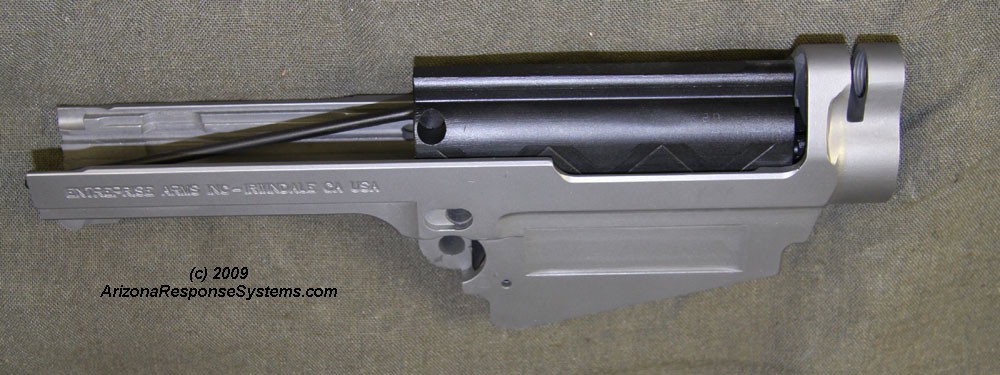
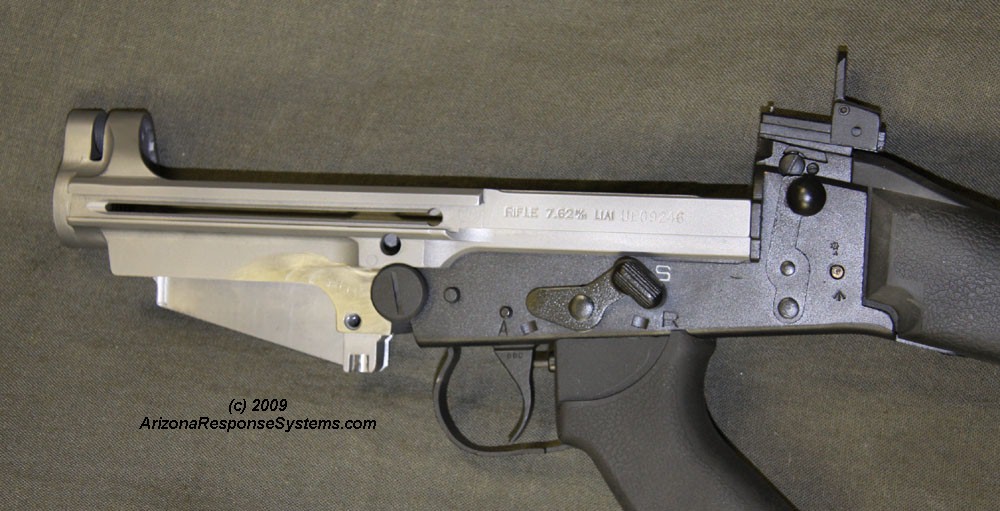
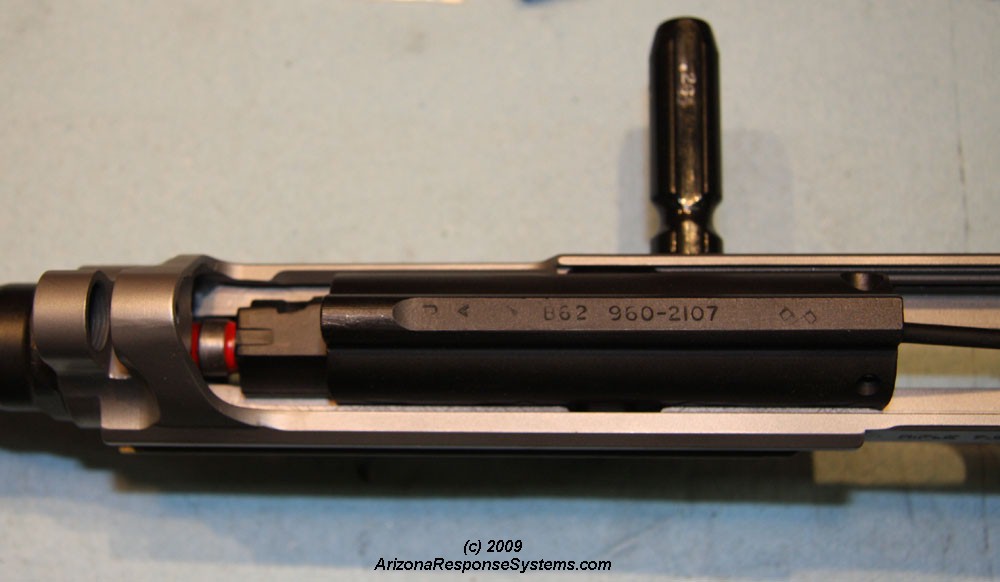
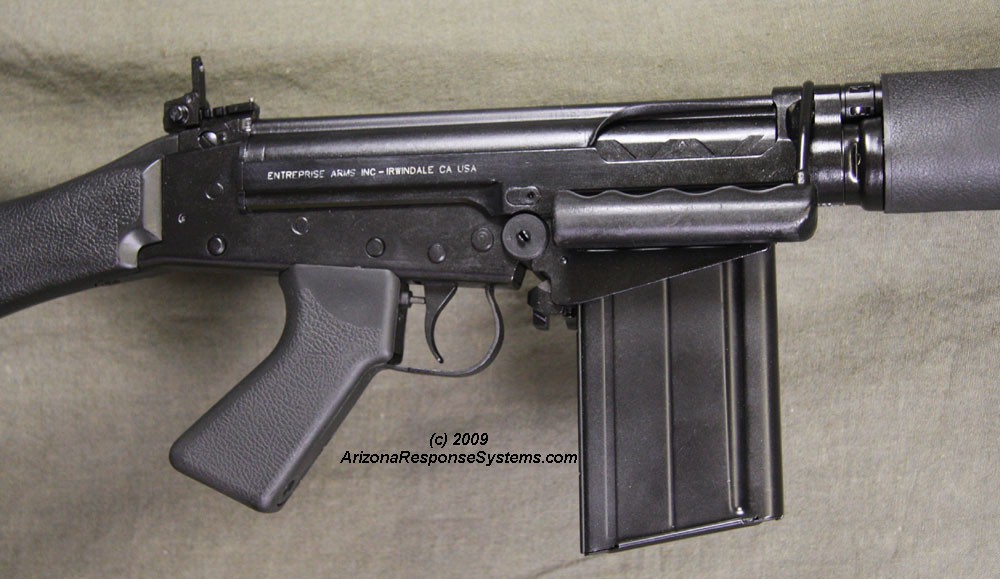
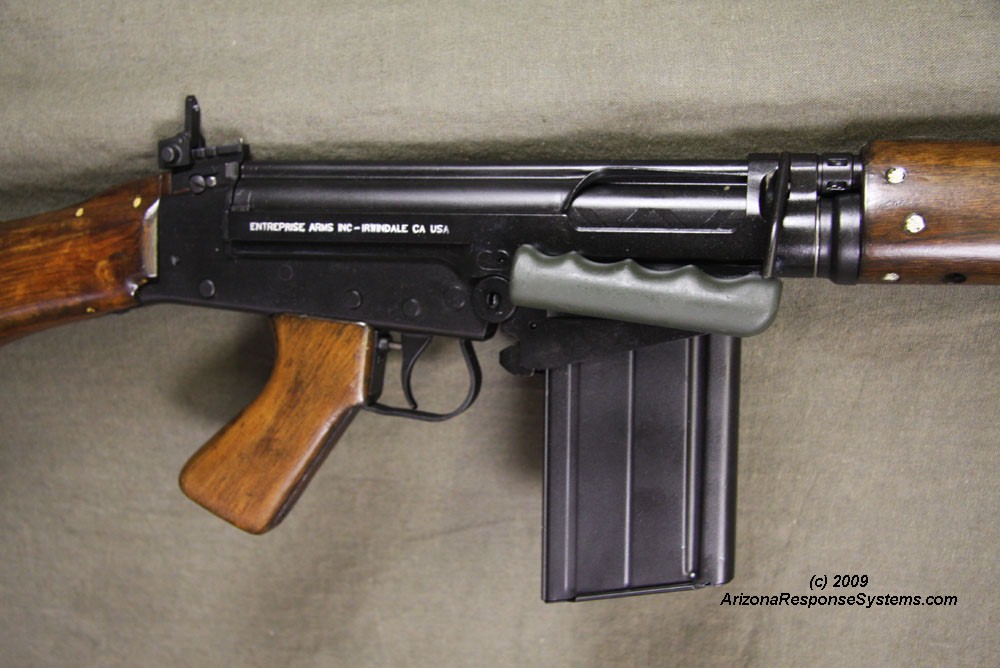
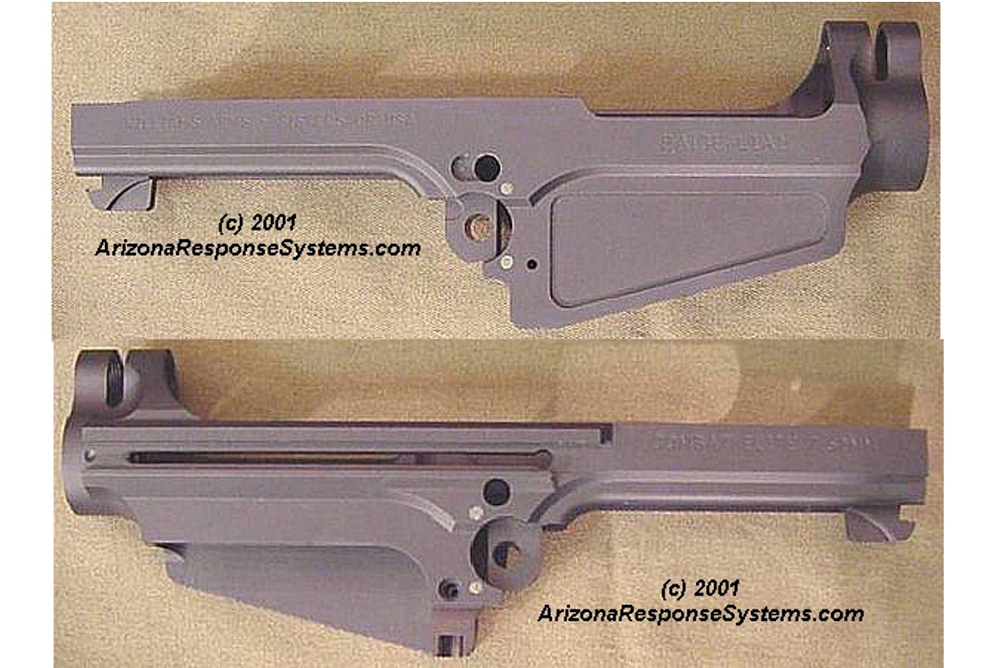
Close-up, left side engraving. The engraving on my last receiver was not as nice as the previous 3. It appears they attempted a new engraving style that made the letters too wide, and then went back over it with the old style, leaving a shadow around the letters.
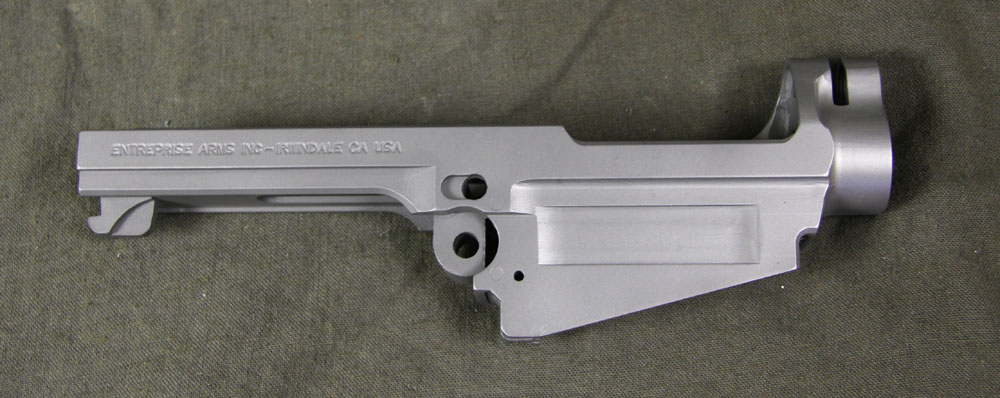
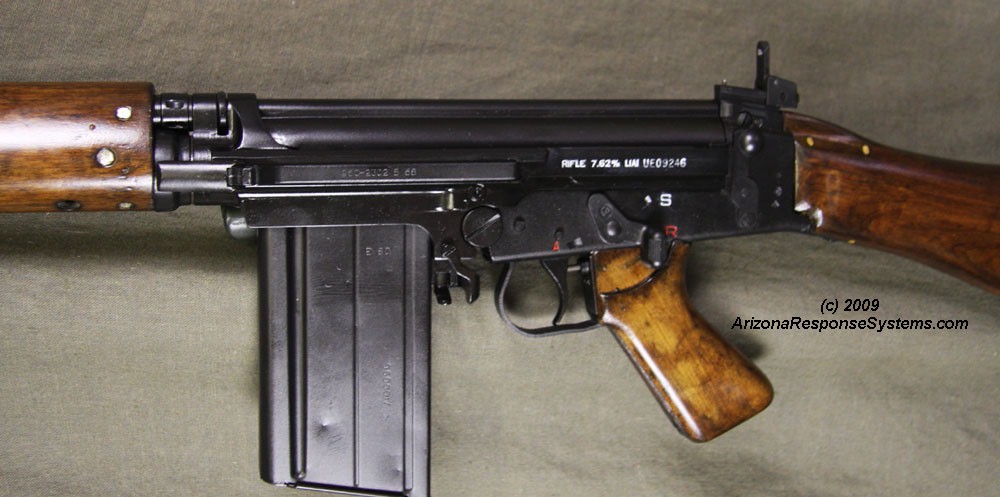
Close-up, right side engraving.
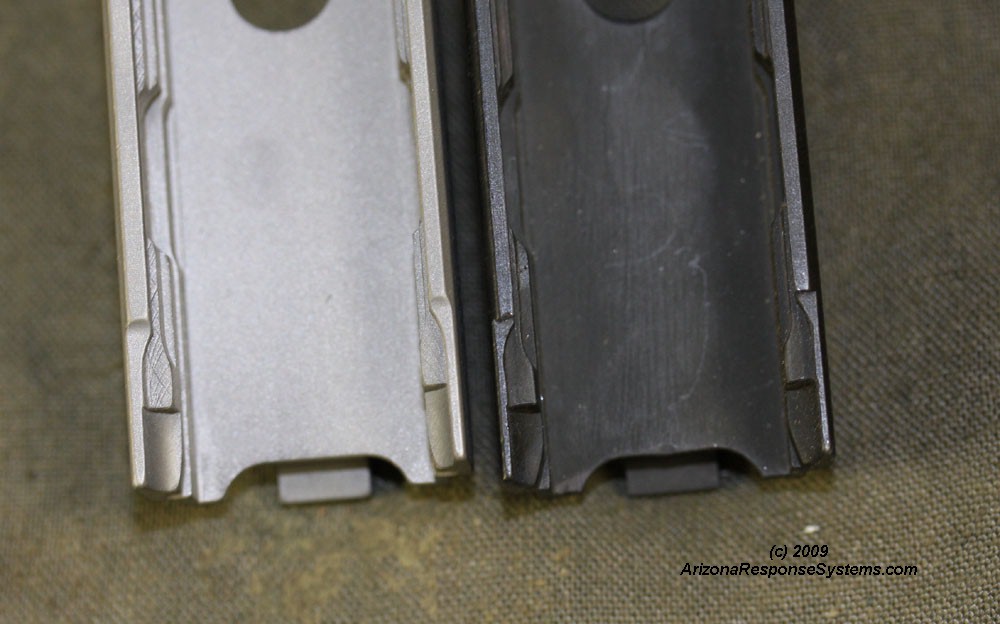
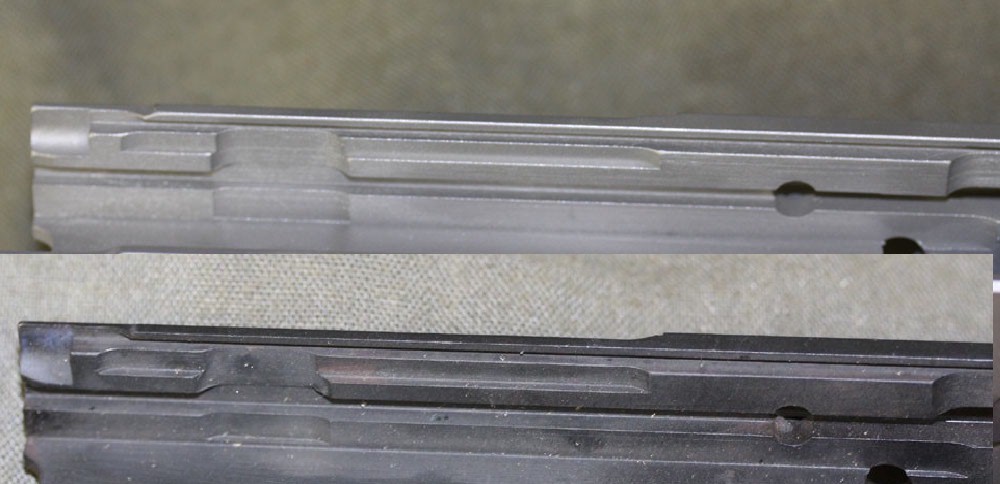
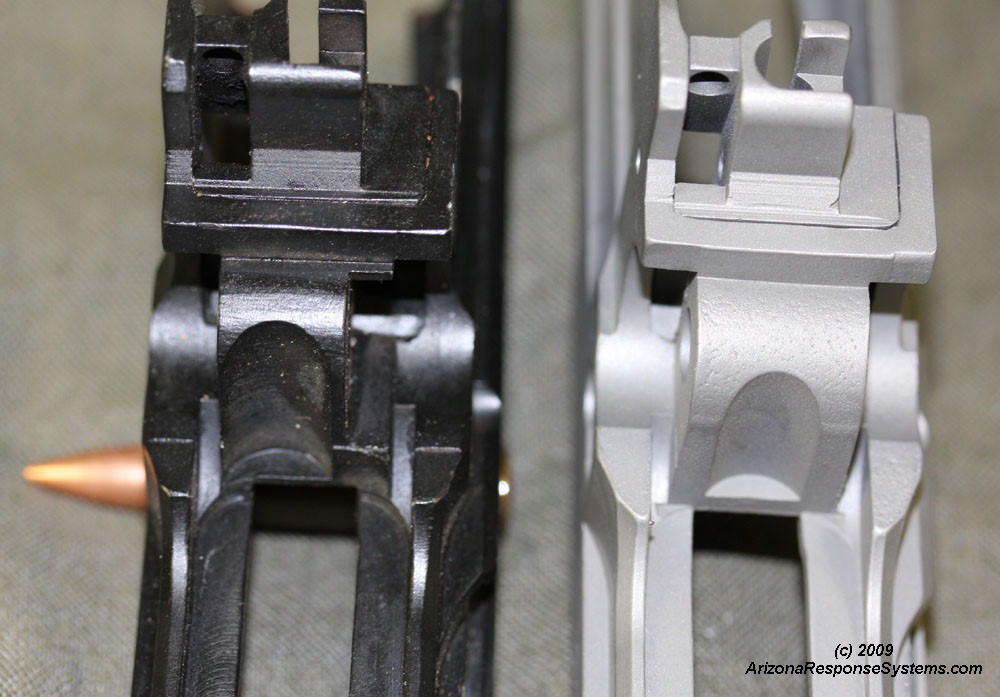
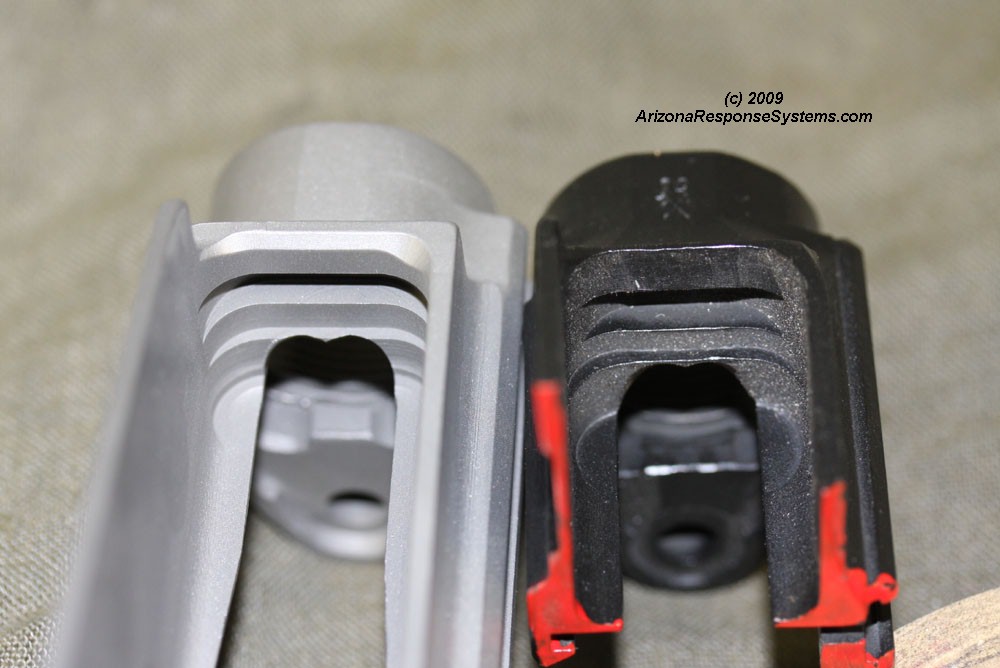
Close-up, comparing internal rear cuts with original. Very nice.
Comparing right side internal lightening cuts to original. Very nice.
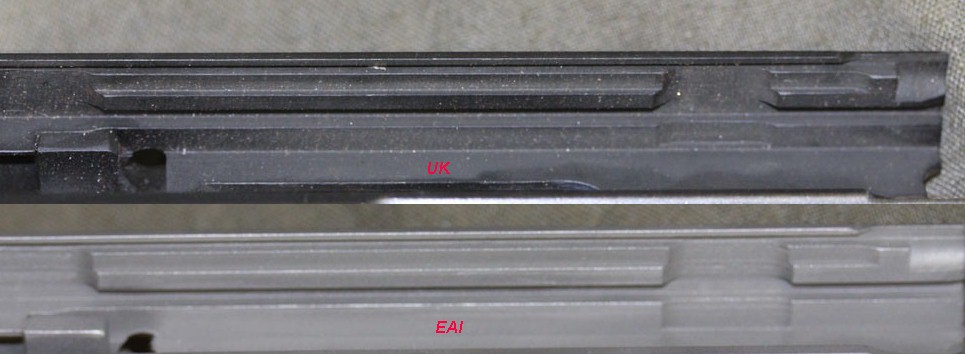
Comparing left side internal lightening cuts to original. Very nice.
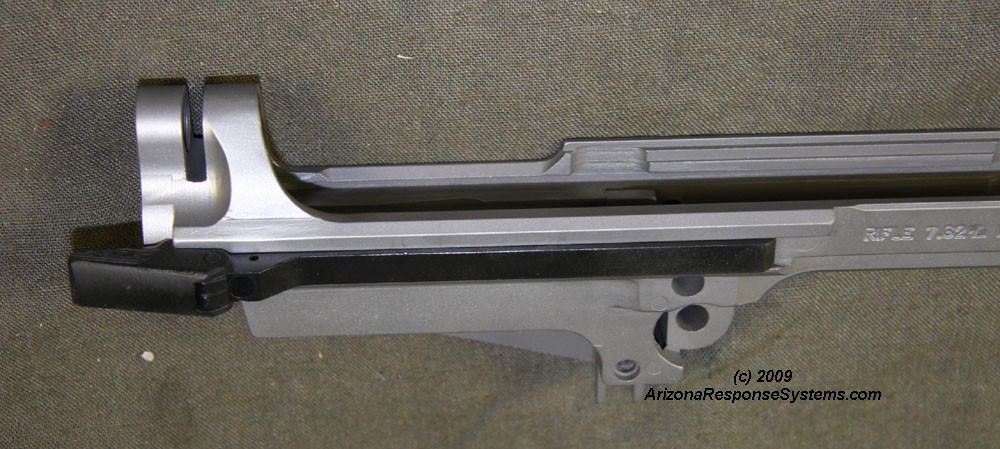
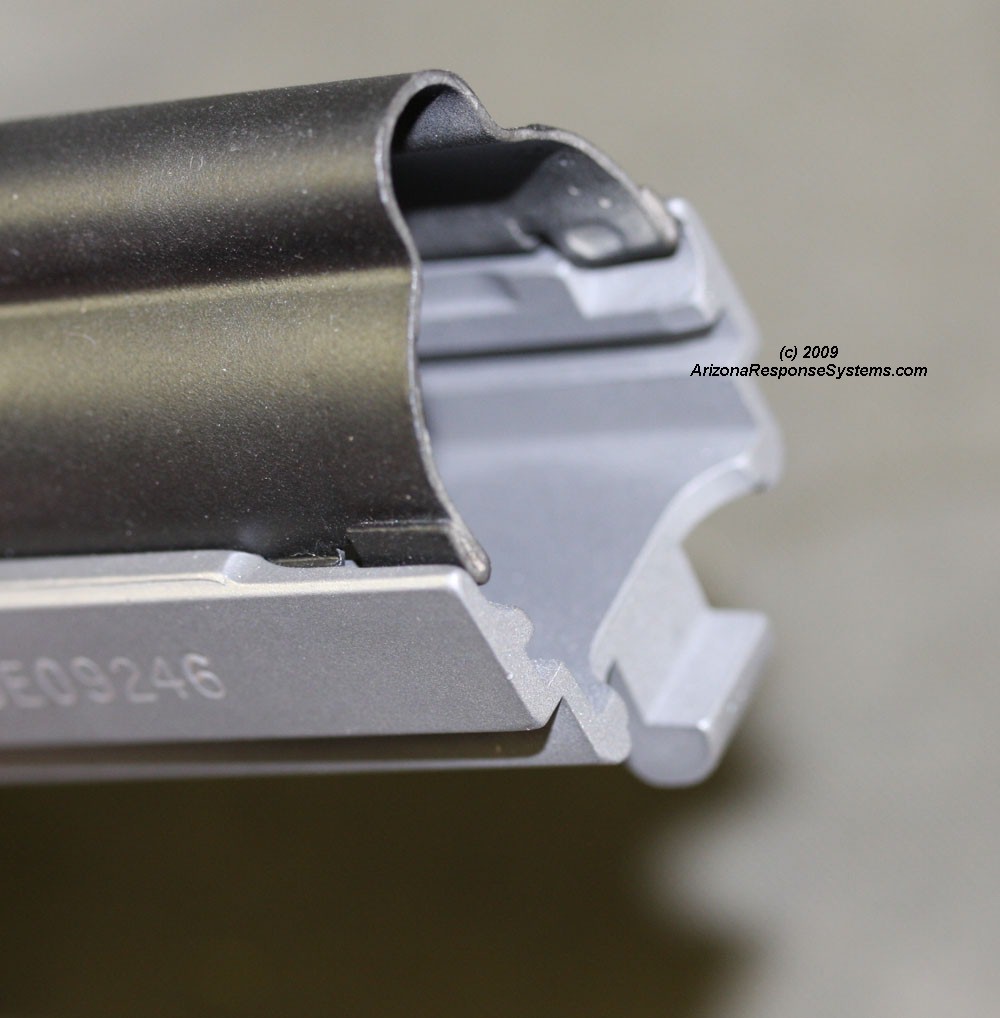
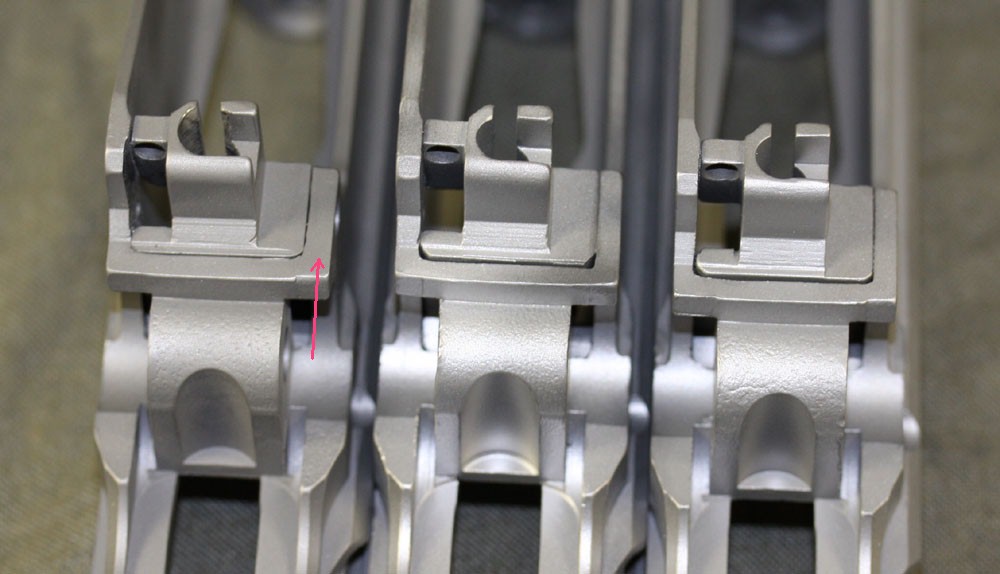
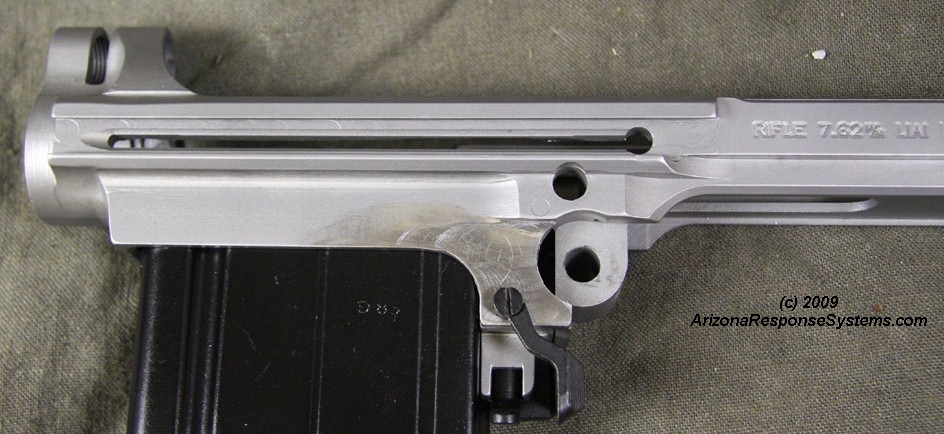
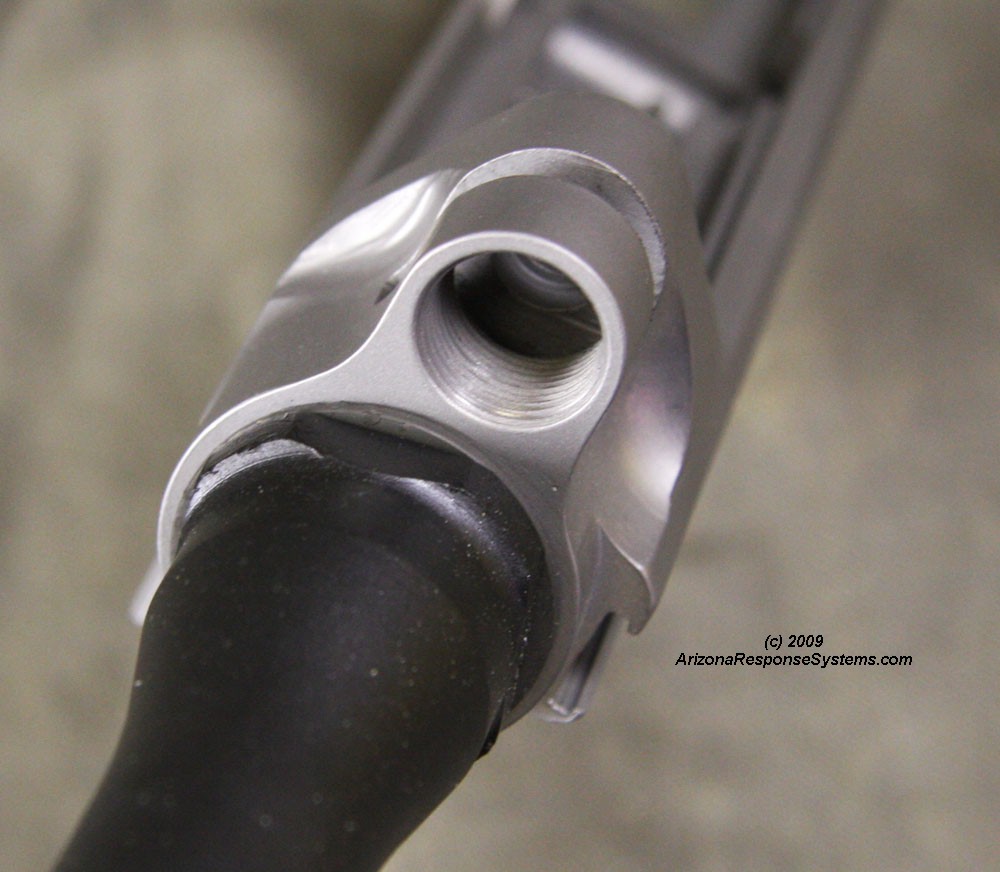
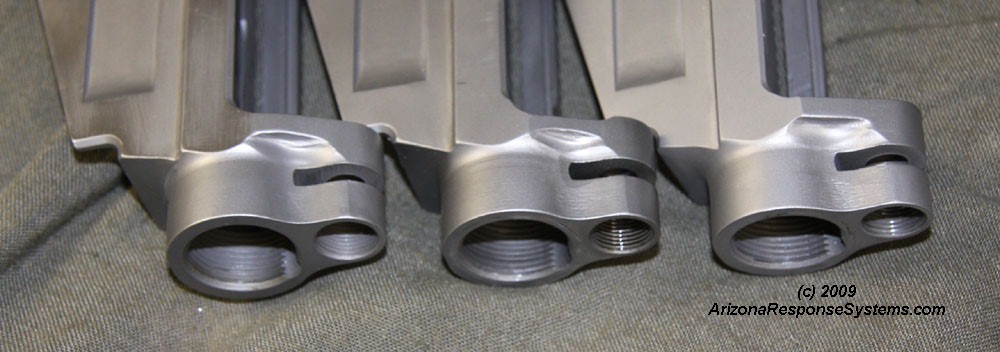
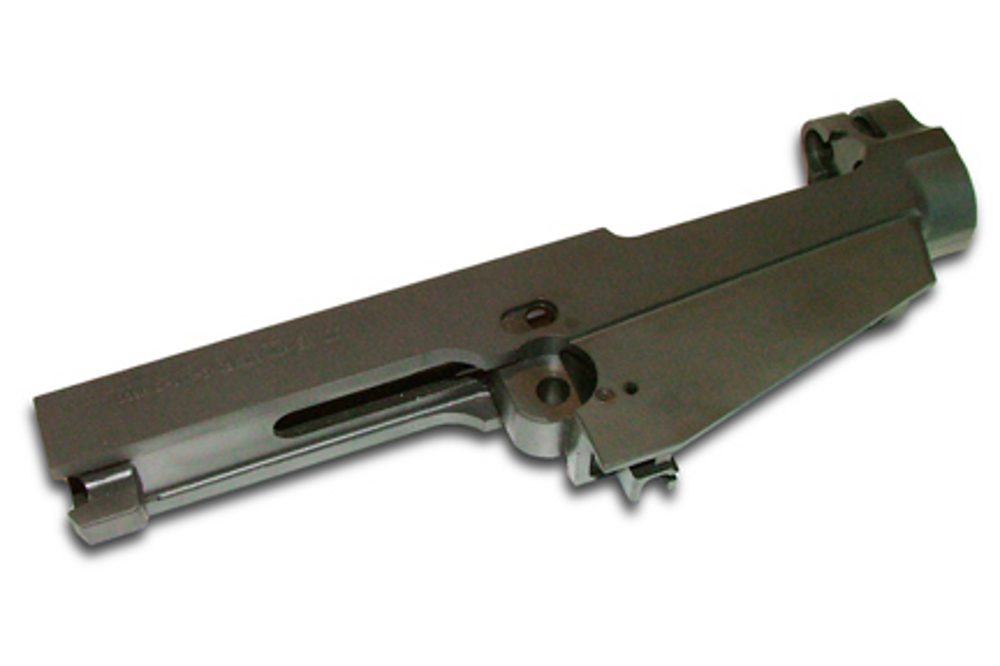
External radius cut. This compound radius is a difficult cut to make. The cosmetics are a little rough (top). More on that later. The magazine well difference is correct for the year of the blueprint – a little different than the Australian version.
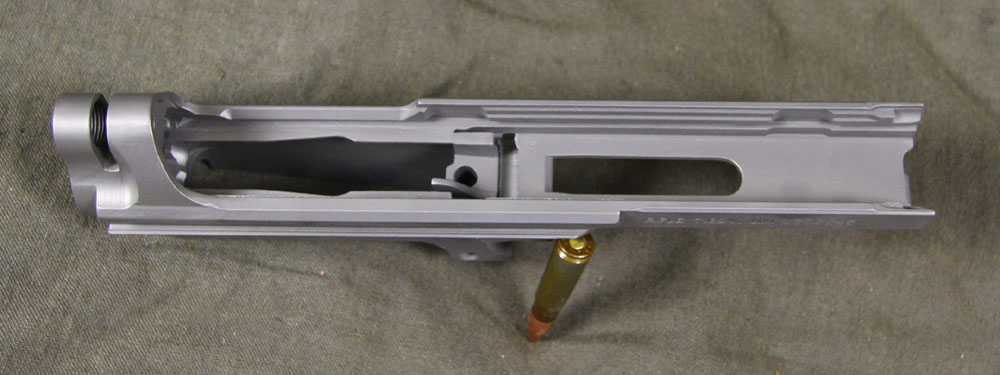
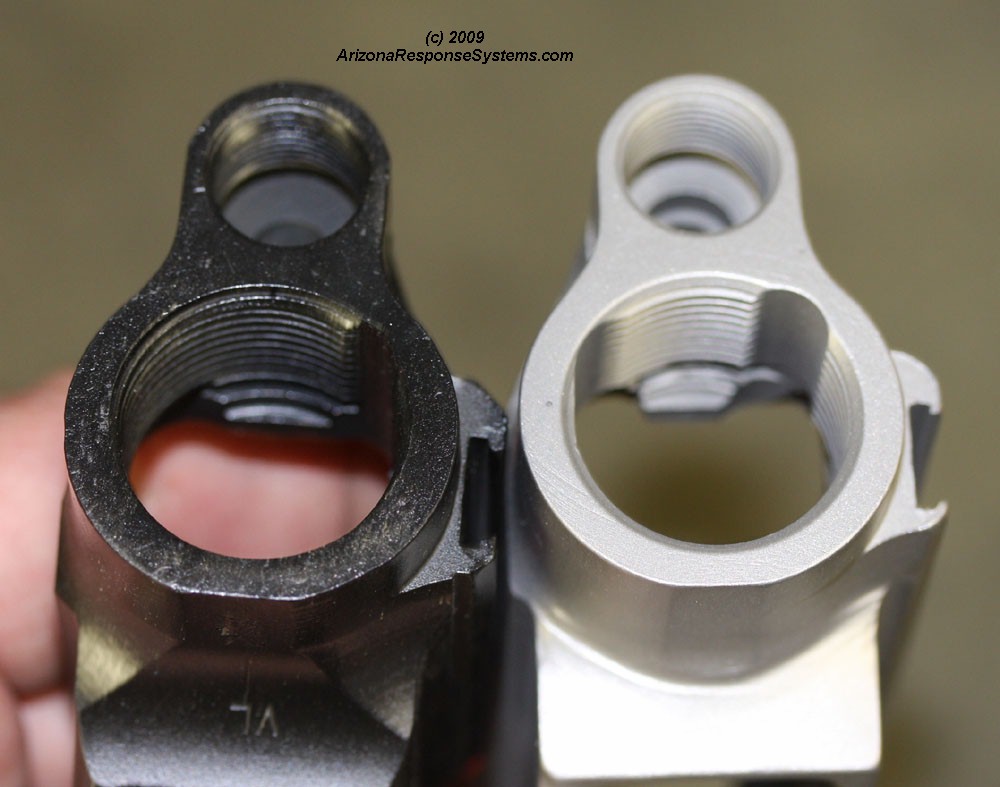
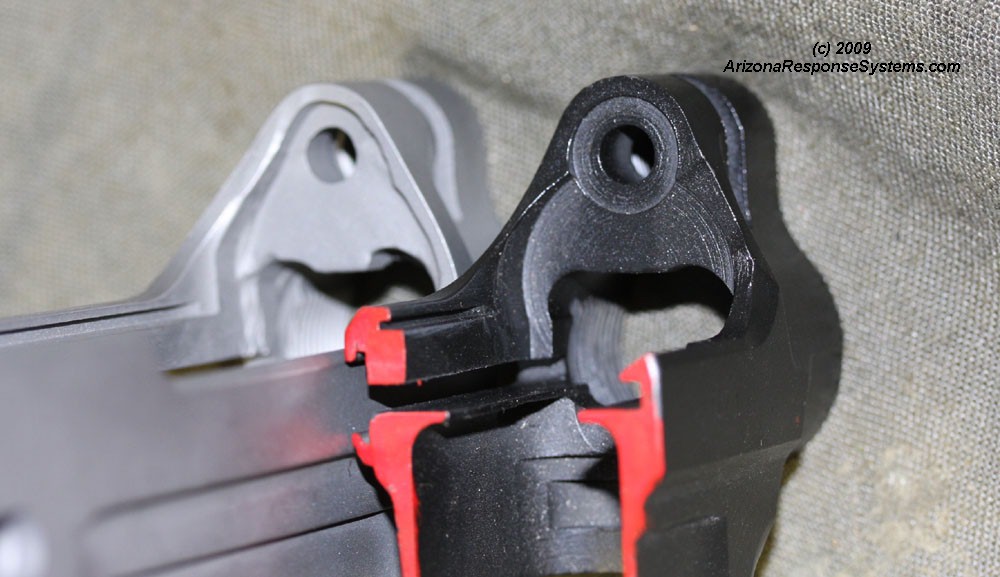
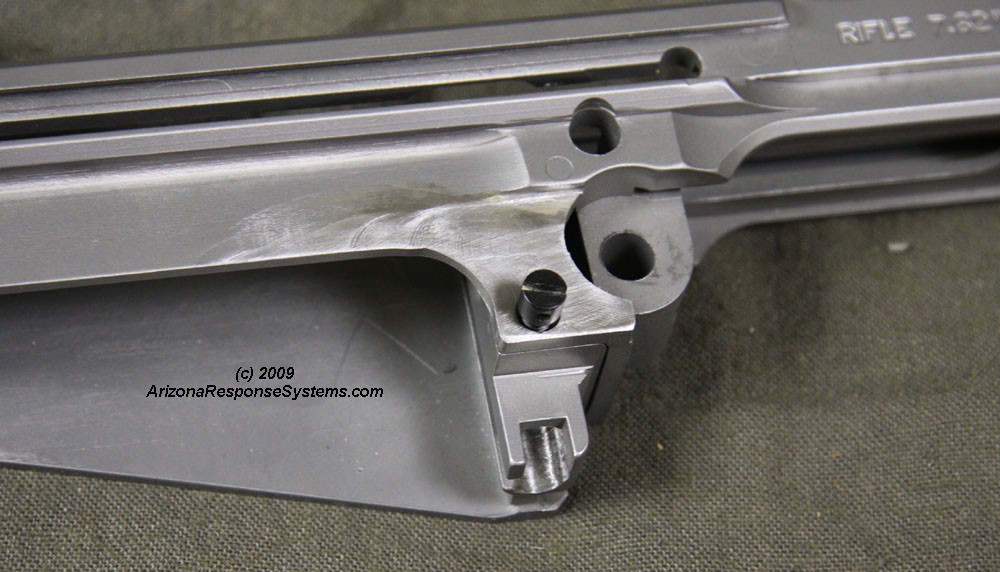
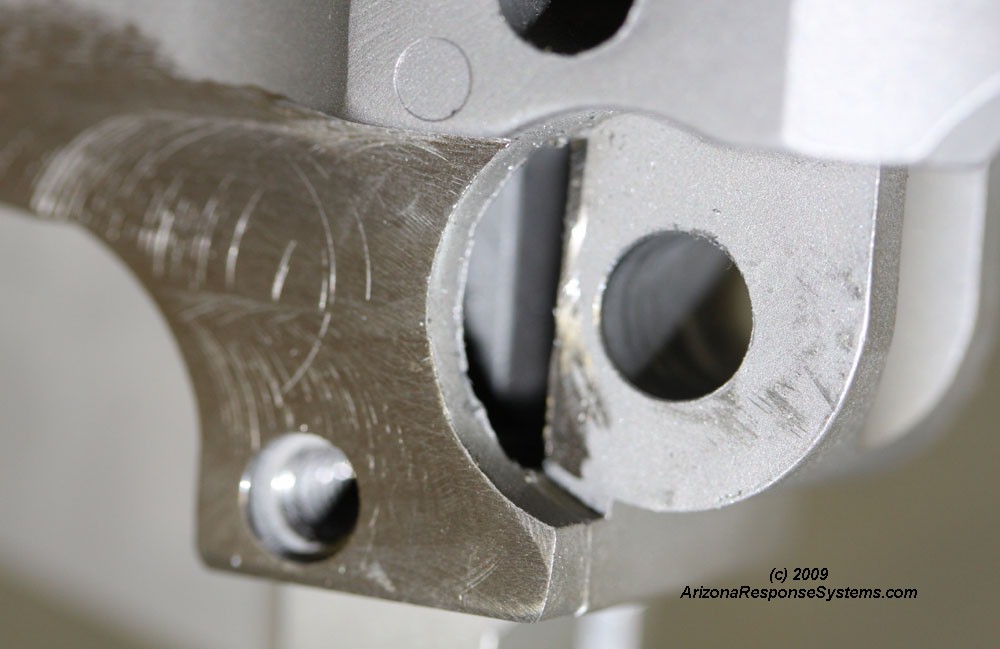
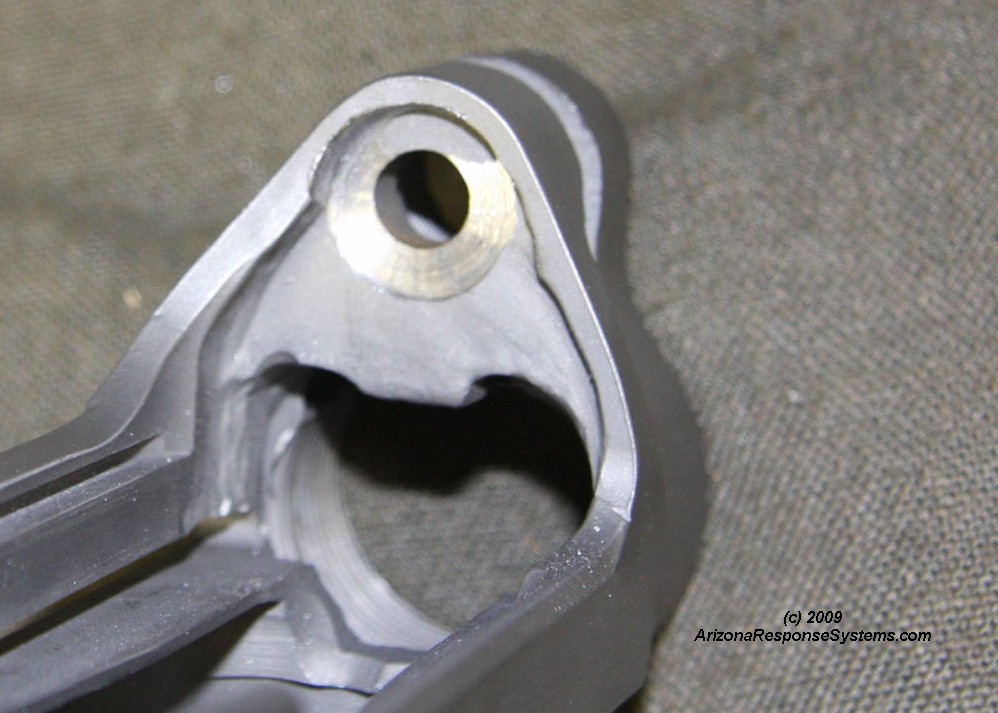
Inside front comparison. This was the area of greatest disappointment. More on this later.
Center underside comparison.
Close-up, center right side.
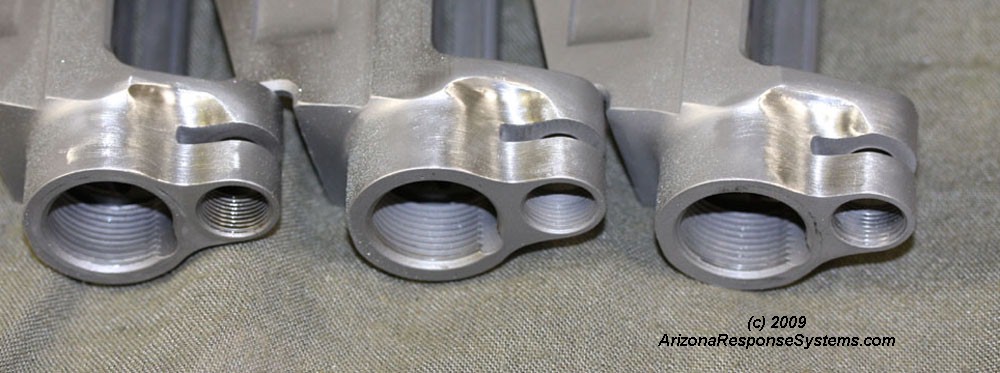
Locking lug comparison, right side close-up.
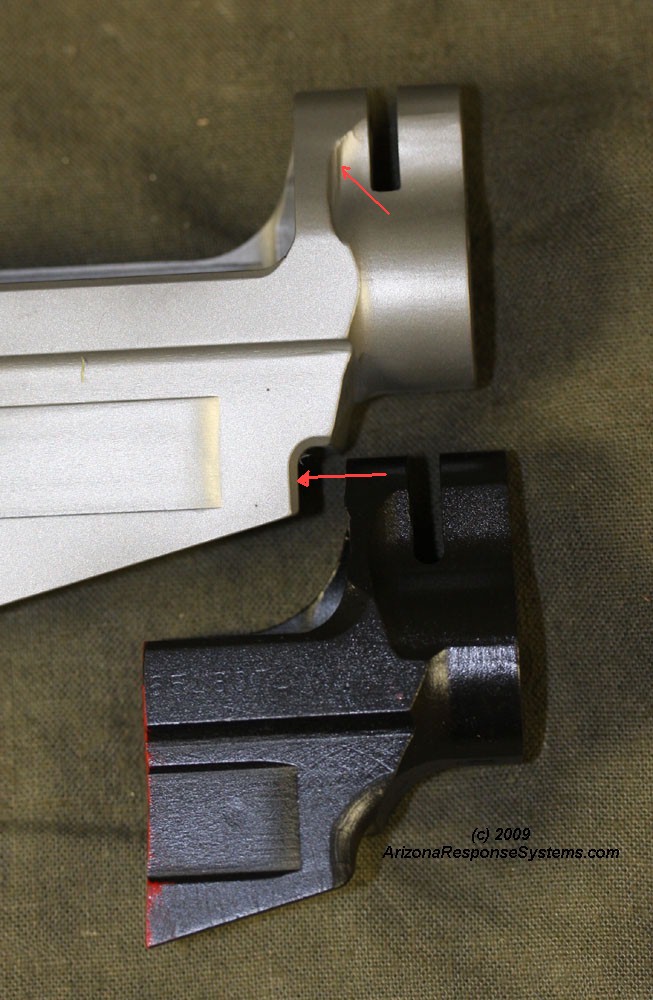
Close-up, underside rear. Note small relief cut missing. Not essential, but helps guide the upper and lower together.
Magazine well comparison.
Test Fitting
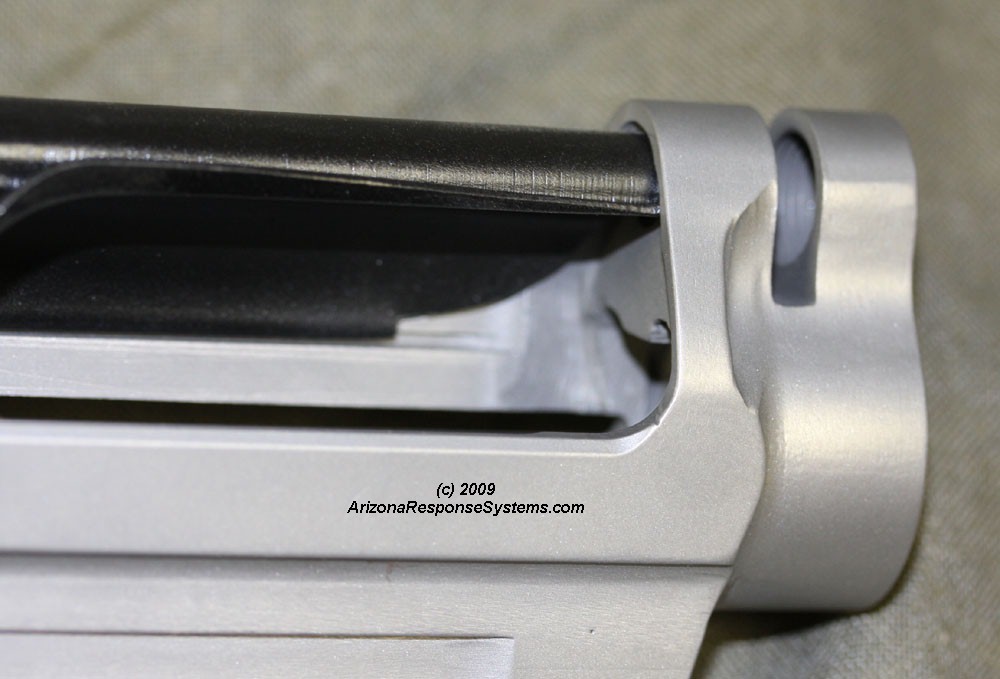
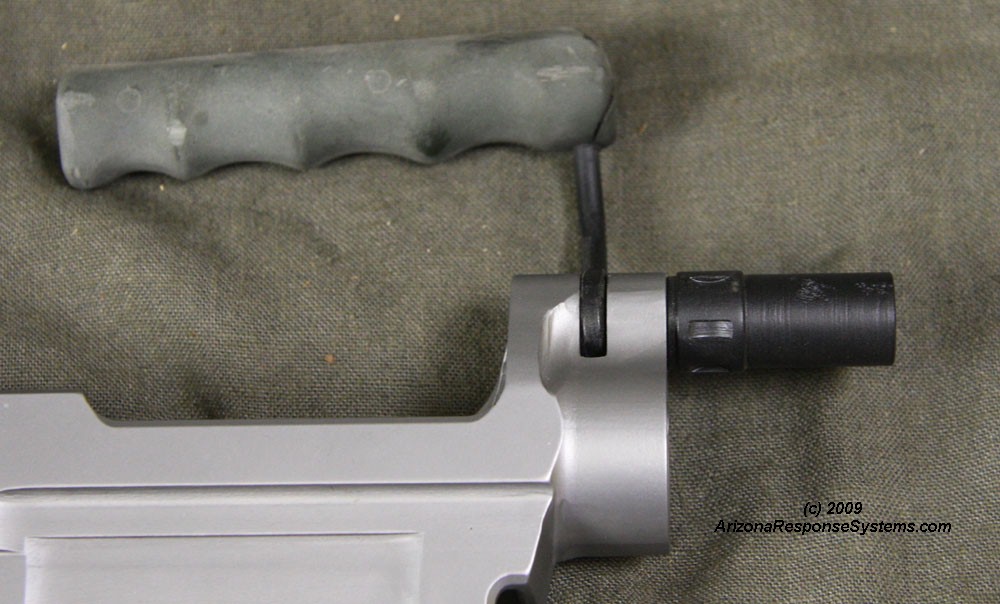
Test fit, cocking handle. No issues.
Test fit, cop cover front. Fits. Earlier ones needed a slight relief. The cosmetics still upset me.
Test-fit, top cover, right side view.
Test fit, top cover, rear. Alignment is good. Clearance slots well done.
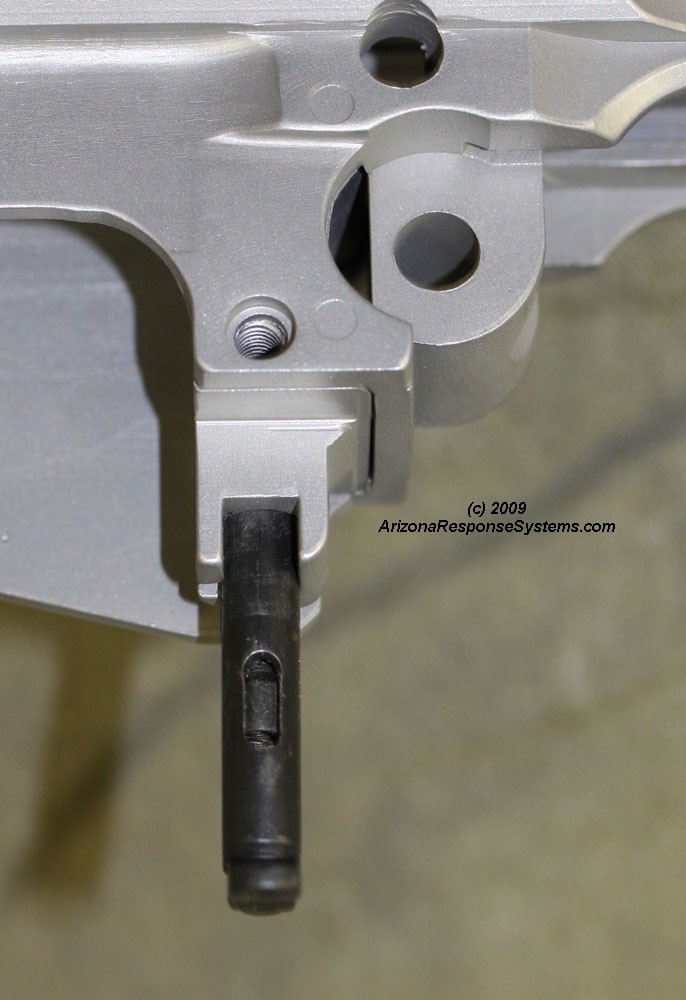
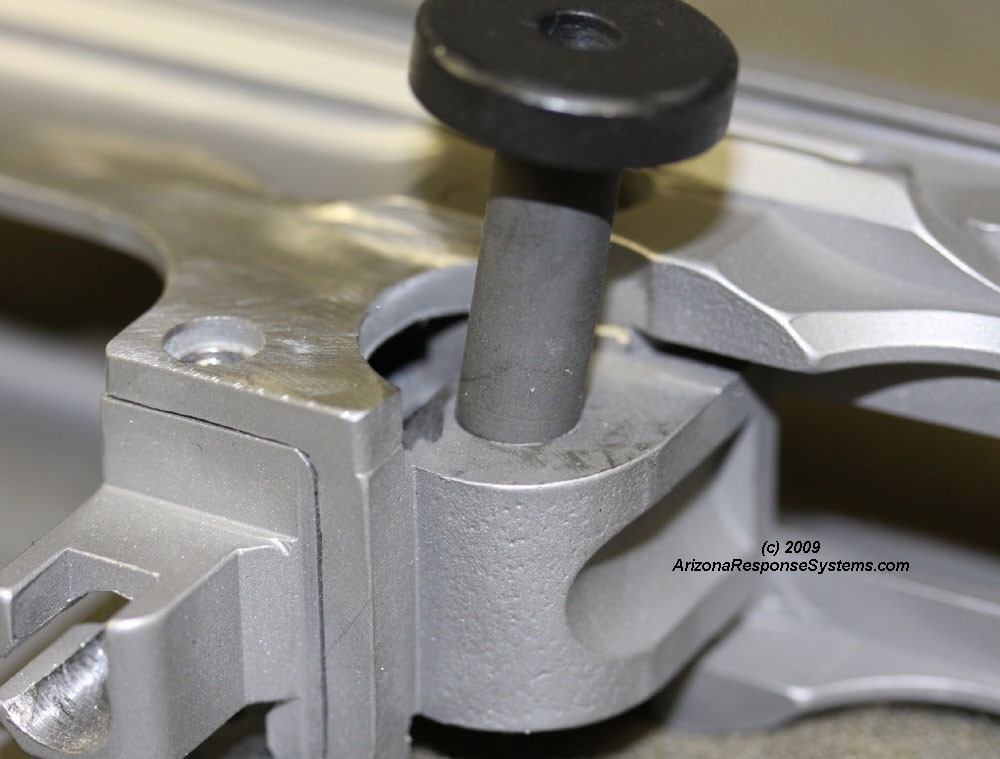
Bolt hold-open did not fit. I initially assumed EAI had used a metric ejector block. One must enlarge the channel to 19/64″ (0.2969″) and magazine catch spring recess #19 (0.1660″) when using a metric ejector block on an inch receiver. I opened the hole and the BHO fit. Only then did I note the broad arrow proof mark indicating this e-block was indeed inch pattern. I speculate that the e-block had been squeezed slightly during install, compressing the bolt-hold-open channel. I am working with EAI to devise a cost-effective means of test-fitting receivers prior to shipping. I had no problems with magazine catch or BHO fit on the earlier prototype receivers.
Magazine catch did not fit.
The magazine catch did fit the slot from the inside, indicating it was only the bottom of the slot that was constricted. I opened it with a tiny 3-corner file.
After opening the slot with a file, the magazine catch fit the slot, but stopped on the side of the receiver.
At this point, I noticed one wall of the receiver was wider than the other, although the overall width was the same as my UK sample. I suspect that the receiver was offset slightly during a fixture change. Combined with a possibly bad ejector block, this could account for the difficulty I was having.
While I could have altered the magazine catch, my goal is to make the receiver fit standard parts. I narrowed the the outside of the receiver by a small amount.
After correcting the magazine catch slot, I discovered the magazine catch axle screw did not fit either. This supported my idea that there was something wrong with this ejector block.
After I chased the threads, the magazine catch axle screw fit correctly. The magazine then locked in place correctly.
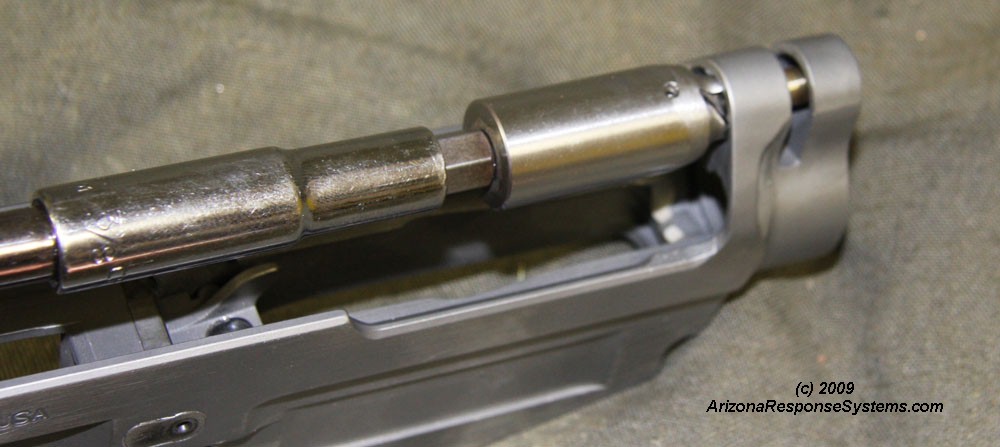
Bolt & bolt carrier fit fine.
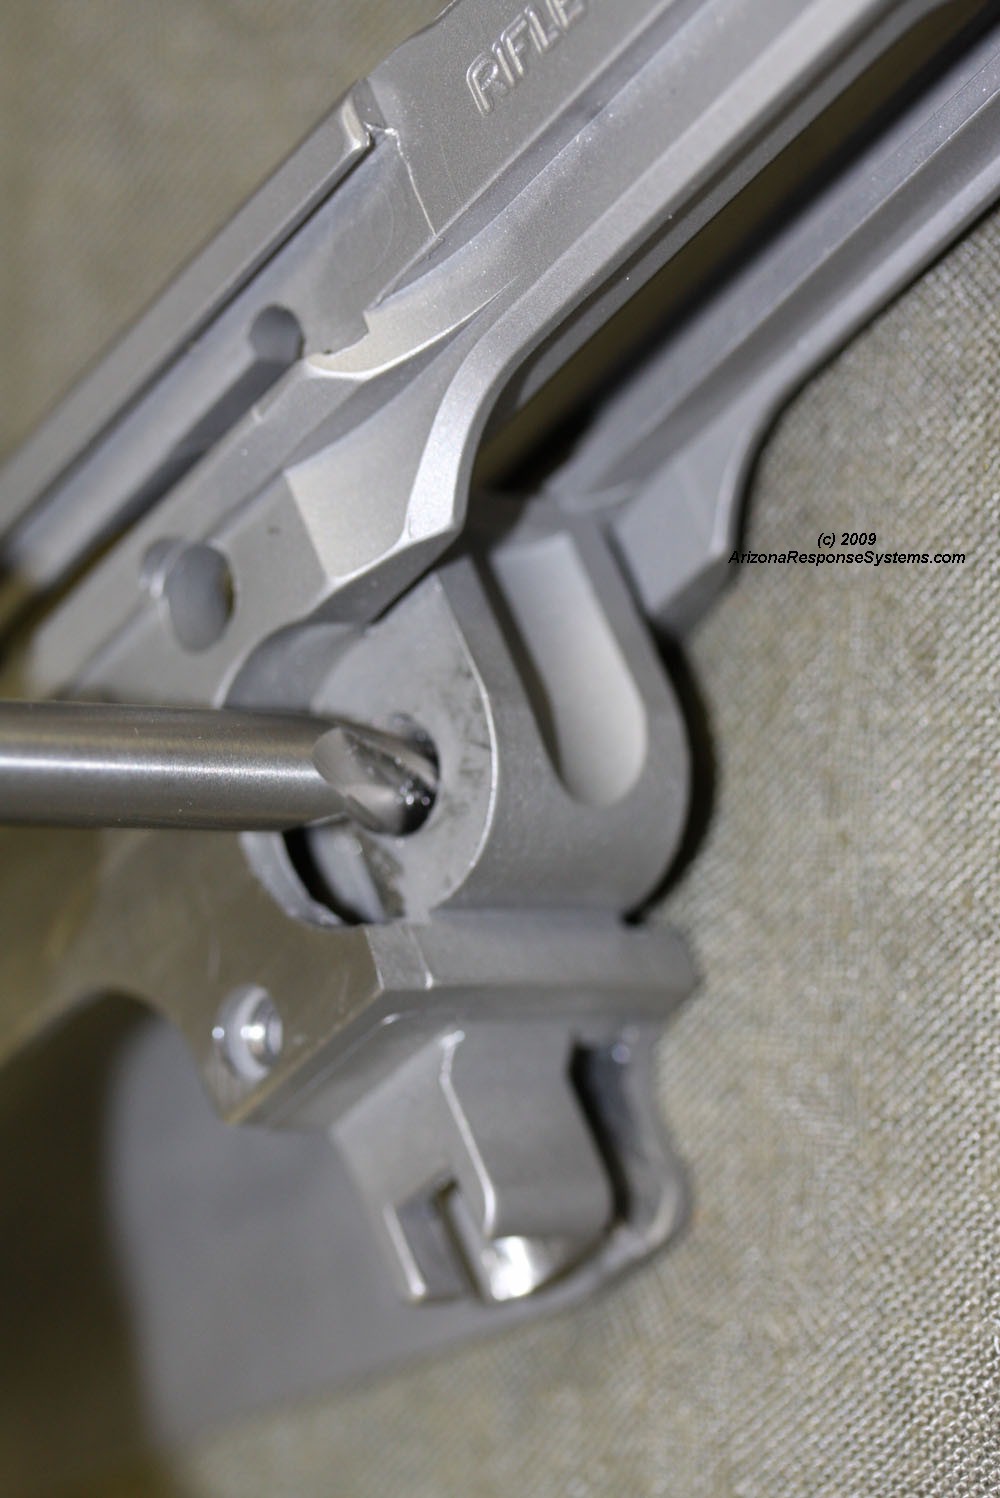
Hinge pin wouldn’t fit in hole. Edge of hole had a sharp burr.
I reamed the hole to get rid of the burr.
After reaming the hole, the hinge pin fit the hole, but only slid in part of the way.
Heavy burrs prevented the hinge pin from seating and from ears of lower sliding all the way over the receiver.
After cleaning up the burrs, the lower fit and locked securely.
The rear gas tube support fit fine, as did the carry handle. On one of the earlier receiver prototypes, the threads for the rear gas tube support were tight and I chased the threads on both the part and the receiver with a 9/16×24 RH tap and die. I did this automatically, before remembering to test other rear handguard supports. I therefore was unable to determine if it was the part, or the receiver, or both, that had tight threads.
With a mid-range breeching washer (#4, 0.052″), the barrel timed to 10:00-10:30.
I had already refinished the parts kits, so I headspaced accounting for short barrel timing. This way I could refinish the receiver by itself, with the locking shoulder installed, and not have to refinish the barrel and receiver together.
Final Assembly & Testing
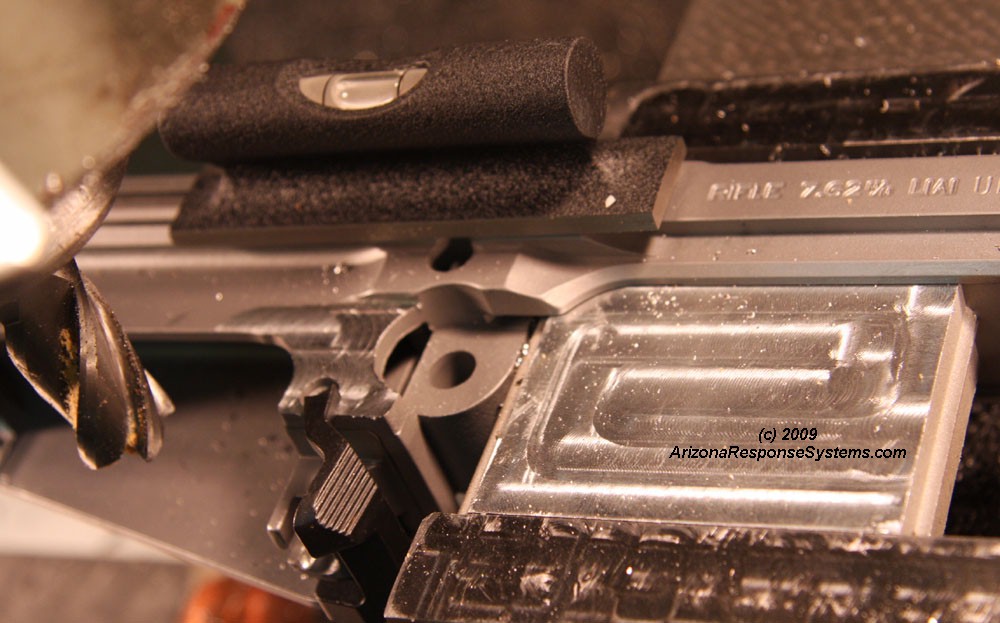
I really didn’t like the jagged cuts on the inside rear face so I cleaned them up the best I could. Matt at EAI says they are working on cleaning this hard-to-reach area up in future units.
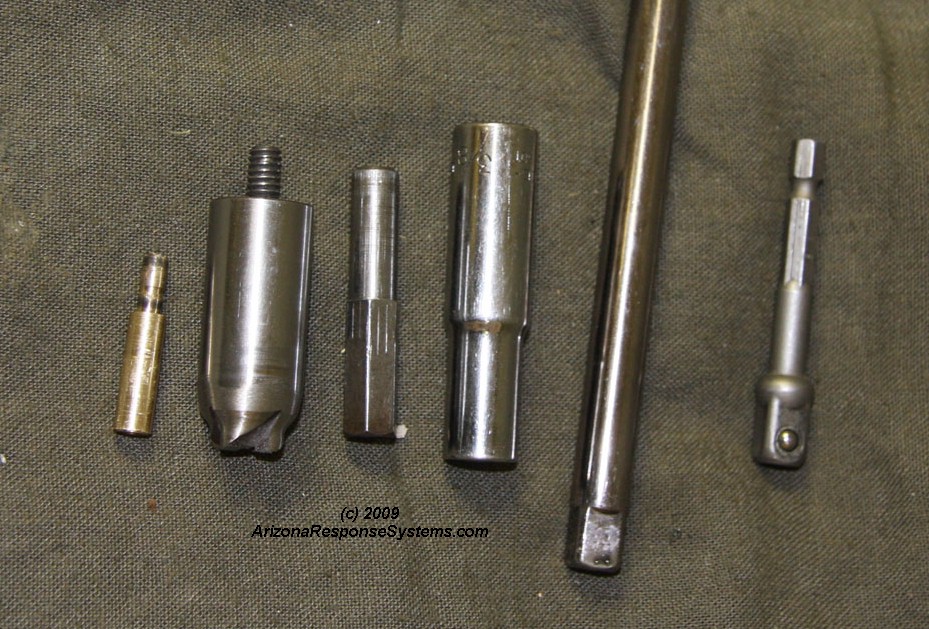
Here is my cobbled together scraper with pilot and drill extension.
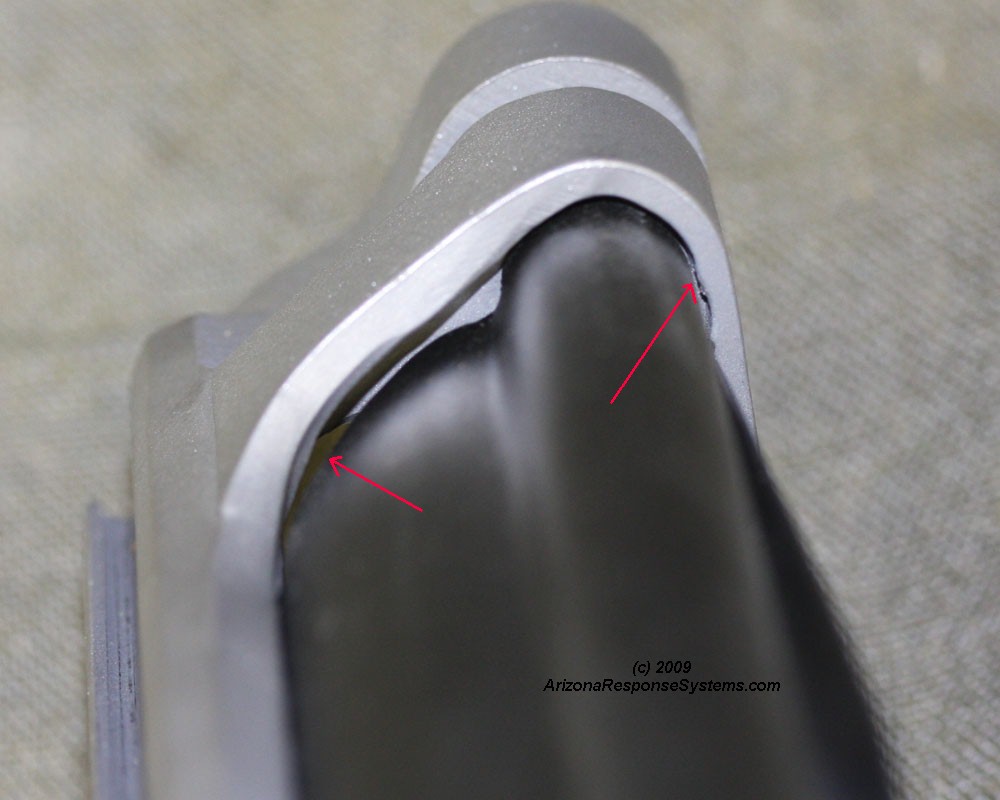
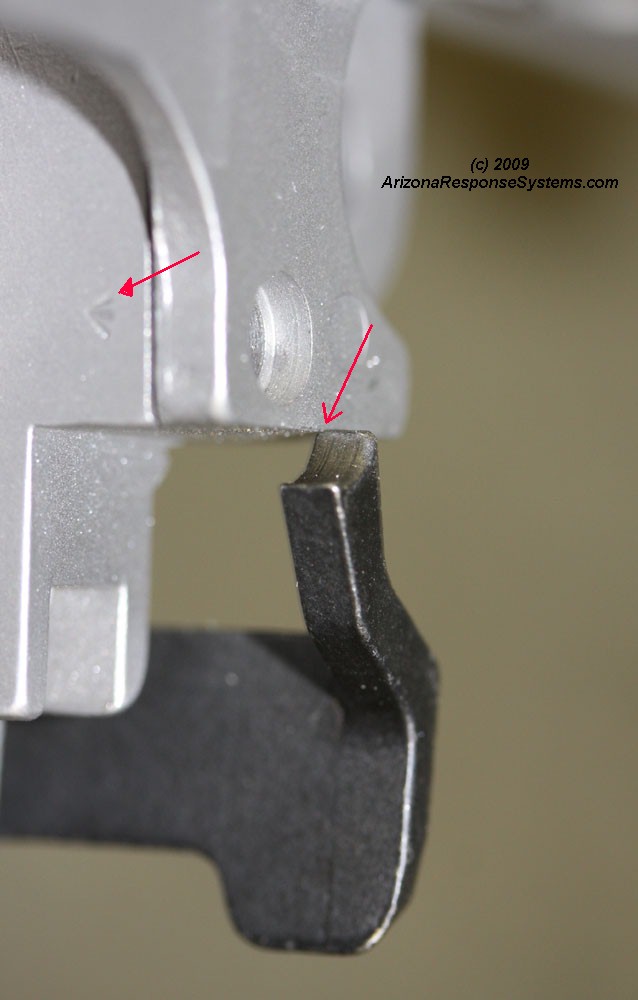
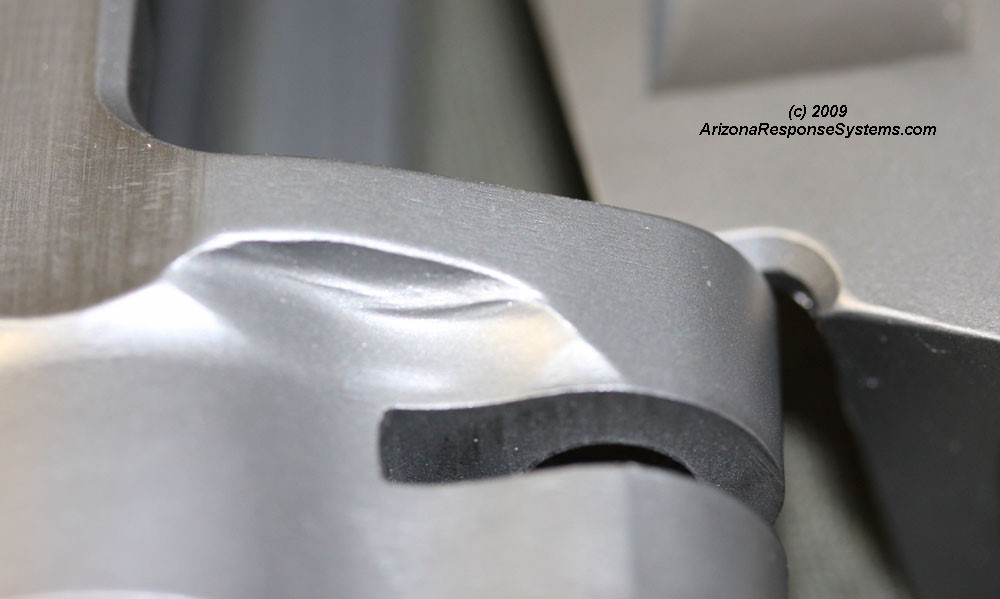
I realize this compound radius is very difficult to cut, I still wasn’t pleased with the step.
Close-up of the transition.
I used a Dremel tool with a 3/4″ diameter stone, followed by a fine sanding drum, followed by a Scotchbrite abrasive wheel to clean up the transitions here.
Summary
Any new product will require some field testing, feedback, improvement and retesting. This is normal and expected. It is not fair to draw conclusions about the quality of a production unit based on the prototypes. Since the first three receivers I examined (one returned with comments) were pre-production models, including them here is only to track improvements. Since the issues I had with them were mostly cosmetic, I made the corrections myself on the prototype receivers.
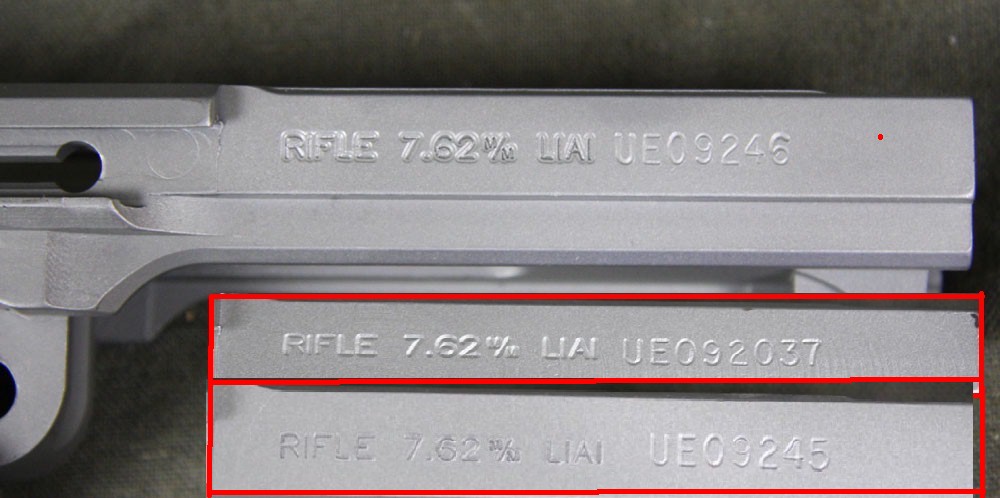
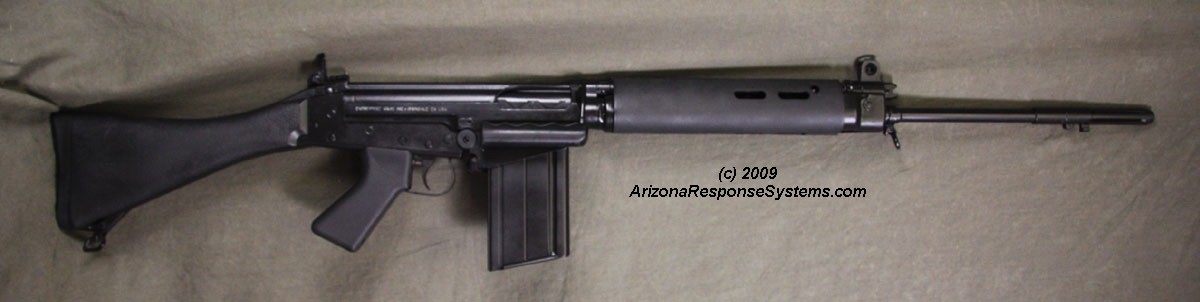
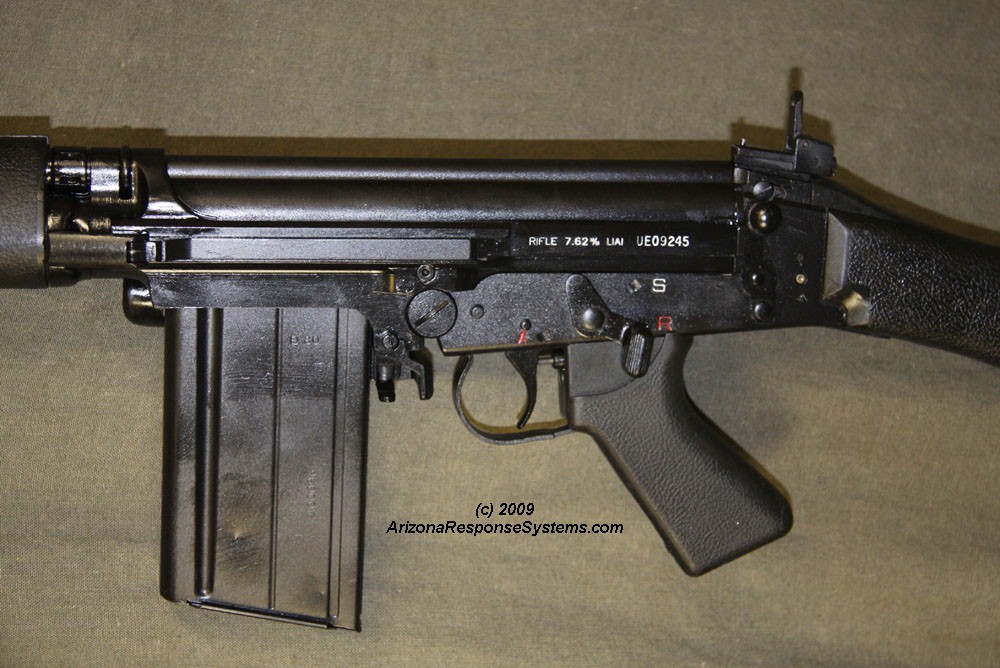
Receiver #46 (kit = wood furniture, 18″ barrel), was a production unit, but had some issues with the magazine catch & bolt hold-open fit that I had not seen on earlier receivers. I suspected that it was a glitch unique to that one receiver and not a pattern that would be repeated on an entire production run. Once I identified the problem, it was easy to correct. While a novice builder would not have much trouble correcting the problem, without a little experience, it might be difficult to correctly identify the problem. I recommend thorough test-fitting of all parts and careful analysis of anything that doesn’t fit or fits tightly, before cutting or filing on the receiver. The rife test-fired fine.
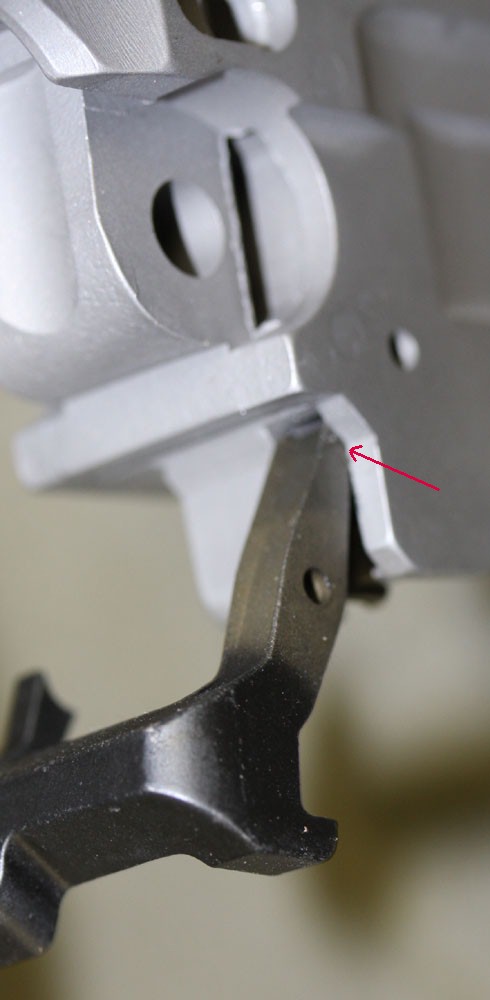
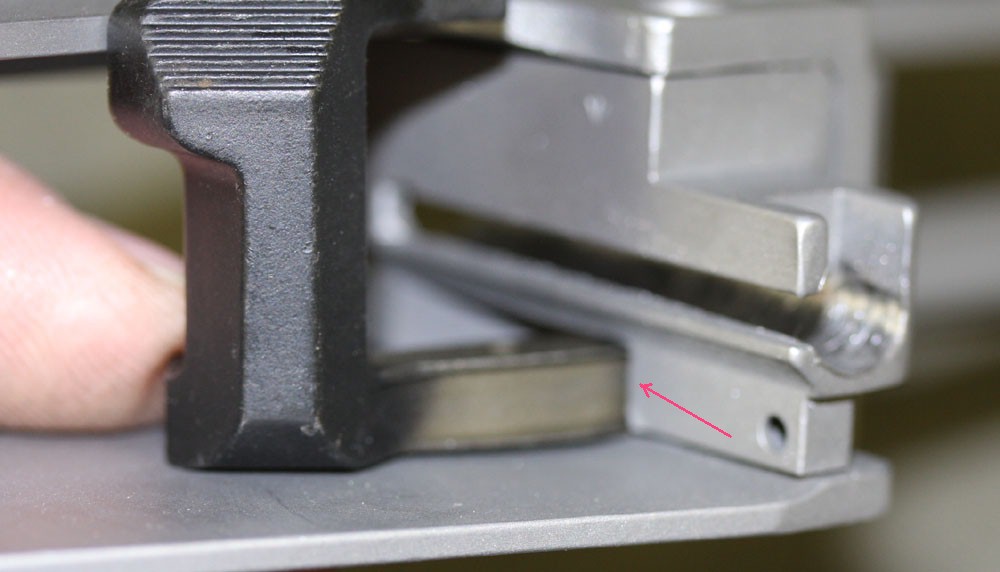
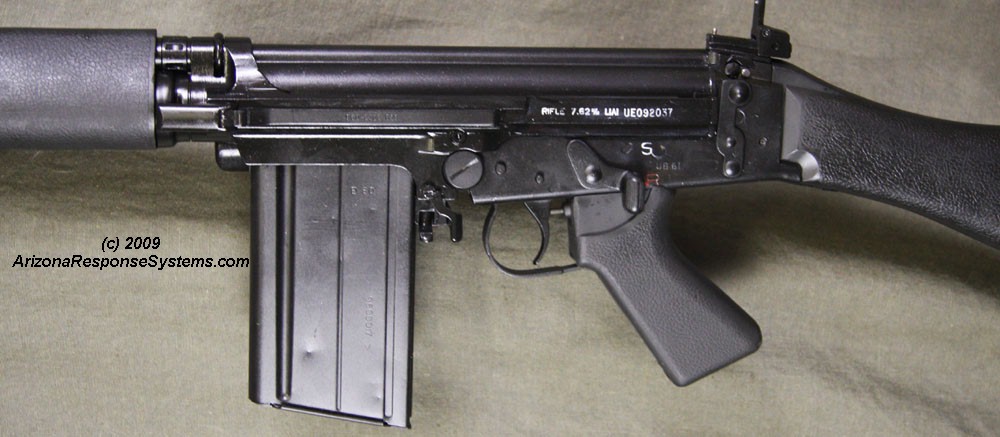
Test-fitting the parts on prototype #45 (kit = plastic furniture, 21″ barrel) showed a looseness to the magazine fit that was not in the earlier receivers, nor the subsequent. I had seen this same problem in years past. Essentially, the distance from the front of the magazine well to the ejector block (which holds the magazine catch) was too long. Since the magazine catch attaches to the ejector block, this allowed the rear of the magazine to droop slightly. This could result in “bolt over base” where the bolt passes over the cartridge rim. Test-firing confirmed this problem. The “fix”was to weld a slight extension on the magazine catch – about .040”, which holds the magazine all the way up against the rails. I have not determined if the ejector block position is too far to the rear, or the magazine well cut is too far to the front. The same result could have been obtained by welding up the step above the magazine catch recess that contacts the front of the magazine under the tab, but getting in there to clean up the weld would have been a lot more difficult. While extending the magazine catch is addressed a symptom, rather than the problem, it fixed the problem and was much easier. Again, this was a prototype receiver.
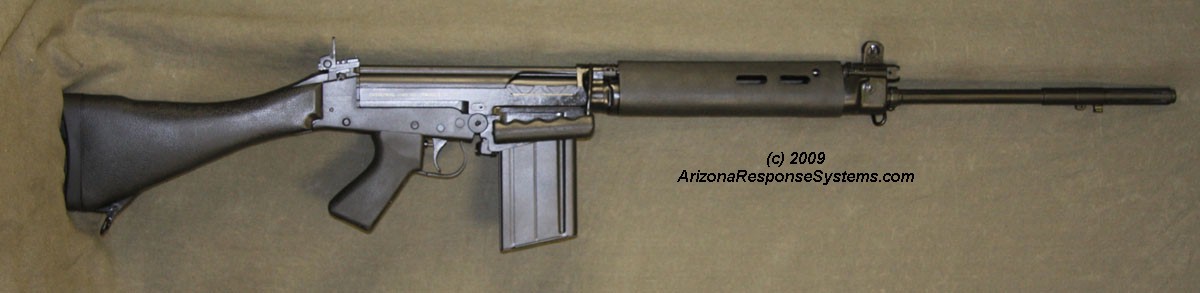
Test-fitting the parts on prototype #37 (kit = plastic furniture, 21″ barrel) showed no problems other than the cosmetic ones identified above. The kit went together and testfired fine.
All three receivers went together with no issues other than those identified above. While not perfect, these receivers are fine for the home builder with the patience to test fit everything first. With EAI’s renewed commitment to customer satisfaction, testing everything before making any modifications will allow EAI to track any issues, and replace receivers as needed. I’ve also discussed enhanced test fitting procedures at EAI to minimize the number of receivers that make it out the door with problems.
Assuming that subsequent receivers have no greater issues than these (and hopefully less), I have no problem accepting the EAI inch pattern British cut receiver for builds.


Leave a Reply
You must be logged in to post a comment.