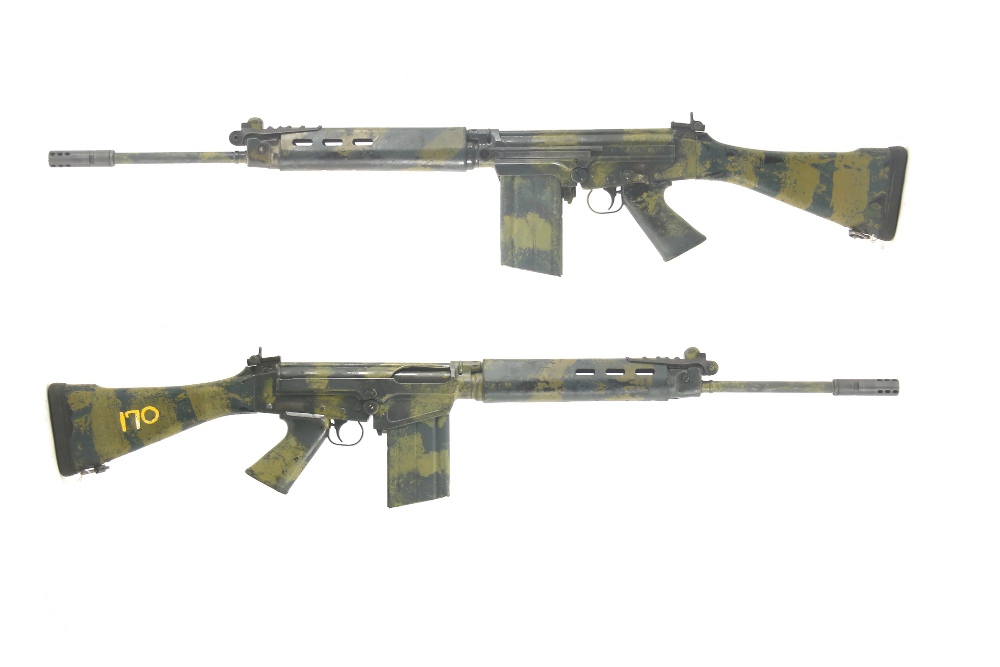
FAL Tutorial: RSA & Rhodesian FAL Camouflage & Distressing.


The popular story behind camouflaged South African rifles, is that captured ANC rebels noted that the black rifles were identifiable at a great distance. This motivated the military to begin camouflaging the rifles. The colors were taken from their vehicles. A blue green, and and a yellow-tan, commonly called “baby poop”.
Surplus rifles from South African, Rhodesian, and Zimbabwe often display remnants of this finish. Those who wish a representative sample of a rifle that saw service in these bush wars, may wish to duplicate this finish style.


There are some who attempt to morph a new camo finish into the remnants of the old one. I find this problematic. It is difficult to build a rifle with new parts on a new receiver and artificially wear just the new parts to match the wear on the old. One ends up with parts that all show wear, but the wear does not look natural.
Many of the original parts will show significant rust. Rust is bad. Many of the parts are damaged. Damaged parts need to be repaired, often involving sand-blasting, soldering and/or welding.
The first thing I do is to photograph the original parts to keep a general idea of the original finish, then I sandblast everything to bear metal. Then I make any necessary repairs, build the rifle, and Parkerize (South African) of black over park (IMBEL contract) the rifle. Then I reassemble and begin the painting and distressing process. This insures that the finish is inconsistent and the wear patterns duplicate actual handing fatigue.

After a couple years, the hardening agent is no longer working in my old color pattern of Glidden from Home Depot, and Home Depot no longer carries oil-base alkaloids.
My goal this time was not for a custom color mix, but to find a standardized color that was a good match. Others have done color-matching with Dupont automotive colors. I have commercial accounts at both Sherwin Williams and Dunn Edwards, and I was happy with what I found at Dunn Edwards.
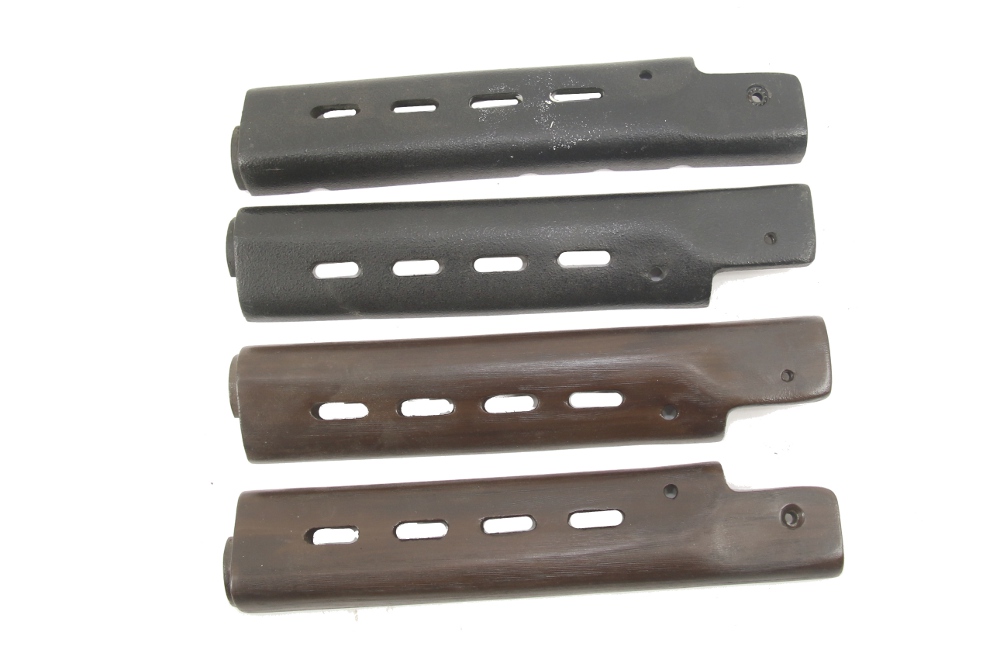
I have a pair of South African handguards where the paint dripped inside the handguards and was protected from wear, so I had a “virgin” color to start with. It’s a little lighter than the oil and dirt-stained finish on the outside, but I think it’s a truer match for what the color looked like new. When I distress it, it should balance out.
Dunn Edwards Syn-Lustro Rust preventative Alkyd Semi-gloss Enamel (oil-based not available in flat, eggshell or satin).
- Yellow – DEA 171 Bay Leaf.
- Green – DEA 181 Refined Green
- Tan – DE 6131 Teddy Bear (less common)
- Medium green – found on some rifles, this is simply a mix of the yellow and green above
- Yellow – alternative (darker) DE 6189 Mossy.


A Parkerized rifle and a painted rifle awaiting the camouflage. While there is no “correct” configuration, there are some features more typical than others for a FAL.
- non-bipod cut handguards.
- carry handle cut off
- sling swivels removed
- grenade-launcher gas plug
- extended length buttstock
- “R” marked selector
- “ZA”, “SA”, or “RA” serial number engraved on lower receiver – this is in addition to the regular serial number
- rack number on stock


more samples
For those wishing to add rust, the bare metal parts can be wiped with bleach which will cause a patina to form. It must be thoroughly rinsed when the desired effect has been obtained.


For those wishing to add rust, the bare metal parts can be wiped with bleach or diluted pool acid, which will cause a patina to form. It must be thoroughly rinsed when the desired effect has been obtained.
These test plates demonstrate the progression. I started with a Parkerized carbon steel plate, and scuffed it with steel wool I then wiped it with bleach and let it sit for about 15 minutes. Then I rinsed it, snapped a photo, and then repeated the process. The final one has been rinsed and oiled.
Leave a Reply
You must be logged in to post a comment.