Introduction

I needed two new workbenches. My old one was constructed of 4×4 timber and free-standing. Trying to cut something in a vise with a reciprocating saw or even a hacksaw would set the whole bench to vibrating.
I wanted a bench that was strong enough and heavy enough to stand alone, but also readily able to be bolted to the floor and the wall. It also had to be constructed in such a way as to allow the counter top to be replaced every few years if necessary. It had to be a comfortable height for me to work either standing, or sitting on a stool. Materials had to be easy to source and the best compromise between strength, weight, cost, durability and appealing cosmetics.
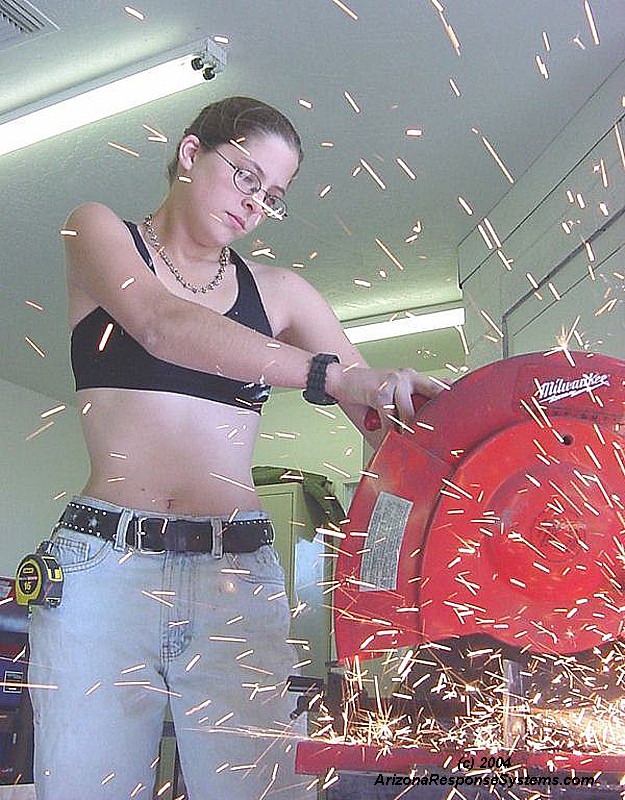
I did all of the welding by myself, however this really is a two person job. Even with multiple clamps, I had the table topple over several times as I set it up for welding. Appropriate clothing and safety equipment is a must. Metal fabrication in cut-off shorts and sandles will eventually lead to problems (such as when my pants caught fire). I strongly recommend an assistant as the combined weight of all the pieces can be difficult an possibly dangerous for a single person. Here my assistant cuts angle-iron. Yes, the picture is posed. She should be wearing a full face-shield, long sleeves, gloves, etc.
Materials
The angle iron at my local steel supply center came in 20′ sections. Based on space available, and the availability of pre-cut counter tops, I selected 10′ as my length. I had the front and back 10′ sections and the legs saw-cut at the steel yard. The nominal cutting fee was well worth the money, as cutting 3″ angle iron is difficult, even with a good chop-saw. You may prefer 12′ or 8′. My old bench was 8′ and I found that to be a bit constricting when I had more than one project going on at the same time. Take into consideration not only the footprint of the bench, but the necessary work area around it. As a right-handed person, I prefer the vise to be mounted on the left side. The purpose of the close spacing of the legs on either side is to provide good support for the 6″ Wilton vises I use. Be sure to read through my reasoning for the sizes I list. You may want to make slightly different lengths.
- 2 x 3″ angle iron
- 8 x 3″ angle iron x 36″
- 4 x 3″ flat iron x 18-1/2″
- 2 x 3″ flat Iron x 24″
- 8 x 1-1/2″ angle iron x 22-1/2″
- 6 x 3″ flat iron x 32″
- 2 x 3″ flat iron x 80″
- 8 x 3″ x 3″ flat iron squares, center-drilled (for bolting to floor)
- welder (I used a Lincoln 125 SP MIG), clamps
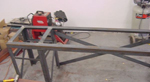
- chop saw (I used a 14″ Milwaukee)
- Power drill and assorted bits (I use a Milwaukee)
- Angle grinder (I used a Milwaukee – seeing a pattern here?)
- plywood (I used 15/32 with one side smooth)
- pre-fabricated countertops (I used “canvas” from Lowes)
- assorted bolts and fasteners
Building Workbench
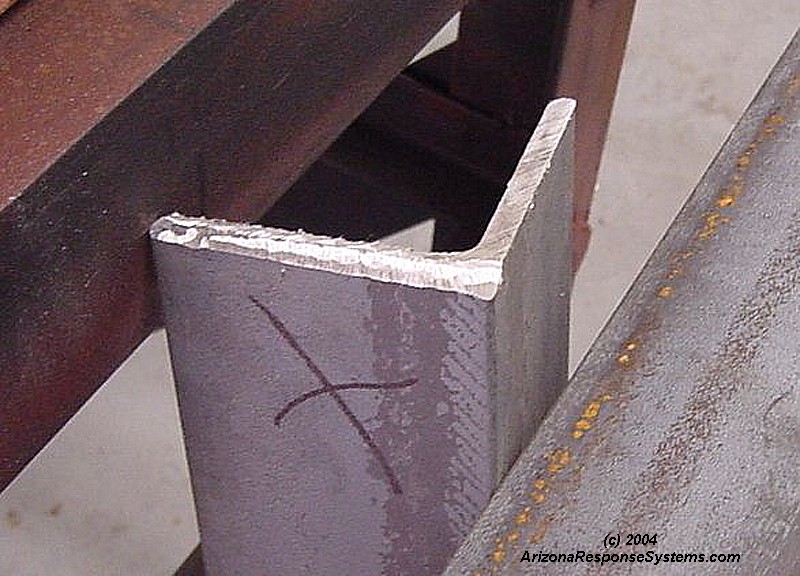
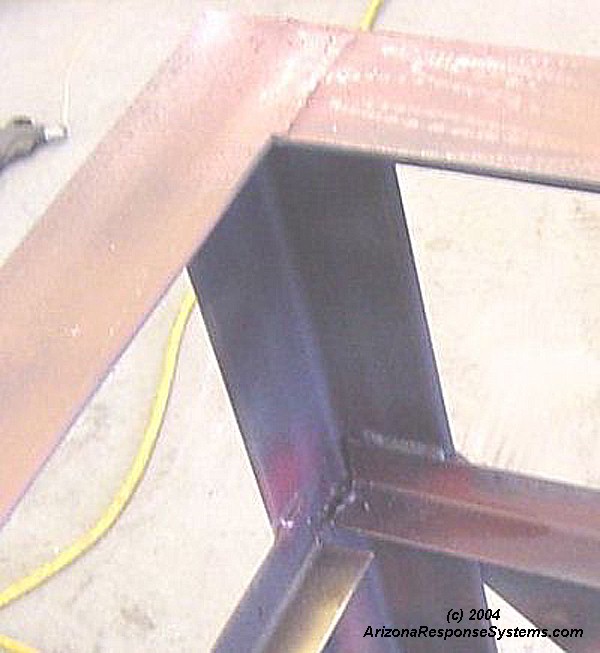
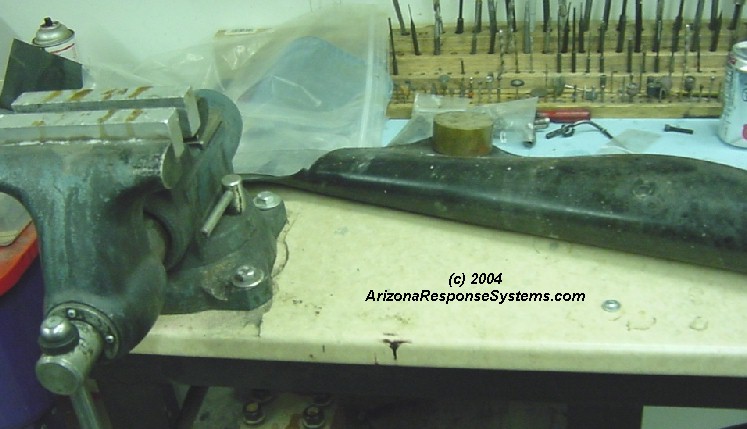
The inside corner of angle iron is not a sharp 90 degrees, but radiused instead. You must therefore bevel one edge of the legs to clear this radius.
Here I am clamping the outside legs. If you are working in a garage, take into consideration that your floor may have a slight slope on it for drainage. You may want to shim the feet to either make the unit level when mounted on a downward sloping floor. I made this unit absolutely level, and then found my floor had a few very slight dips in it that I noticed only when examining over the full 10′ length.
There are plenty of seams for welding. I probably did far more welding than was necessary, as I welded both the inside and outside of the seams for their entire length. Hey – it was fun and gave me some good practice on cosmetic beads. Realistically, 25-30% seams on two joints per part should be fine.
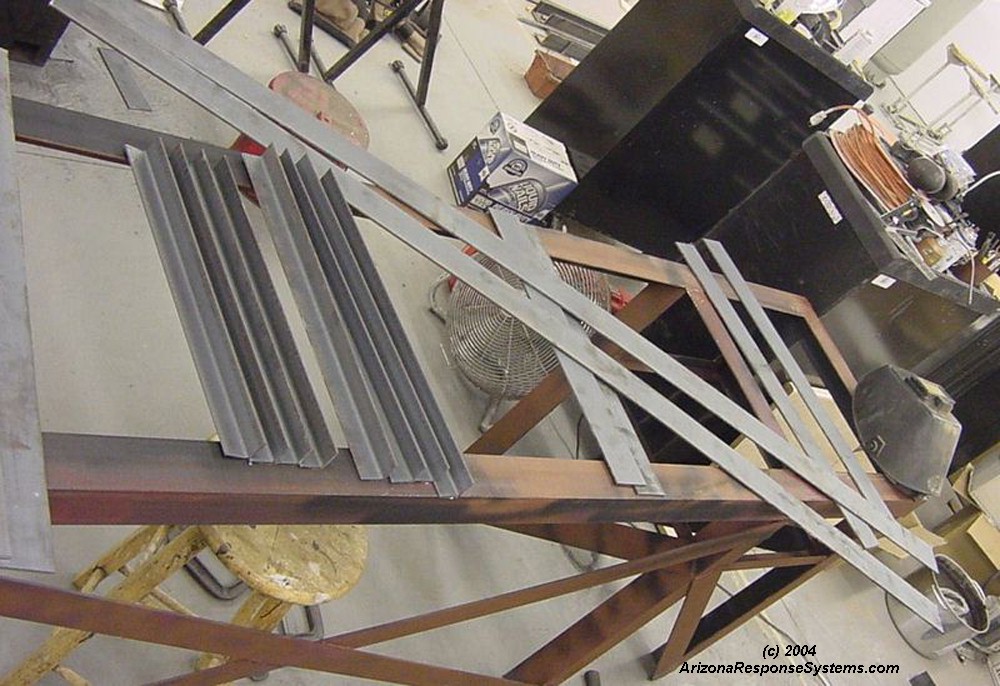
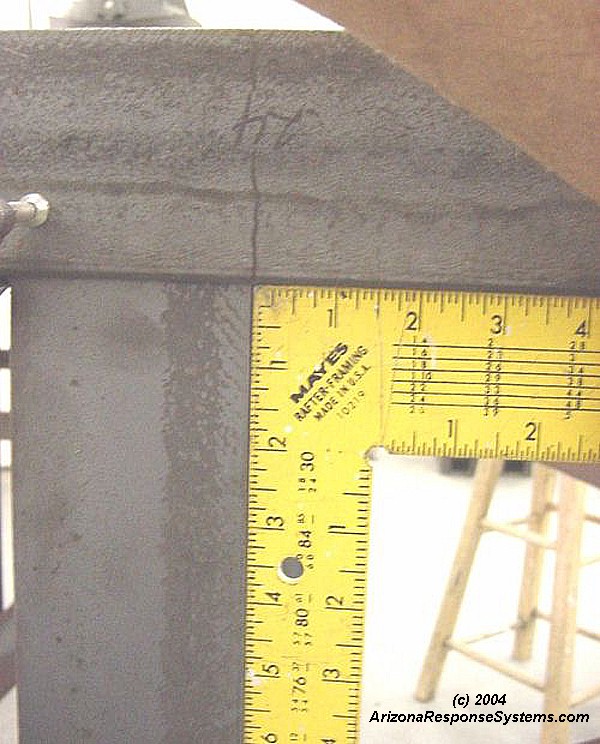
Here are all four legs from one side clamped together. The “boxes” are 24″ square. After you are satisfied the unit is level, tack-weld it together. This is just a safety precaution, as a misaligned part is much easier to cut off if you only have a few tacks to grind off. Keep the clamps on if you can because when my unit fell over, several of the tacks broke. On the other hand, maybe the tacks breaking caused the unit to fall over. On the left side of the picture is a small section of counter top I used to make sure the complete counter-top would fit correctly and butt-up solidly against the wall.
A final check of alignment before tack-welding.
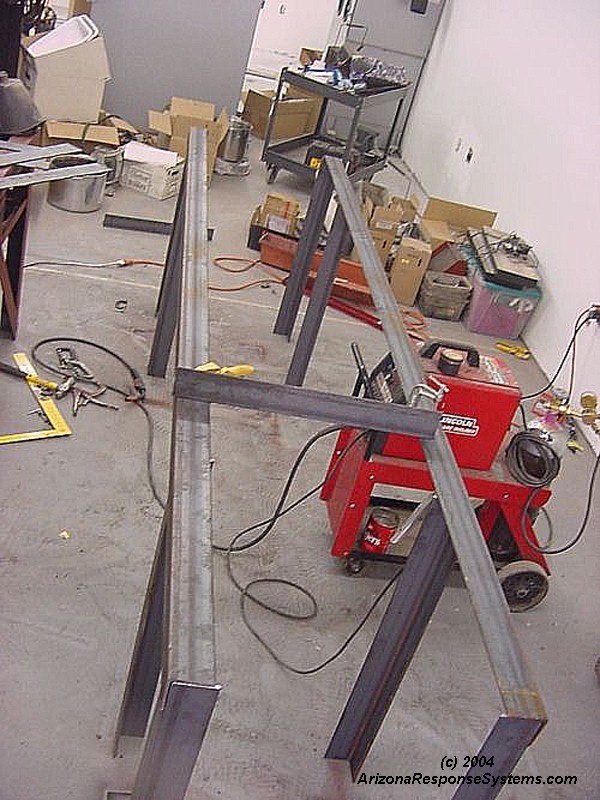
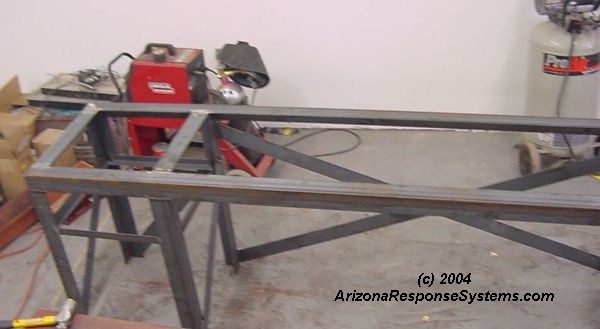
I have the front and rear sections balanced and clamped together with a temporary cross-support. This gives me eight feet on the ground for better stability during welding. An assistant would have been nice.
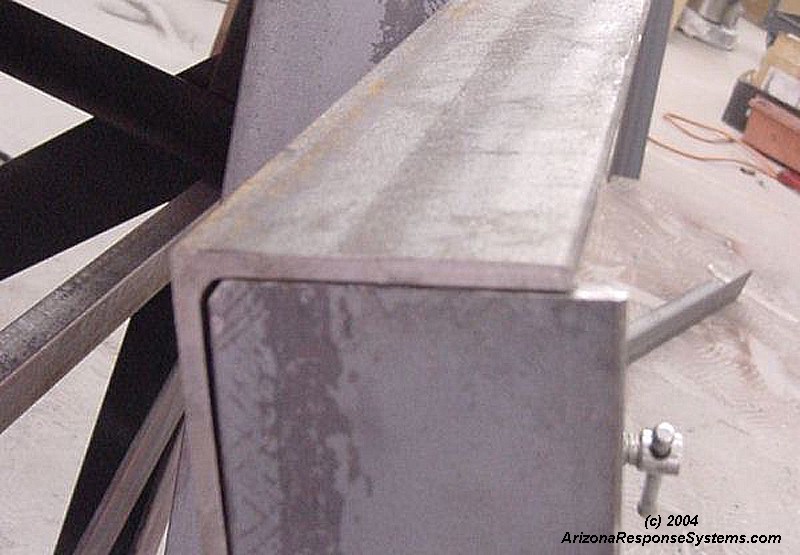
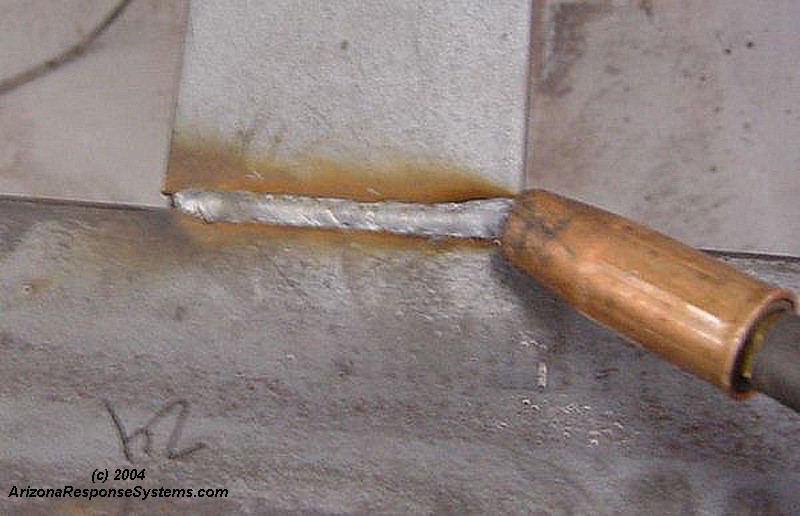
After making sure the front and rear halves were square, I tacked the four pieces of 3″ flat iron x 18-1/2″ . These were the first pieces I did continuous welds on. Measure corner to corner to insure the unit is square. I opted not to use 3″ angle iron on the left and right top pieces because of the complicated cutting I would have to do for the piece to fit both top and side. 18-1/2″ lets me use 24″ flat of 3″ iron on the left and right side. There will be a small 1/4″ edge on the angle iron legs to support these flats for welding. Welding the outside top flats top the 24″ outside top sides gave me the same effect as angle iron without having to cut compound angles.
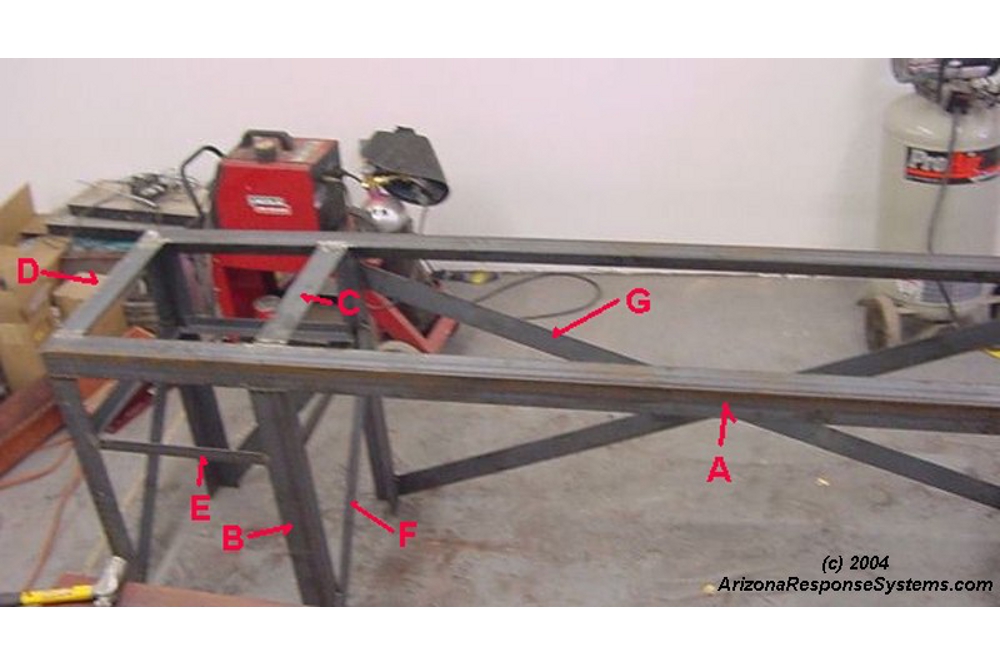
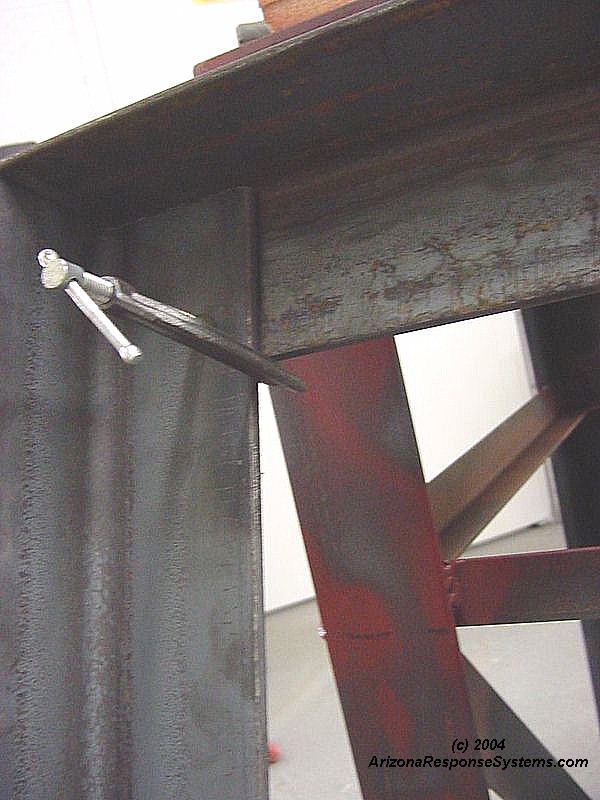
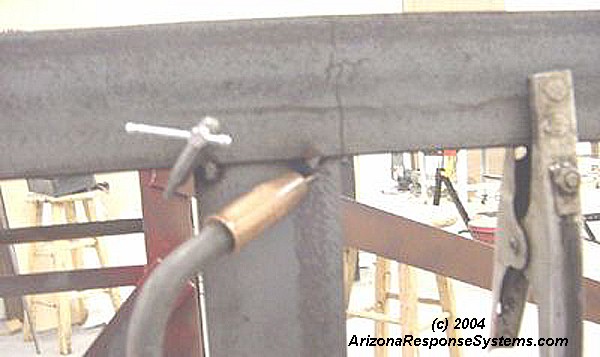
I wanted shelves, but I wanted them high above off the floor and somewhat small. I had a floor-height shelf the entire length of my old bench and it was a trap for every bit of dust and grime and small part. These smaller shelves have the added benefit of forcing me to put tools away instead of just sticking them on the shelves underneath. I ran into an unexpected problem in that my one-piece shelf would not fit between the pieces of angle iron. You may wish to adjust the height of the shelf for that reason. I chose 22-1/2″ because I didn’t want to be bothered with cutting 45 degree angles and then chamfering the points to match the inside angle iron radius. These theoretically provide additional rigidity, but since they were primarily shelf-supports, I didn’t mind gaps that would be covered by the wood shelves. 22-1/2″ was the longest easy size I could choose without having any pieces overlap. This pictures the front fight corner from the inside.
This is the inside front left leg pictured from the inside.
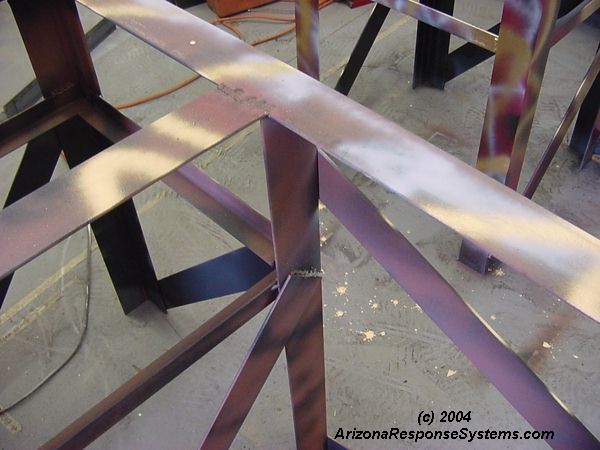
I added rigidity to the “boxes” on the left and right side by adding four pieces of 3″ x 32″ flat iron. The angle is not important. I clamped to the front legs and pivoted the pieces until the corners no longer protruded over the back edge. Two more pieces of 3″ x 32″ added rigidity to the back. I then made an “x” with two pieces of 3″ x 80″. I don’t think this added much to rigidity as it has quite a bit of flex to it, I think this piece should have been 1-1/2″ angle iron. I considered welding another piece of 1-1/2″ angle iron to it, but didn’t have enough in my scrap pile. In any case, it provides additional surface area to bolt the unit to wall studs.
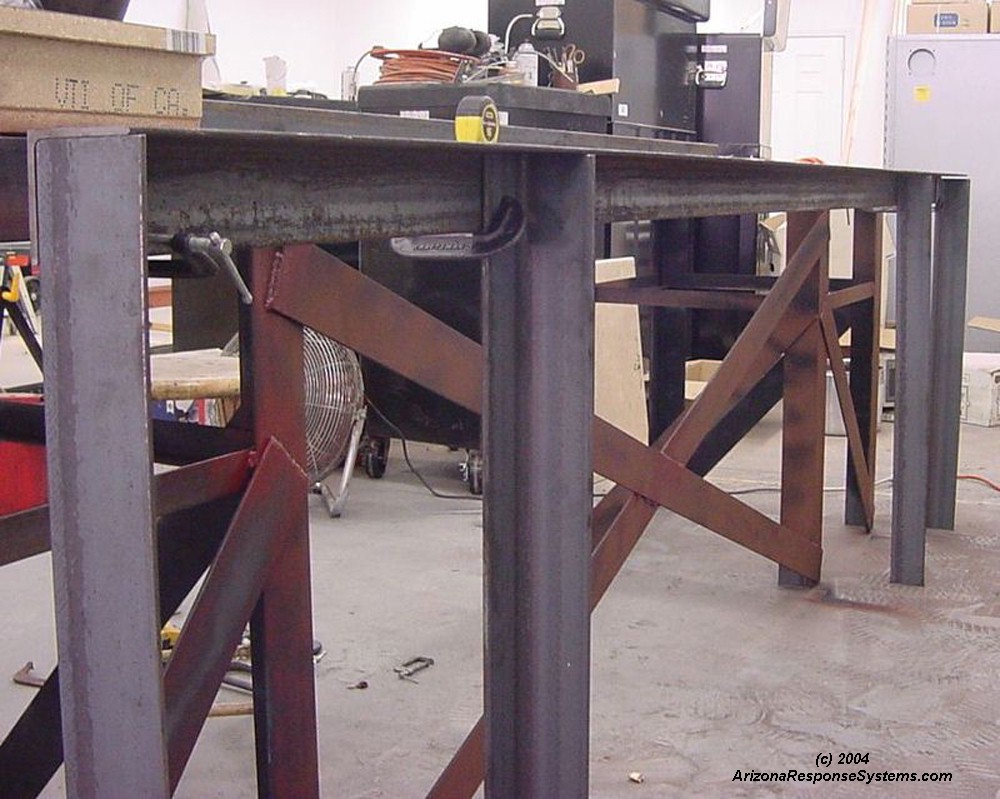
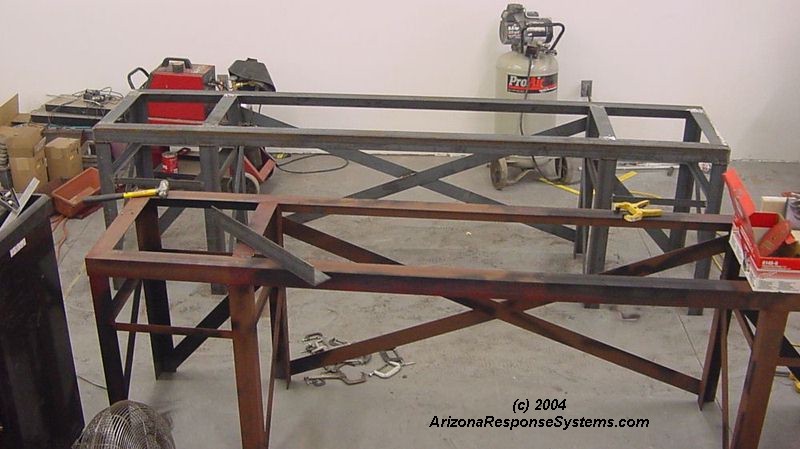
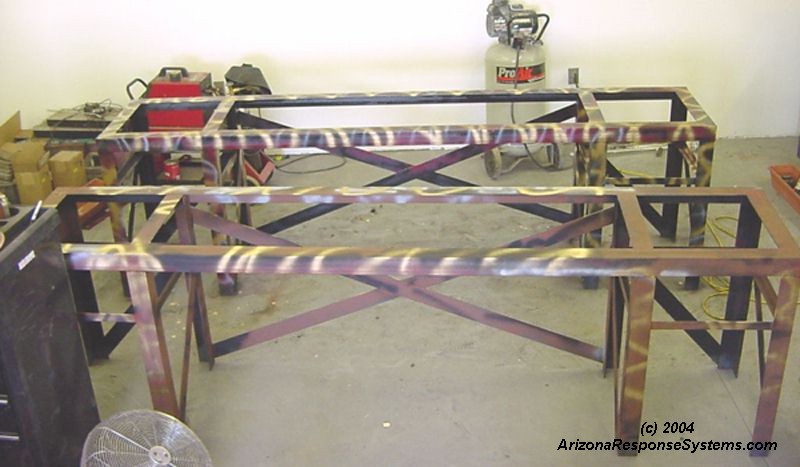
I completed the welds and did more redundant welds on any other places where two pieces of angle iron touched. Total overkill, but welding wire is cheap and I was having fun. I then ground my welds where necessary, particularly on the top. Here are the finished frames.
I ran out of primer, and since it was 3 AM, I took all of the partially filled spray-paint cans I had accumulated over the years and primed the unit with them.
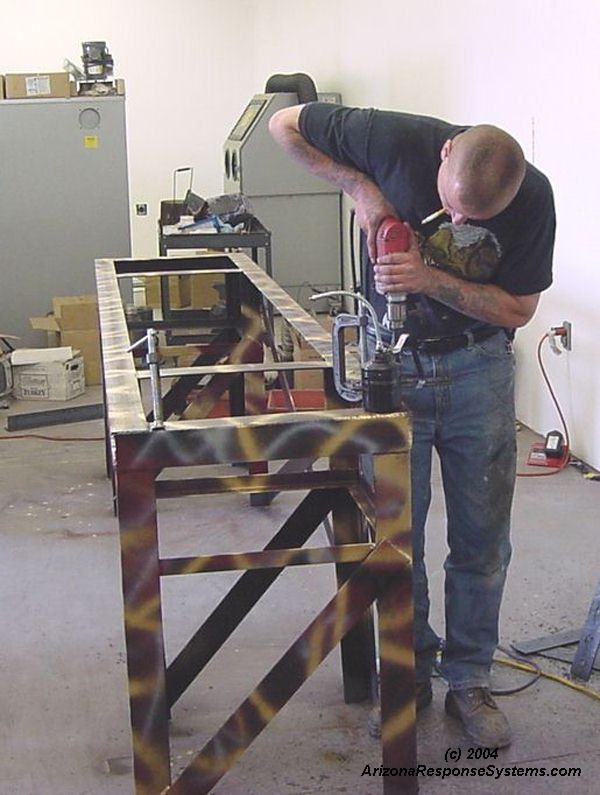
My assistant drilling the unit for the counter top bolts and the shelf bolts. You should decide if you want to bolt the counter top down to the inside top flats. It is annoying to have the bolt heads sticking up, and probably not necessary for rigidity. Short panhead screws could be used but the particle board under the counter top isn’t the best material for short screws. You could also cut recesses in the counter top for flush-fasteners. Coolant and a drill-sharpener (I use “Drill Doctor” by Darex) are necessary for drilling all these holes in the 3″ angle iron. If using typical drill bits, recut to 135 degree split-point for much faster drilling through this mild steel.
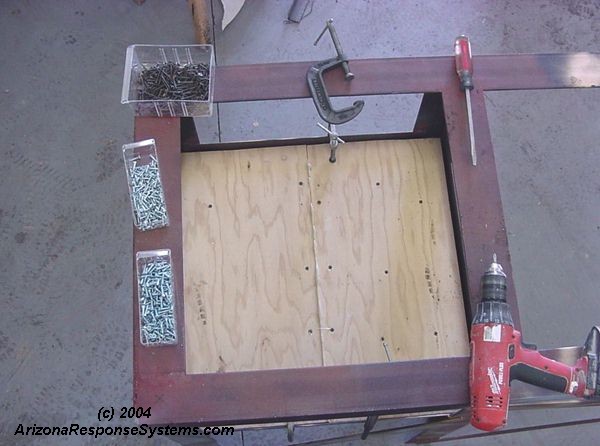
Here is the only major snag. The plywood wouldn’t fit through the gaps in the angle iron. So I cut the shelves in half, cut a second piece to clamp underneath, and with lots of adhesive (I use liquid nails), I rejoined the two pieces. I then used lots of short screws to fasten the three pieces. After it dried, I removed the clamps and heavily caulked all the seams. This is so no critical little gun part falls into the crack between the wood shelf and the metal supports.
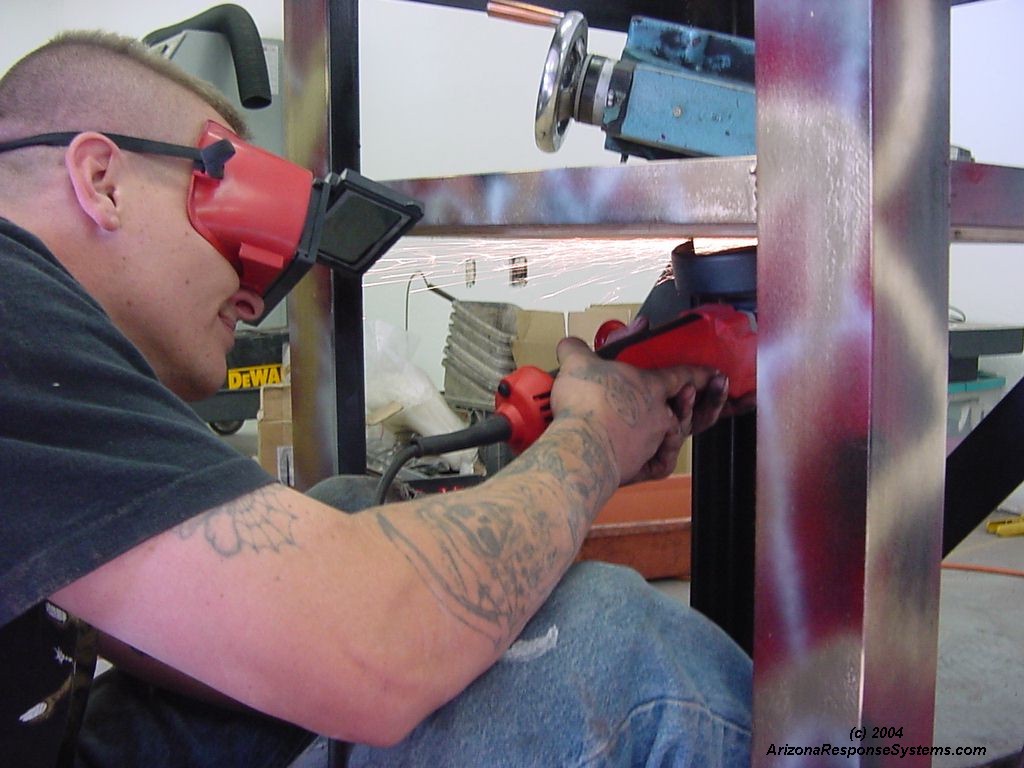
My assistant grinding flush the protruding points of the wood-screws. I had 1/2″ wood screws, but they were not long enough to join two pieces of 15/32″ plywood. I only had 1″ deck-screws, which protruded about 1/16″.
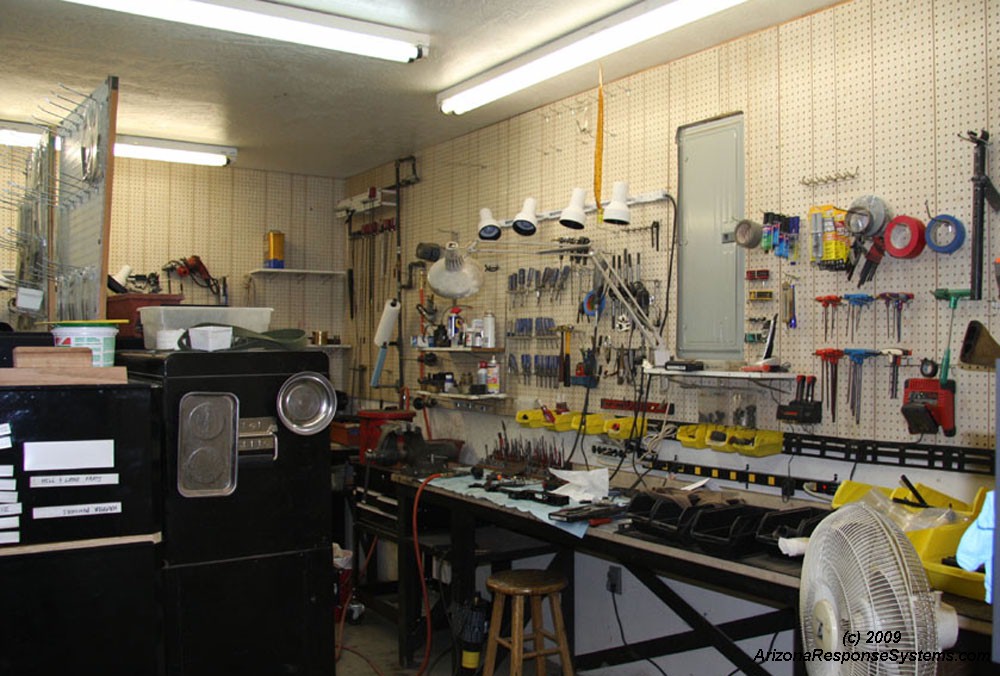
“Canvas” color counter top from Lowes, overlaid by 1/4″ solvent-resistant rubber sheeting. My last bench was white, but gave off too much glare. The salt-and-pepper granite color makes finding small parts difficult, and while the butcher-block wood grain looked nice, I thought it a bit too busy.
Finished Workbench
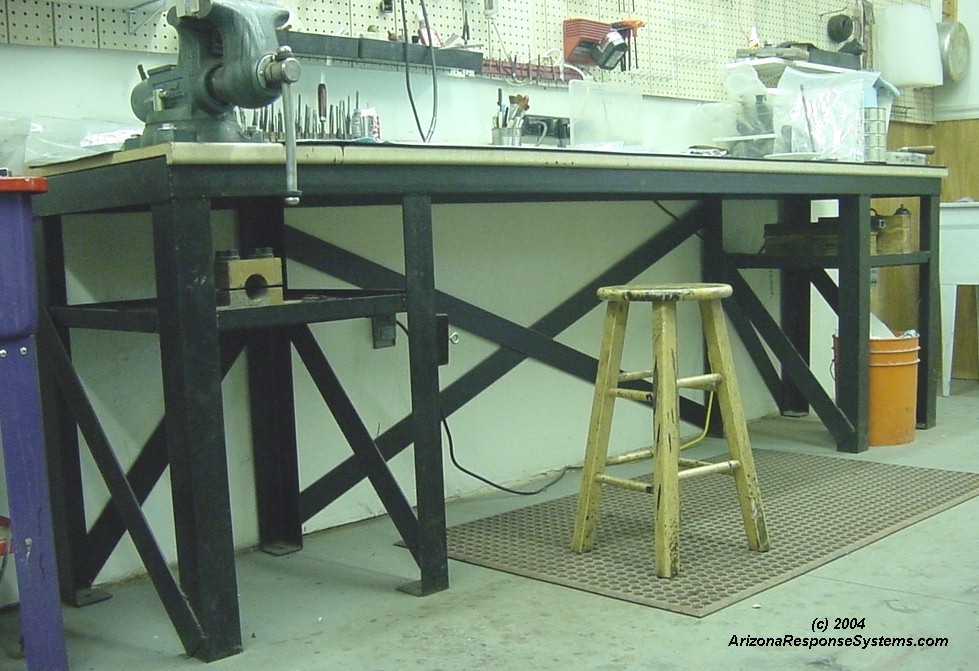
Finished unit, coated in 2 part epoxy black paint. I shimmed the bench so it was perfectly level on my not-quite level floor and then center-drilled 8 x 3″ square plates. I welded these to the bottom of the angle iron legs so they sit flat on the floor. My plan was to use these plates to bolt the unit to the floor, but the bench is so strong and secure that I have not yet needed to bolt it to the floor or the wall.
Still going strong after nearly 15 years of use!


Leave a Reply
You must be logged in to post a comment.