Refinishing Tutorial: Firearm Wood Finishing


First remove all hardware and scrape off grease dirt, tar, and similar gunk. Some stocks will have metal components that are not removable, or the risk of damaging is greater than the need to remove, for example, recoil lugs that are heavily staked in place. The overall result with these parts left alone will be better than damaging them. They can be brush painted black upon completion, or sanded and cold-blued, or left bare.
The least aggressive manner is to spray with Easy Off Fume Free Max Oven Cleaner. This is caustic lye based and strips oil-based finishes out of the wood. You can also wrap in paper towels after spraying, or wrap in towels and plastic, such as Saran Plastic Wrap. The towels absorb the oils as they are drawn to the surface and the plastic wrap slows the evaporation. You can also use flour to absorb the oil. I leave the parts in a utility sink and periodically rinse, scrub, a a few times. Your stock is now wet and probably a bleached gray. Blow the water off with compressed air. Rapid drying in the sun or using heat may cause expansion cracks. Incomplete drying will cause bubbling in the oil finish.
Using a wet washcloth and a clothes iron, steam dents.
Often I’m processing dozens of surplus stocks with 50 years of crud. I need a faster way of processing them. I used it when I had 50+ G1 FAL and StG-58 FAL wood stocks and I needed to find out which were salvageable and which were not. Previously I used a Cuda transmission washer at my friend’s auto repair shop, and that’s what gave me the idea for this process. Now I have an ultrasonic cleaning tank that works better with less risk of damage, but it was very expensive. Since some stocks will crack from the wood swelling, this method should only be used for those stocks where replacement is an option.
Prepare a stock pot with hot water (170-180F, not boiling) and dish washing soap or laundry detergent. I have found Cascade Dish Washing Detergent or Unilever All Free and Clear Laundry Detergent seem to work better than other brands, with minimal foaming. This serves two purposes. It draws out oil-based and water-based contaminants, and it swells the wood. This swelling will minimize dents. Aggressively scrubbing the wood with a brush will help. Usually a half hour is enough. I put a heavy object in the pot to keep the stock submerged. For stocks slightly longer than the stock pot, simply invert occasionally to avoid a stain on the wood at the water level.
Another technique I have tried with some success is to stick the wood in the dishwasher. Some stocks take two washings. Do not use this method on thin or laminated wood, like an AK upper handguard, as they may lose their shape. On one occasion, I put stocks with heavy Cosmolene in the dishwasher and it made a terrible mess, like chewing gum in the clothes dryer. The only thing I found to remove it was Magic American Goo Gone, so make sure all Cosmolene is removed first.
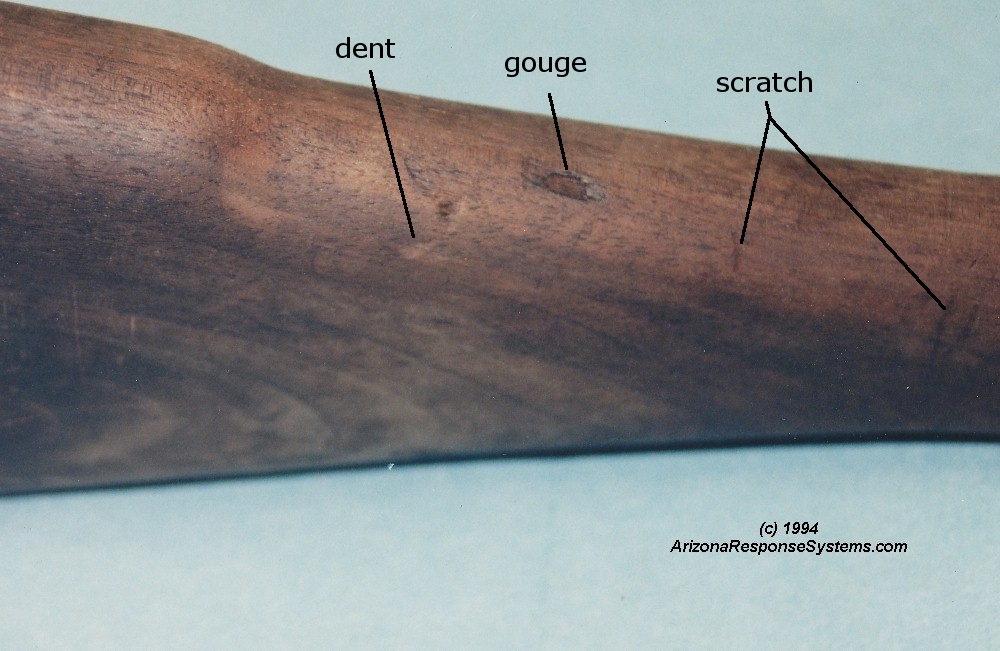
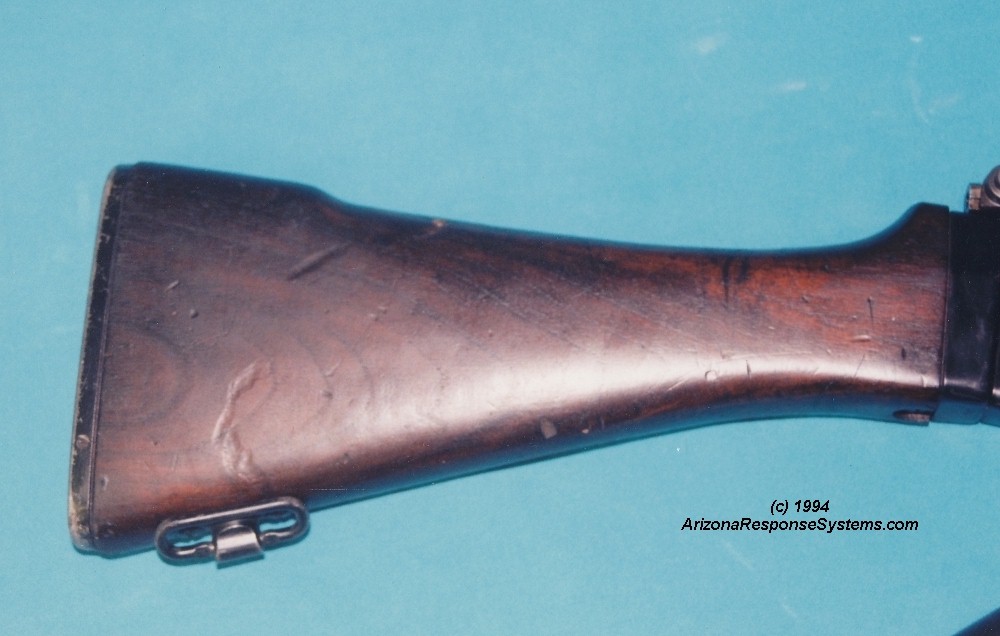
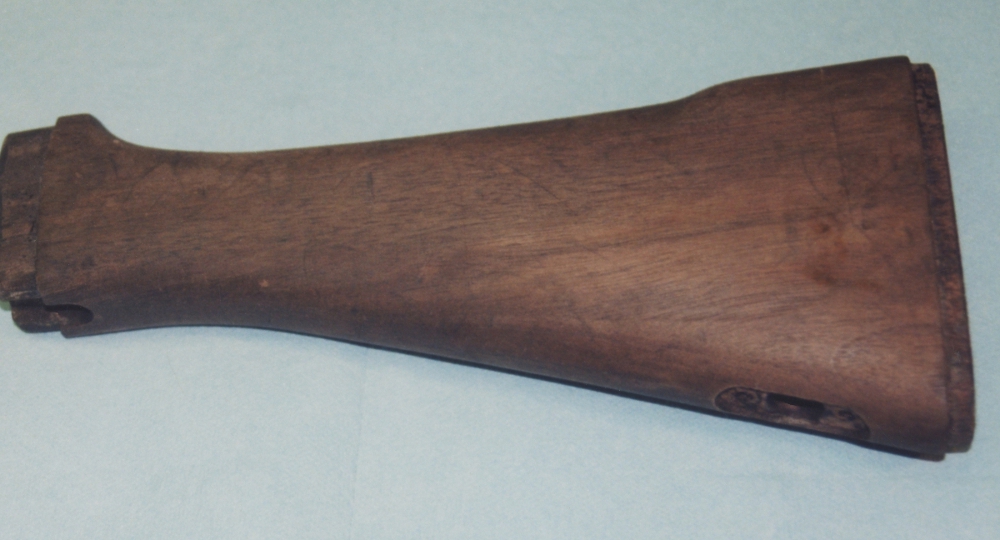
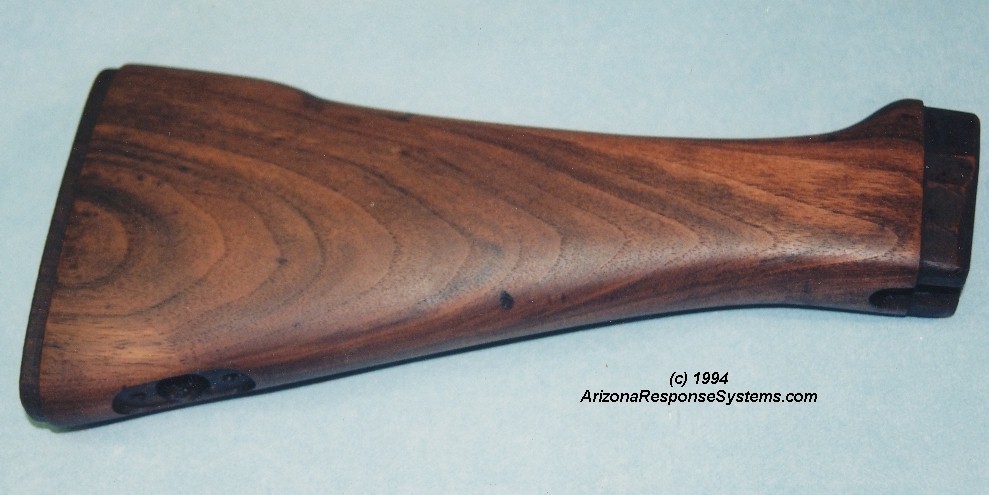
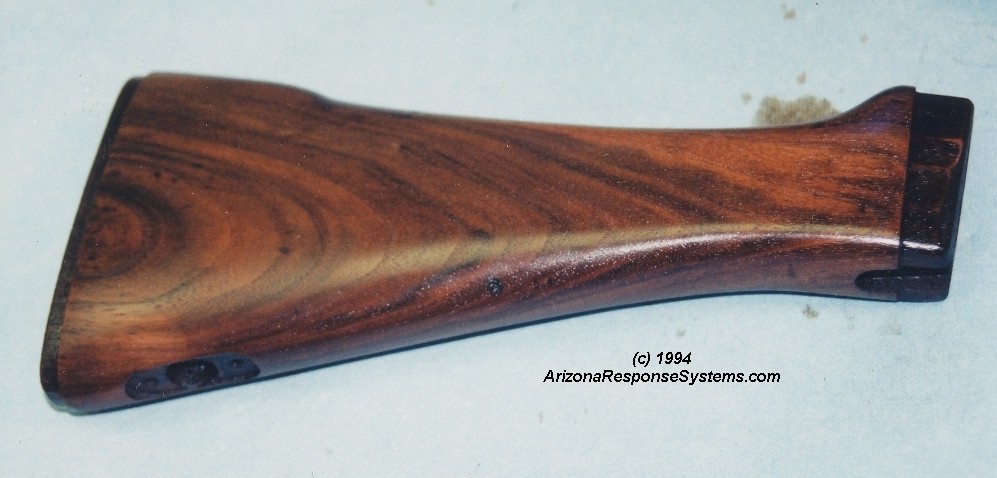
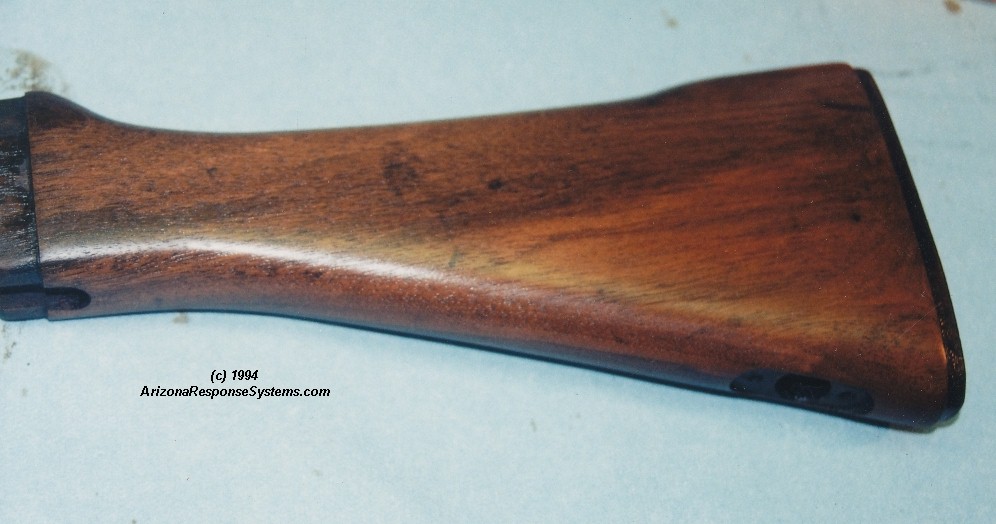
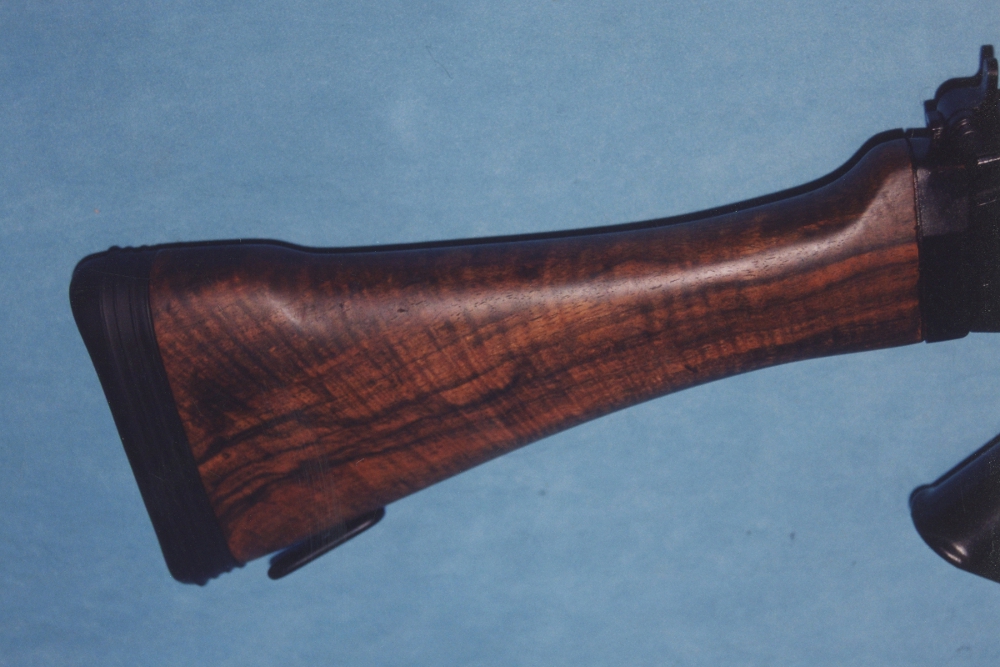
There are several types of damage to repair. The first is a dent. By dent I refer to an area where the wood has been compressed, but the grain is intact and has not been cut. While dents can be raised by steaming with a clothes iron and wet wash cloth, if you opted for the boiling method of removing oil, it is unlikely that applying a wet towel and clothes iron or soldering iron will raise it further. The sample stock has most of the dents removed or greatly mitigated by boiling.
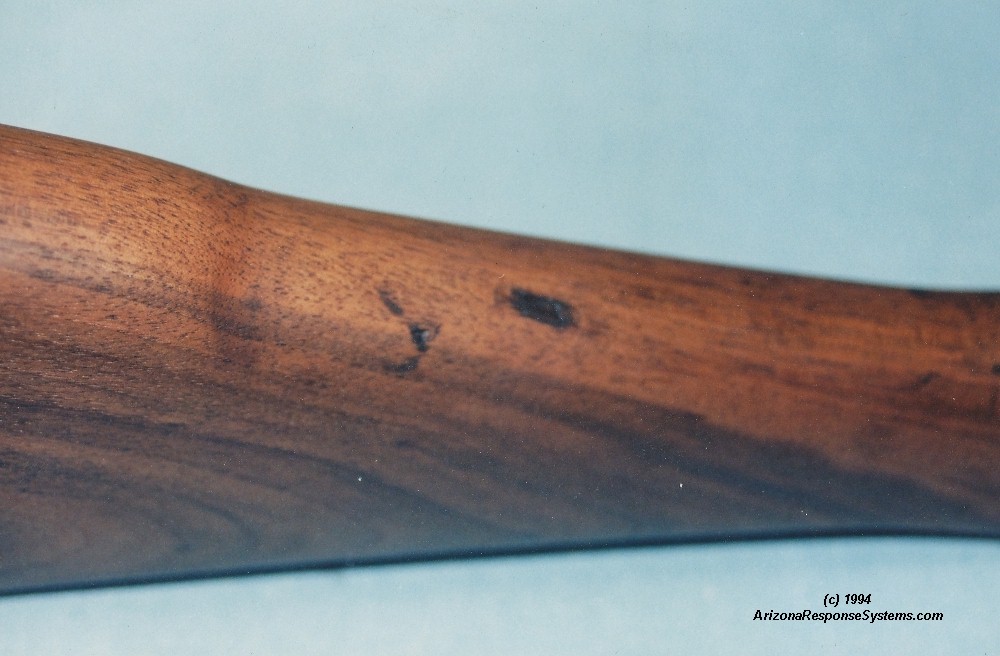
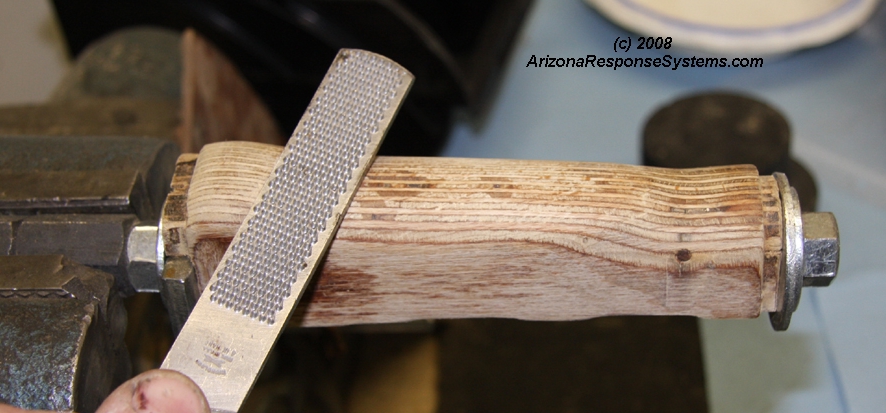
Another type of damage is a scratch. These are usually not deep, but may be long. Worse, they usually involve the wood grain being severed, which makes steaming of minimal value. For these, I recommend sanding perpendicular to the scratch without regard for the direction of the wood grain. Use 180 grit sandpaper with a hard backing. If completely removing the scratch will cause significant dimensional change in the stock, leave it alone. This is sometimes a very difficult decision to make. How much is enough? My experience has been that often a small dent looks better than a dimensional change, particularly where too much sanding will make the hardware fit poorly. Take care to leave edges sharp and be mindful of where the metal fits. I’ve seen far too many M1 Garand stocks where too much sanding leaves the back left edge of the receiver overhanging the wood.
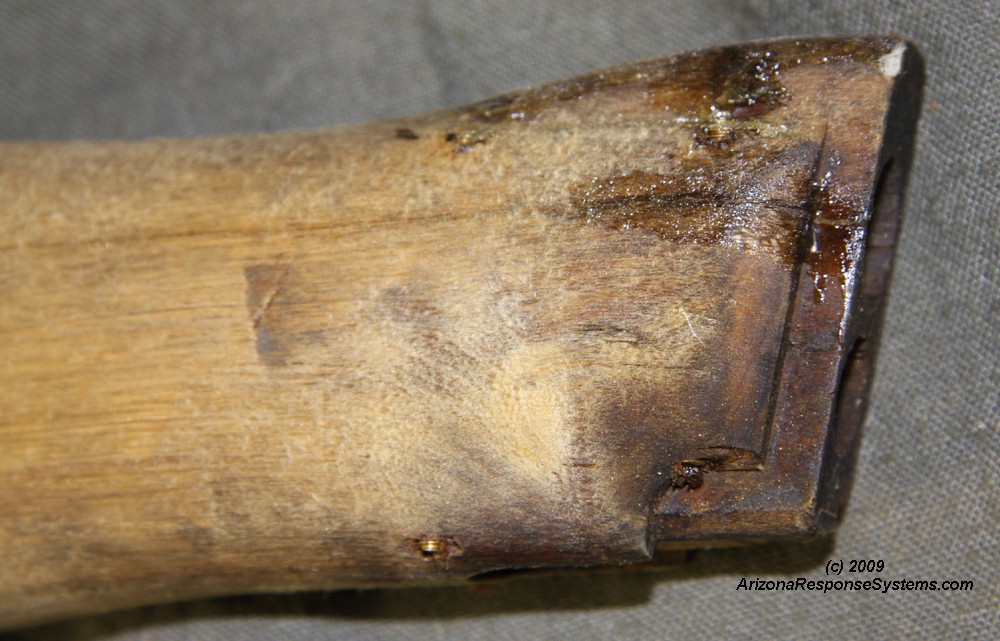
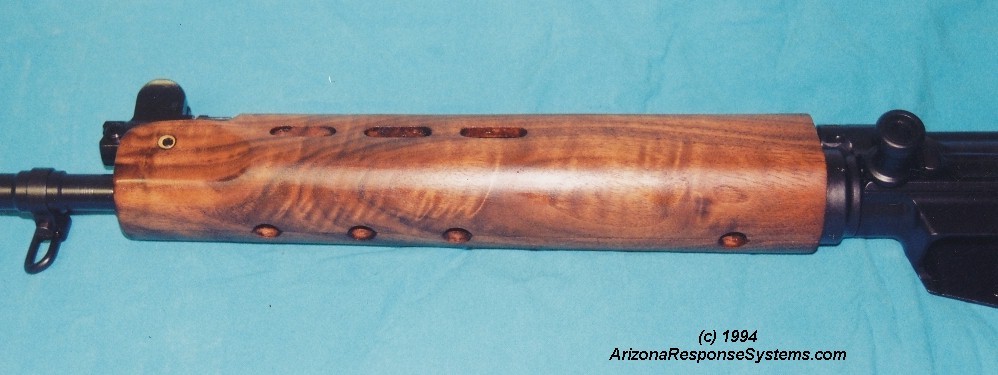
Another kind of damage a gouge. A gouge is where some wood has been removed, and may include a dent at the bottom. It may also resemble a dent, but differs in that it is more than a compression of the wood, the wood grain is actually severed on one side or both. I treat them the same at this point of the process. In my example, there is a significant gouge on the top of the stock. I opted to leave it alone. You will see from the finished product, that as a whole the gouge does not detract from the overall appearance. Your other option is to fill the gouge with Brownells Acraglass, or other wood fillers. Find a wood filler that you can dye before using. I have been unhappy with the Minwax Wood Putty that smell like 3M Bondoauto body filler. It claims to accept stain afterwards, but I have been dissatisfied with the color-matching and texture. DAP Plastic Wood also does not have the texture I’m looking for. I’ve had best results mixing sanding dust with Super Glue Quick Set (5 Minute) Epoxy, particularly on light-colored wood.
If you are particularly adventuresome, you can find a similar color wood, and sand it over a piece of paper – collect the dust, and mix it with wood glue. Use this to fill the gouge.
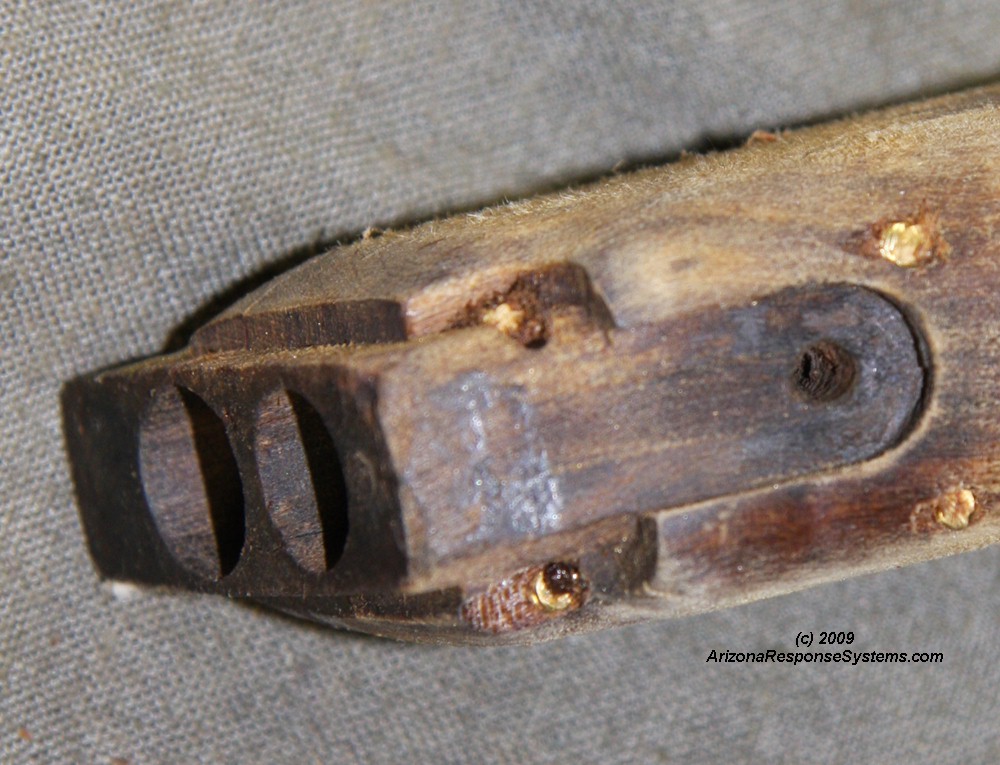
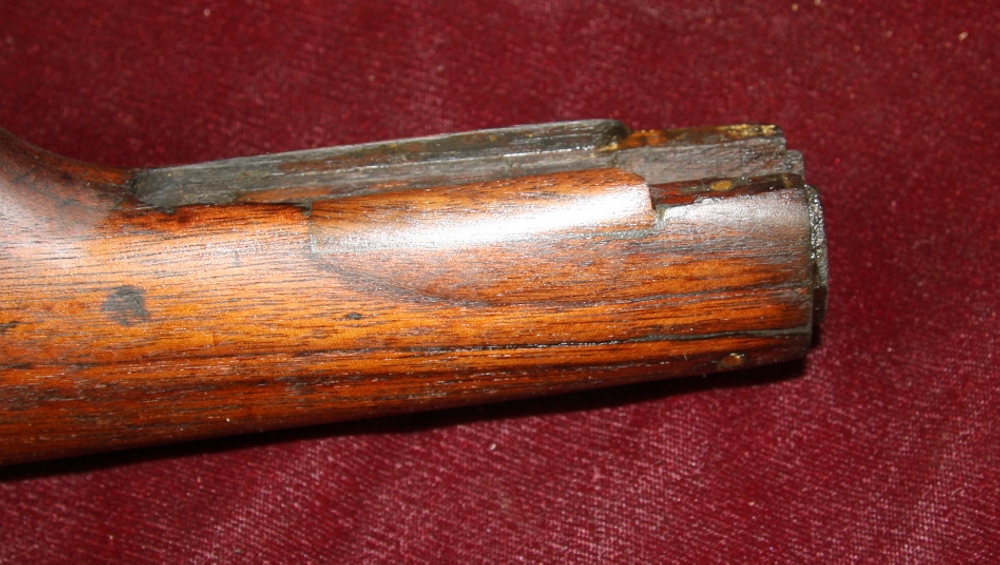
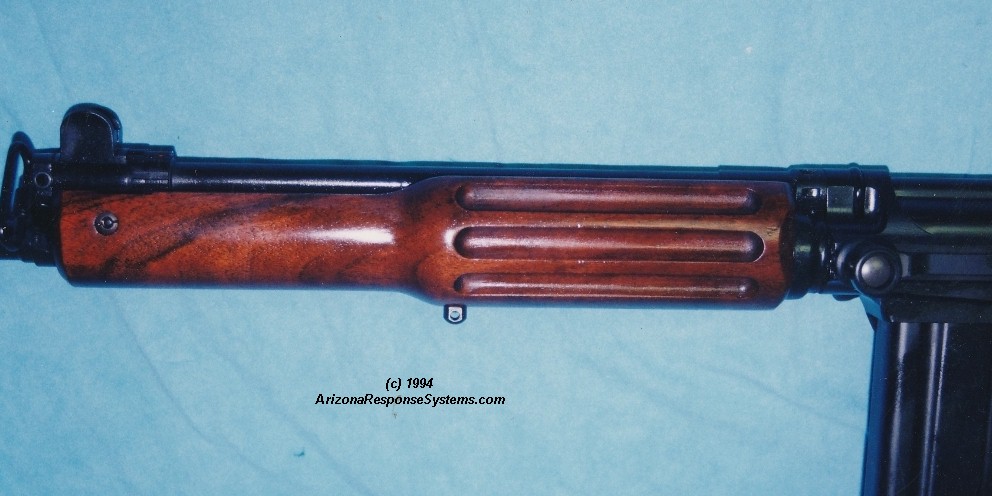
More serious damage includes a crack or split These often occur on FAL stocks at the front, and are one reason why later stocks went with a metal ferrule to support this front area.
One repair method is to reinforce with a brass threaded rod (all-thread). Depending on location, you will want a #6 or a #8. Drill your hole slightly smaller than the rod. Spread the crack if possible and squeeze in some wood glue. Chuck the rod in a hand-drill, cover with epoxy, and screw it through. When dry, cut off the ends and sand flush. Example is an Australian L1A1 shoulder stock.
Some military wood furniture, such as the AK lower handguard, install these reinforcements at the factory.
.
.

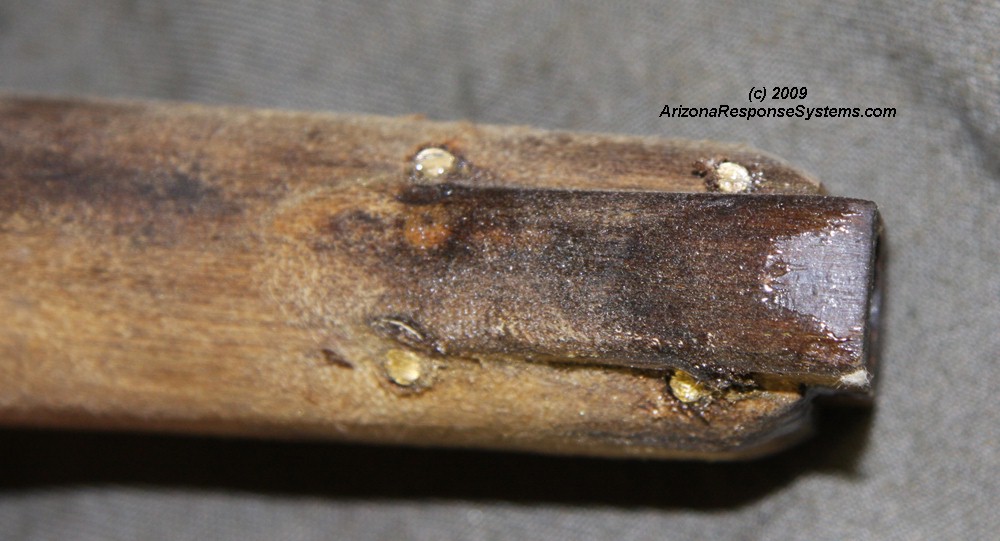
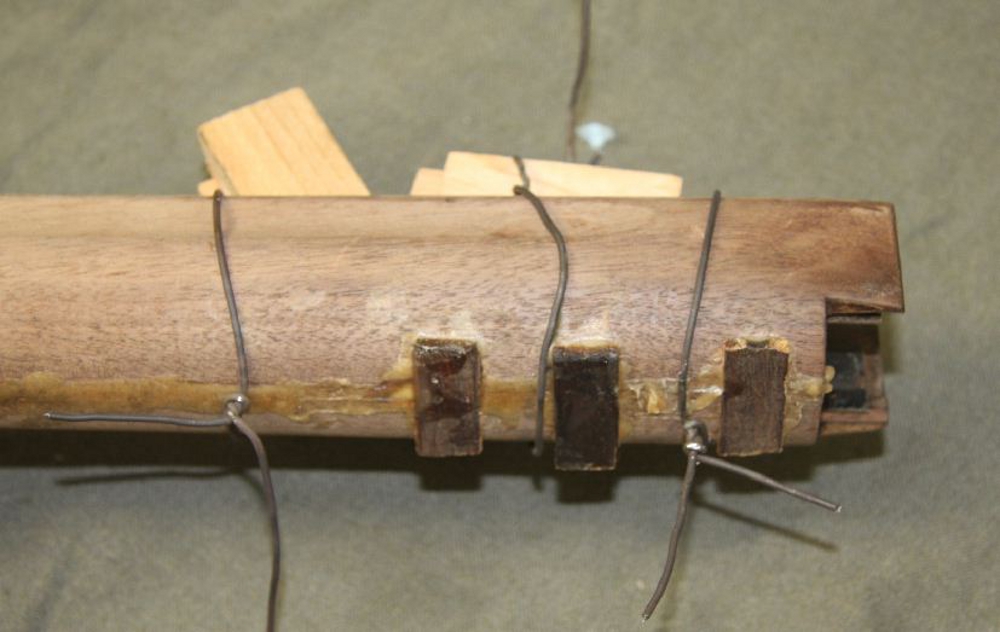
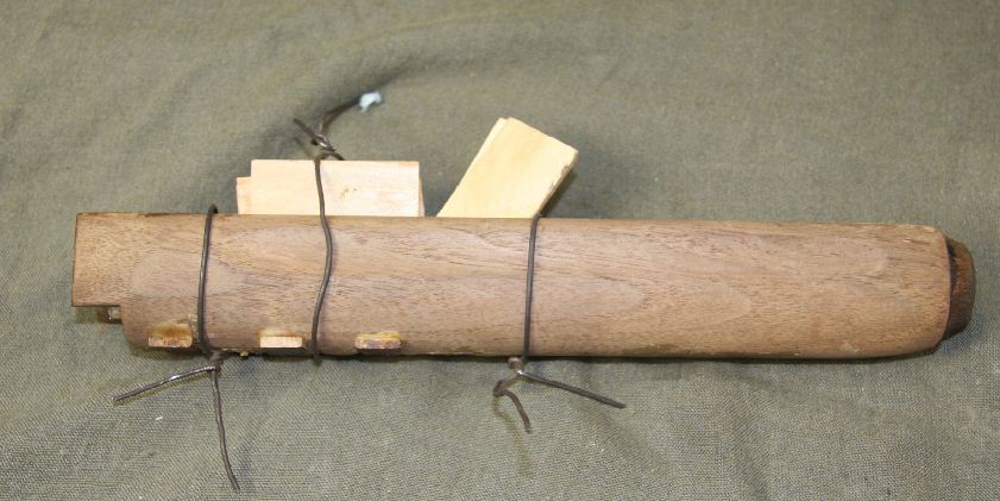
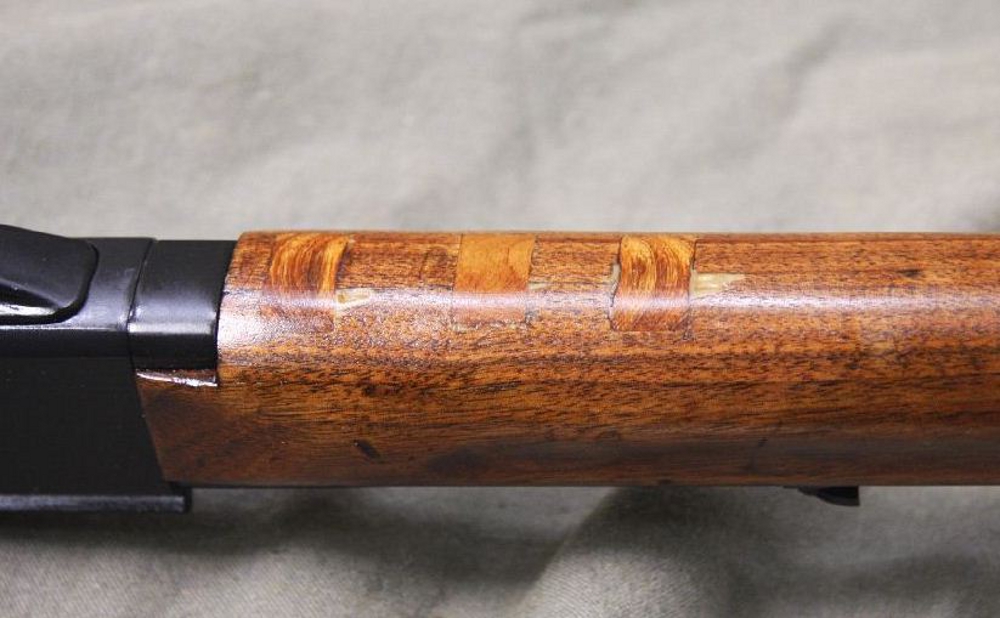
The final type of damage I will be covering is when a section of the wood is missing. Select a piece of wood that is of similar type. Adjust the contour of the missing area to make matching the missing area easier, and if there is an opportunity to use undercuts (dovetails) this will make the joint stronger. Glue the patch.
This example of a Winchester stock had multiple cracks and a missing section. I used a combination of brass rod and a patch.
.
I’m always learning new techniques and one of the areas where I’ve learned a lot of new things is in adhesives. My prior belief was that modern adhesives, such as 5-minute epoxy, are “better” than wood glue. A comprehensive scientific evaluation of joints under strain gauges, by Woodworker magazine, opened my eyes. Some subsequent destructive tests I’ve performed have validated their conclusions. It’s outside the scope of this tutorial to go into an analysis of adhesives, but I’ll give you my conclusions.
For gluing metal reinforcements to wood. 60 minute epoxy is stronger than 30 minute epoxy, which is stronger than 5 minute epoxy. MarineTex is best of all, but will be white, or very dark gray.
For wood to wood, water-resistant carpenter glue is stronger than any of the modern epoxy adhesives, including products like Gorilla Glue. The wood will split before the glue joint does.
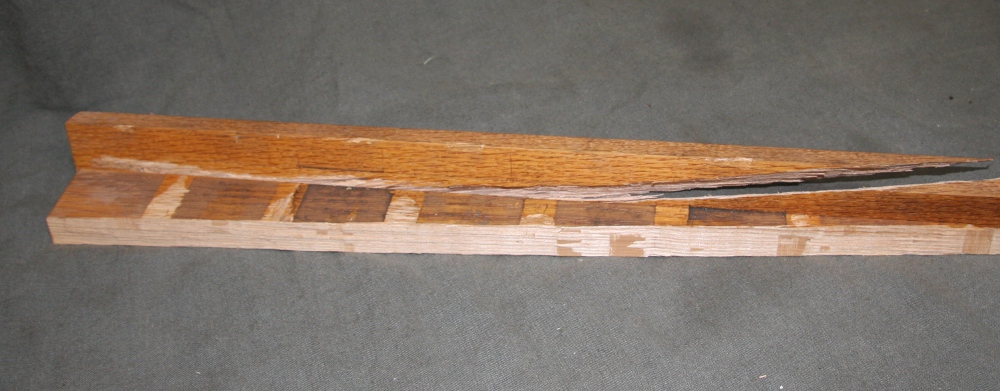
Here’s an oak shelf I was breaking apart to reuse the wood. I used interior Elmer’s wood glue on it, which is not as strong as the water-resistant variety. You can see the grain split before the joint separated.
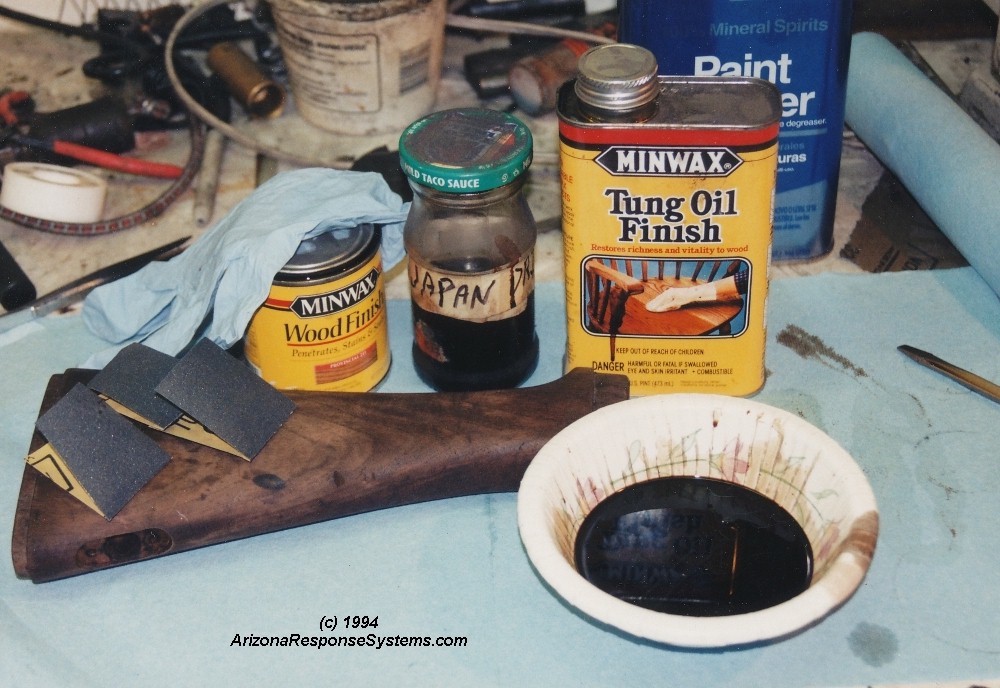
Gather your finishing materials.
- latex gloves
- stain
- oil finish
- thinner (turpentine or mineral spirits)
- Japan Drier (optional)
- scissors
- sand paper: 180#, 220#, 320#, 400# (optional, ultrafine finish)
- mixing bowl (paper is fine)
- blue shop towels (lint free)
- small disposable sponge brushes (optional)
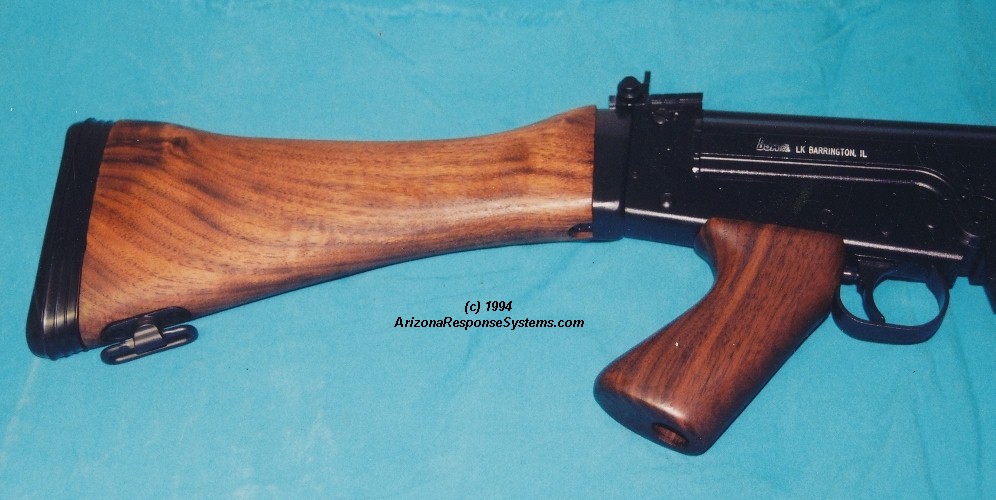
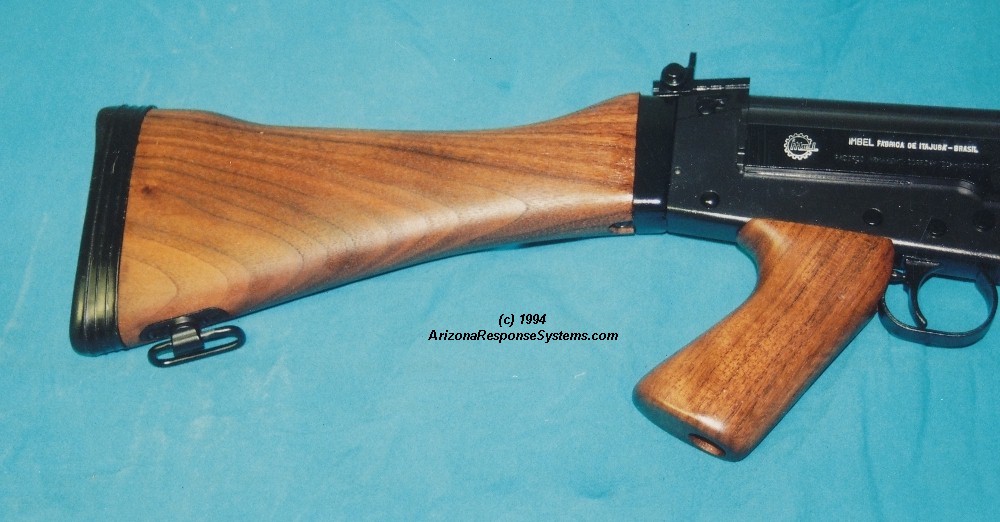
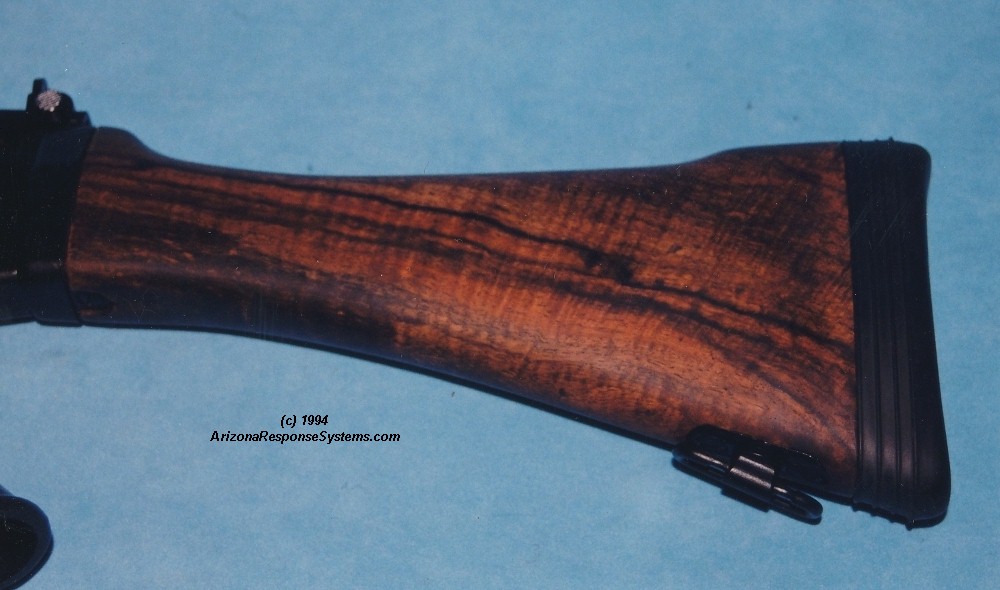
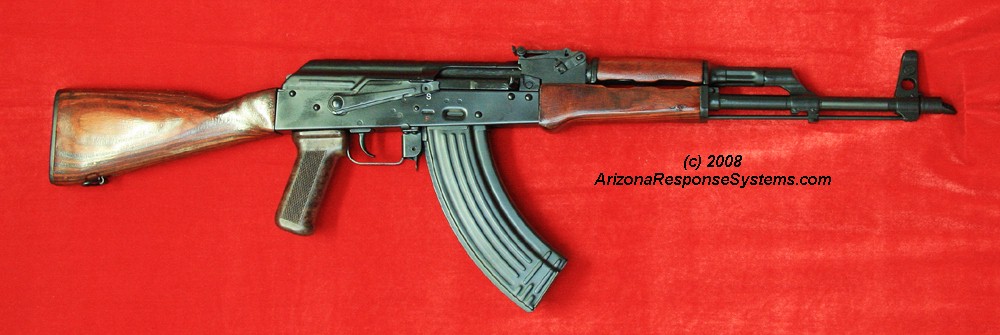
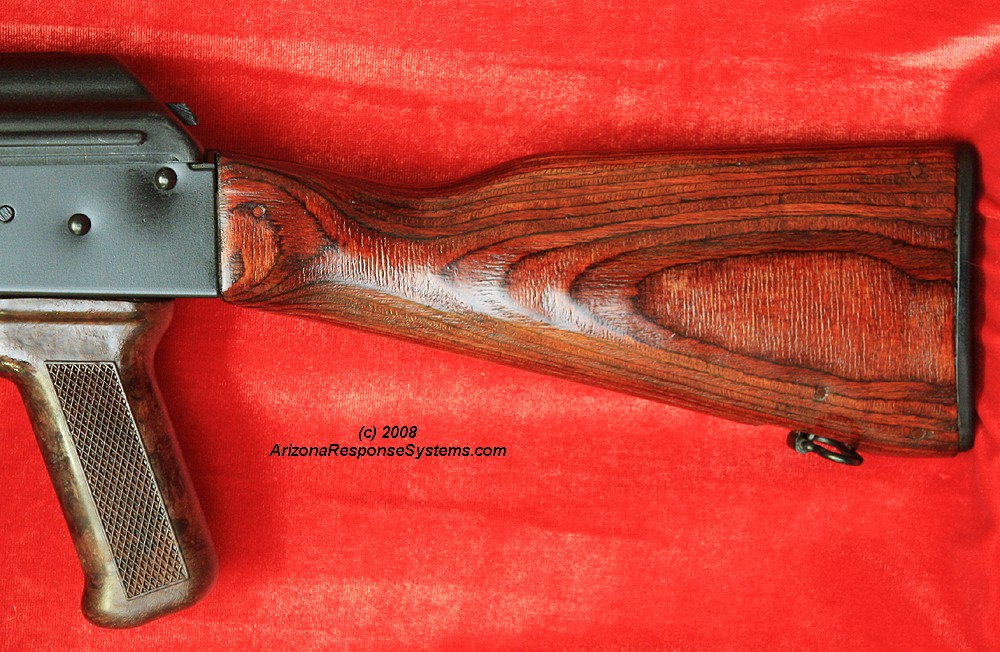
The stain color, or whether to use stain at all, is largely a matter of personal preference. If you use stain and subsequently mar the finish, it will be harder to match the color on repair. For walnut wood, I prefer the slight red tint of Minwax Wood Finish: Special Walnut or Minwax Wood Finish: Red Mahogany. This slight red color is typical of USGI rifle stocks.
On sap-wood, or wood with varying hardness, or light colored wood such as Italian Carcanos, and Israeli FALs, a dark stain will give poor results. It darkens the differing harnesses unevenly. In these cases, I recommend using no stain, or using a light stain like Miniwax Wood Finish: Natural which will give a slight yellow/gold hue.
You can use Minwax Tung Oil, any brand of Boiled Linseed Oil (BLO), or Birchwood Casey Tru-Oil. Tung Oil is thicker and gives a shinier finish. Linseed Oil takes longer to dry and gives a satin finish. Birchwood Casey Tru-Oil is more expensive, but gives a very nice satin finish. It is essentially BLO with additives for faster drying. Japan Drier is an additive that accelerates the drying time of oil based finishes. Do not use with the light color woods as it will darken the color. Mix equal parts of stain and oil in a small bowl with a tablespoon or so of Japan Drier. Cut your sandpaper. Do not tear. Tearing will leave bits of abrasive material in your mixture that will imbed in the stock.
If you have large variations in color, such as a birch upper handguard and walnut stock, the only way I have found to get an even color is with a dye like Mohawk Ultra Penetrating Stain, discussed below in the AK stock section. I also found on birch or elm that Fiebing’s Leather Dye Dark Brown (leather supply, or saddle supply) makes a surprisingly good match to USGI redish walnut. In cases where you dye the wood – do all sanding first, then dye, and let dry. Then several coats of oil without stain, or sanding.
Safety Notice: Spontaneous combustion of oil-based finishes is no joke. Do not dispose of wet oil products. Allow them to dry thoroughly on a non-flammable surface before discarding. Oil-based finishes generate heat as they dry. A crumpled paper towel in the waste-basket can ignite. Ask me how I know.


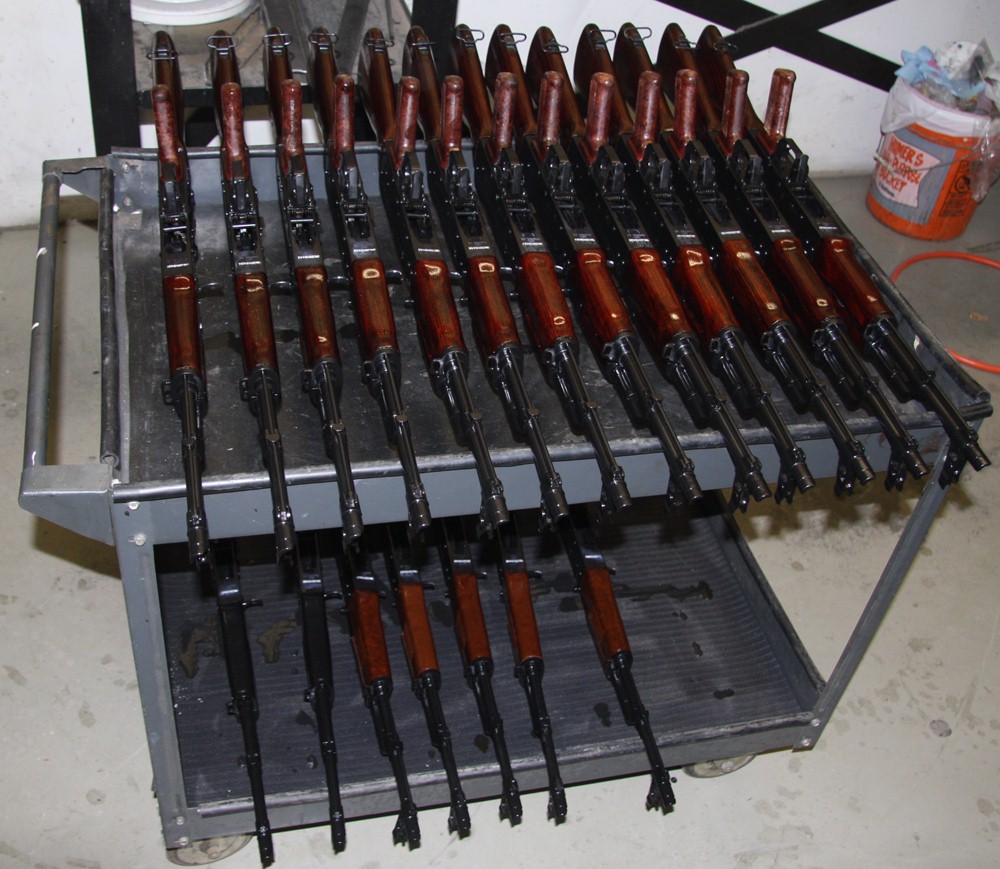
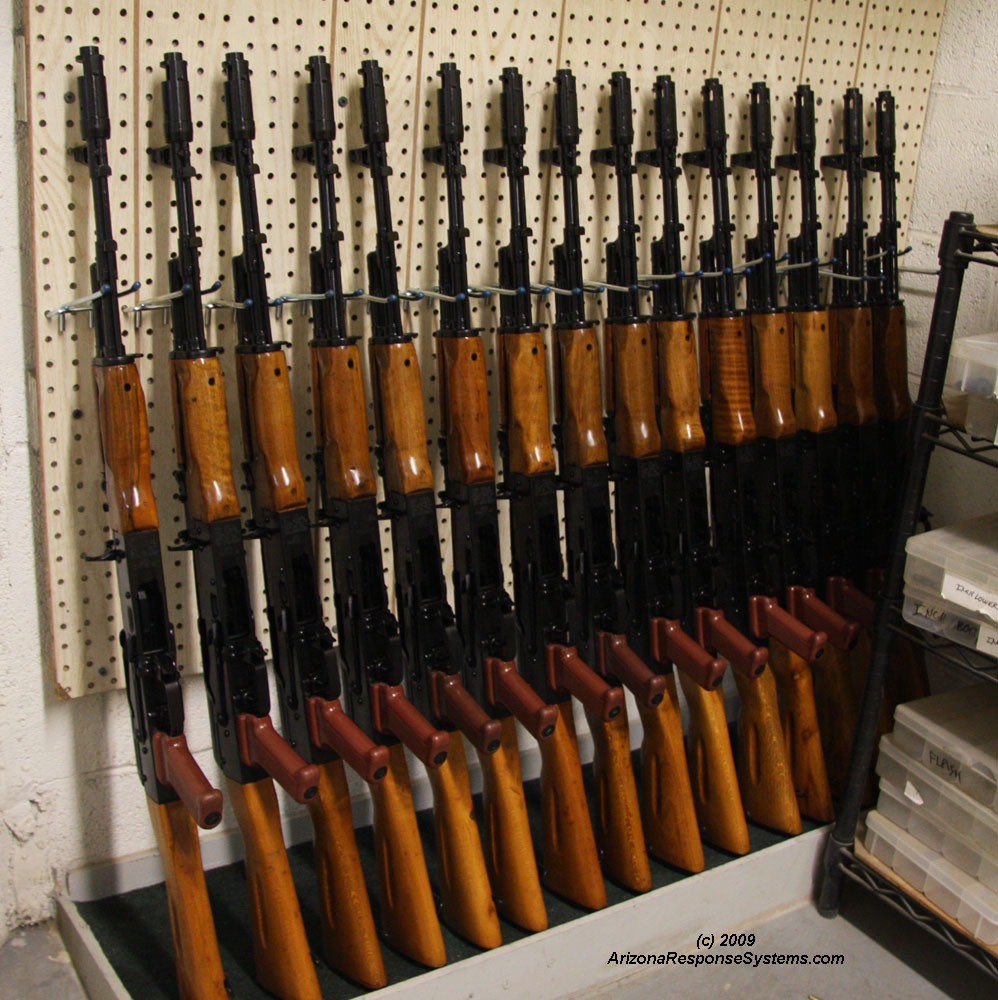
The original finish is a lacquer base. Lacquer strips in lacquer thinner, acetone and/or alcohol. Sometimes a mix of two or more works better than one only. I was processing 500 AKM stock sets, so I experimented with different mixtures, but found no ideal mixture.
You can also use a methylene chloride stripper like Klean Strip, per product instructions. Do not soak the upper handguard as it may warp. scrape/scrub with stiff brush and rinse with water. sand with 100 grit soak in 50% bleach solution for 15 minutes and rinse. then soak in vinegar for 15 minutes and rinse. Dry in cool location. Do not accelerate drying Do not soak upper handguard. (on the Romanian) it is not laminated like the other pieces. Manually sand only. There is no need to remove all of the original color as the dye will cover it, and some tracers of lighter and darker shades will more closely match the laminated lower handguard.
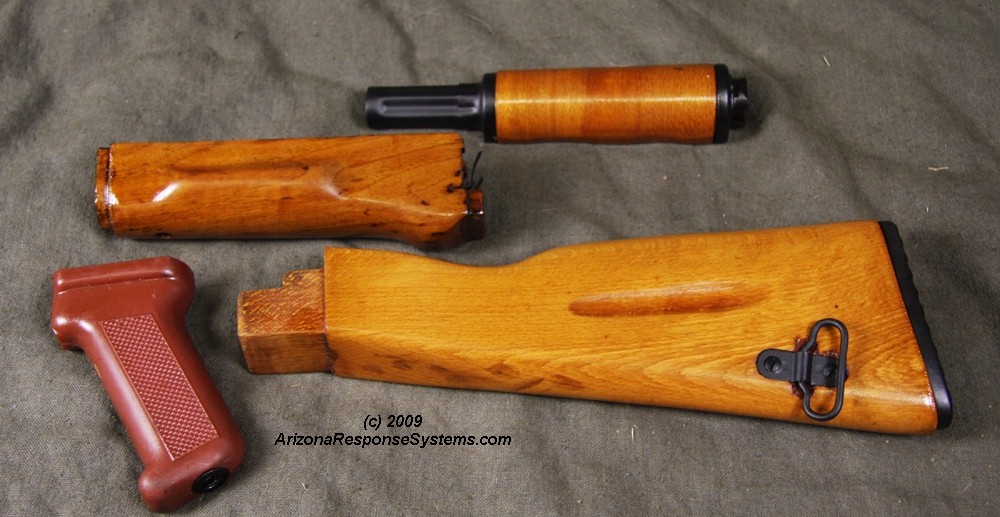
Romanian “G” lower handguards include a front pistol grip. Decide if you want to keep it. If not, cut off. Be aware that the angle of the lower side does not match the upper side. Since I was doing hundreds of them, a set up the table saw for an angled cut.

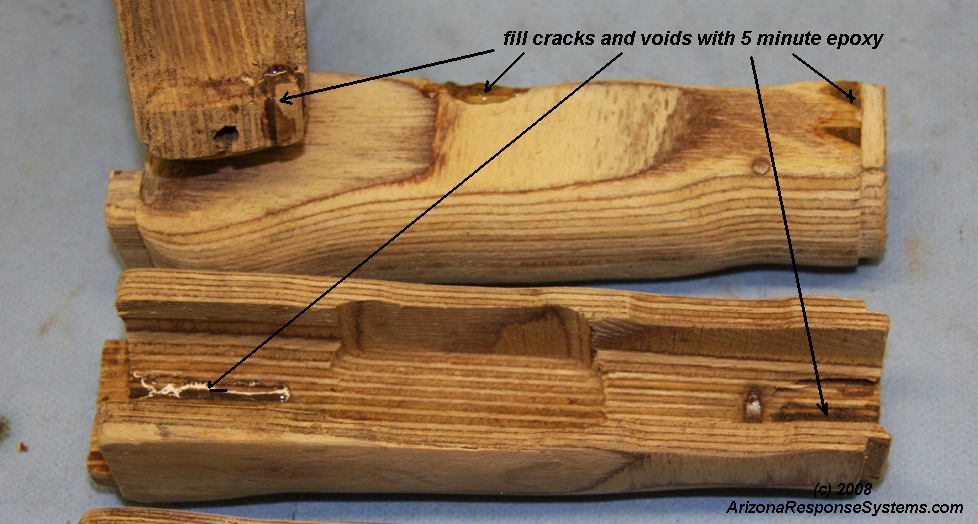
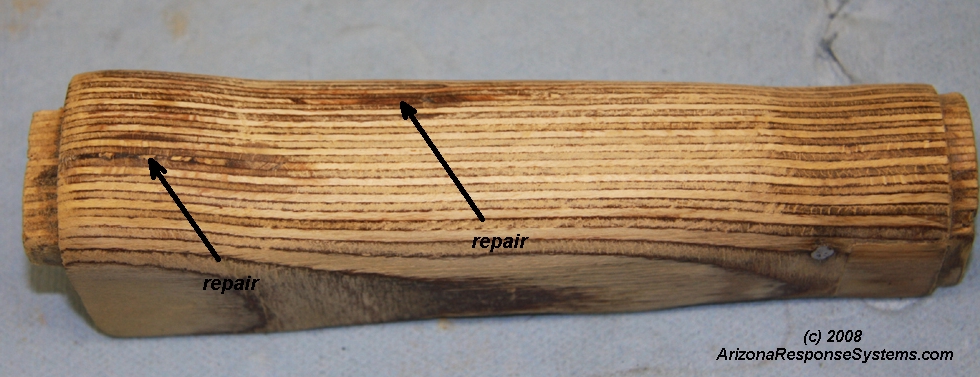
Patch voids and cracks in laminate wood with 5 minute clear epoxy as needed. Since this is laminated wood, the epoxy works better than wood glue.
sand smooth with 200 grit
If you wish to have the stock amber in color, skip this step on dying.
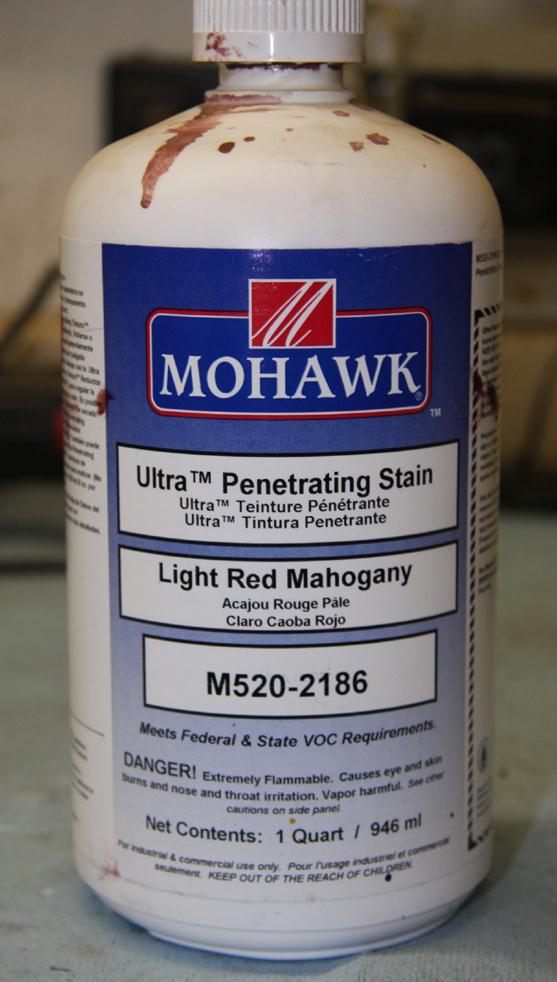
I use Mohawk Ultra Penetrating Stain. While they call it a stain, it is not a stain in the tradition of Minwax Wood Finish. It is an alcohol based dye and has much greater penetration and color density than a stain. I had on hand 5 different colors and coincidently, mixing equal amounts of all 5 colors gave me the shade that I wanted. I used Mohawk Ultra Penetrating Stainin Dark Red Mahogany, Light Red Mahogany, Oxblood, Modern Mahogany, and Dark Walnut. You can probably obtain the same color match using Oxblood and Dark Red Mahogany. The Mohawk Ultra Penetrating StainOxblood is purple and gives the plum tint. Use sparingly, as the reason I had to use so much of the other colors was to tone down the potent coloration of Oxblood
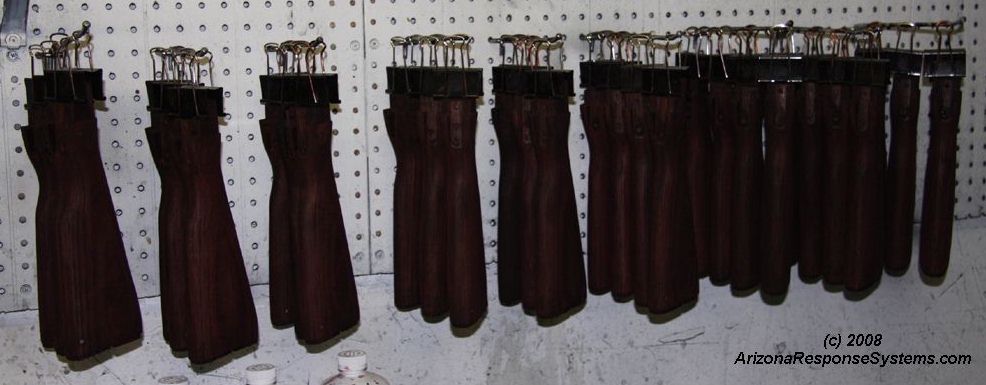
I mixed the colors in 1 gallon Rubbermaid storage bin ($2). It is large enough to dunk an entire stock. I use extra-large binder clips to hang the stock for drying. After dunking, I wiped with disposable foam brushes, taking particular care to remove any excess dye from the sling swivel recess, the front shoulder, and the but-plate recess. Failure to do so may allow accumulating dye to drip as it dries. Depending on the color and rate of absorption, I dunked some stocks a second time after about 30 minutes drying time. This darkened them another 50%.
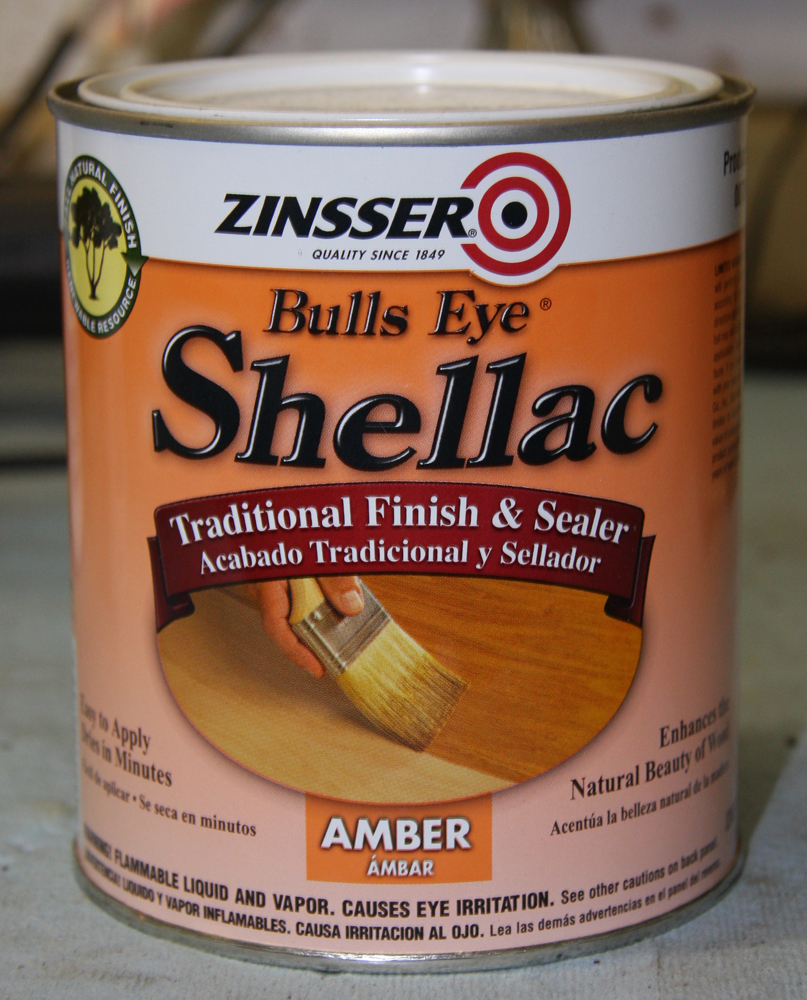
I experimented with raw lacquer flakes, dissolved in alcohol, but for doing just a few stocks, using Zinsser Brand BullsEye Shellac(Amber) works well. Shellac is lacquer with the addition of drying agents and stabilizers. Apply one coat of lacquer, thinned 10-20% with alcohol. This thinned coat is to obtain maximum penetration into the wood.
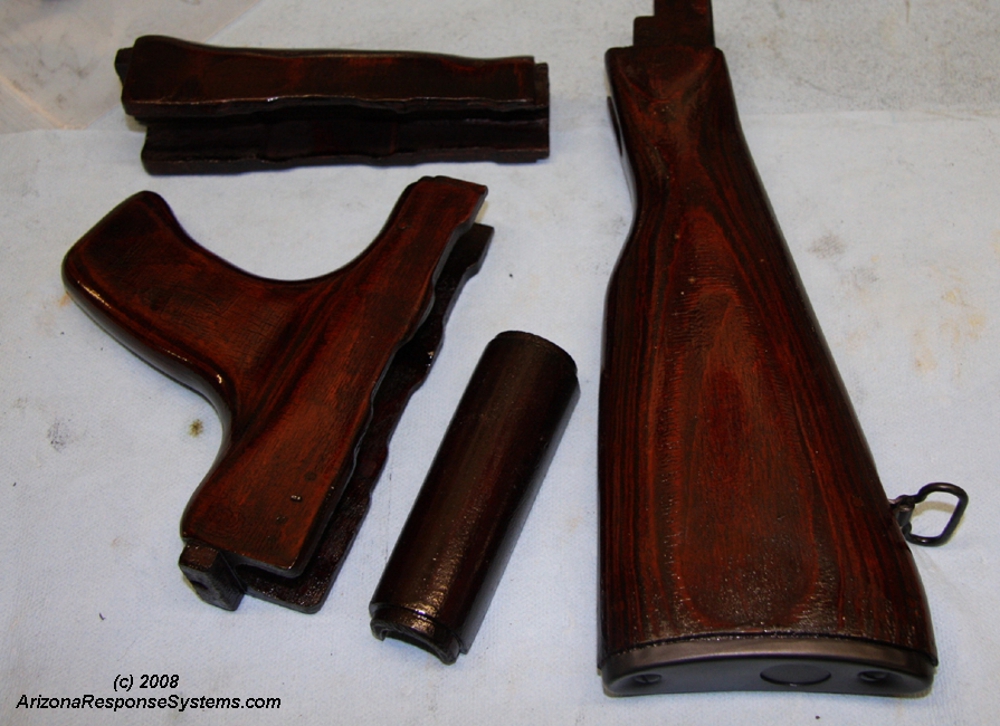
Apply 4 more coats of straight lacquer, allowing a couple hours between coats. The portions of the wood that are inside metal portions – the stock tang, the upper handguard shoulders, the lower handguard ends) only need one coat. Too much buildup will have to be filed off during reassembly.
After the 4th coat, allow to dry for several days, and buff with #0000 steel wool . The steel wool should yield fine powdery dust. If it instead peels or rolls portions of the finish, it needs more drying time. Blow with compressed air to remove all traces of dust and steel wool residue. I do not care for a finish that is very glossy or looks like a candy-coat, so I avoided polyurethane finishes. While I wanted the wood to be attractive, I also wanted it to closely resemble the original military finish.
Apply final coat of lacquer, thinned 10-20% with alcohol. This final coat is thinned to give a smoother finish. Allow to dry for a week. do not allow pieces to touch each other. Even if dry to the touch, two surfaces in contact will glue themselves together. If storing for a period of time, either leave hanging or separate pieces with wax paper.
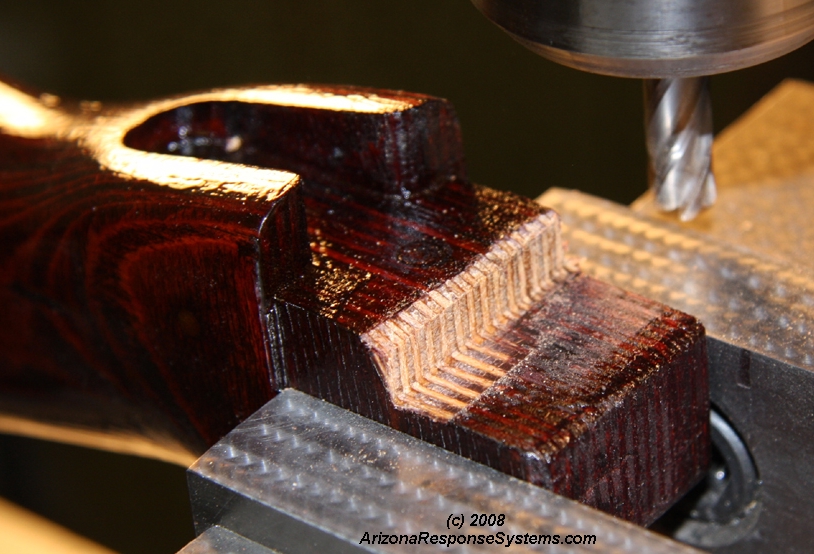
There is supposed to be a slight gap between the forward shoulder of the stock and the metal of the receiver, as well as all around the tang. This keeps the tenion as the recoil-bearing surface and prevents the stock from cracking. Sometimes this gap is larger than is cosmetically appealing. You can close the gap by setting the recoil surface of stock back a hair less than the gap width.
Lengthen tang slot by same amount. The original specification for the AK stock was to be off the receiver by a minimum of 0.4mm. This could be to ensure the thinner sides of the stock and the narrow portion behind the tang do not become recoil absorbing surfaces. This made sense with the original wood stocks that were prone to splitting. It is not as applicable to laminated stocks and not at all to synthetic stocks. I find having the sides of the stock closer to the receiver to be more attractive and easier than explaining to customers that the gap is not from a sloppy fit, it is supposed to be there.
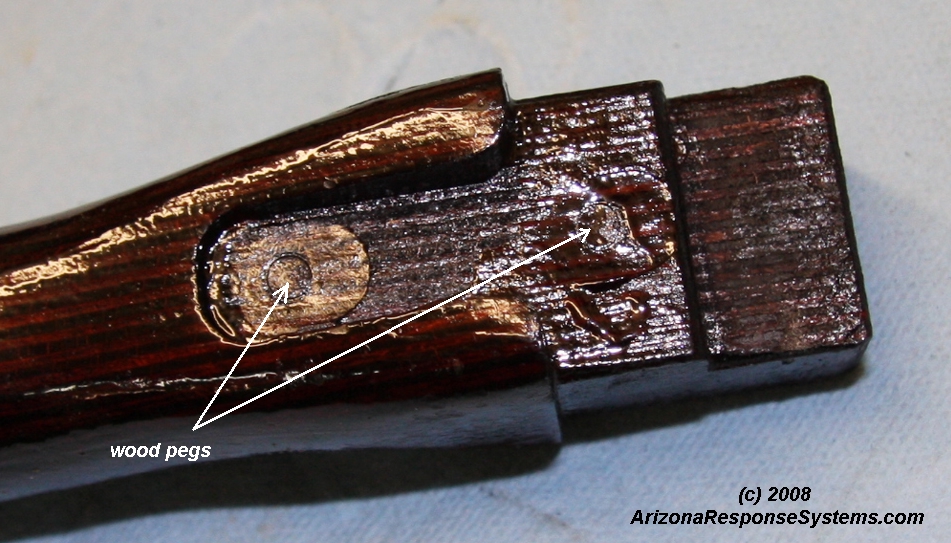
If the tang screw holes do not align on the newly-riveted rear trunion and receiver, or they are stripped, drill the holes out and insert wood pegs. Drill new holes to align with the tang.
Leave a Reply
You must be logged in to post a comment.