AK Tutorial: Building an AK Pistol
(updated 04-09-2020)
Introduction
These directions are for the advanced builder who already has successfully built and refinished a standard size AK. This project requires lathe turning, milling, threading, welding, and silver soldering. This tutorial does not cover riveting, headspacing, barrel pressing, or wood and metal refinishing.
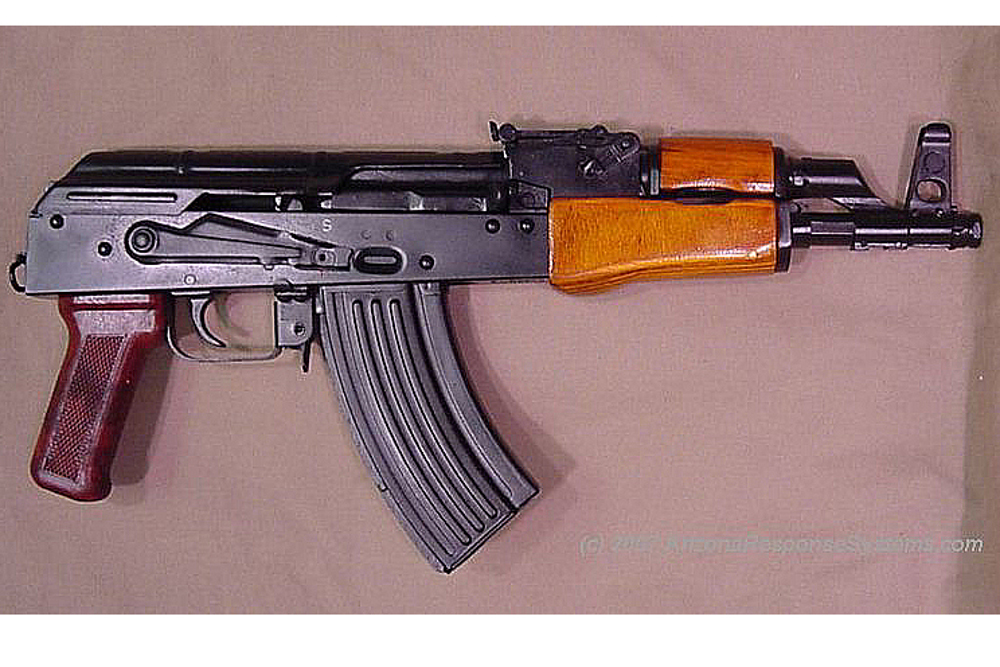
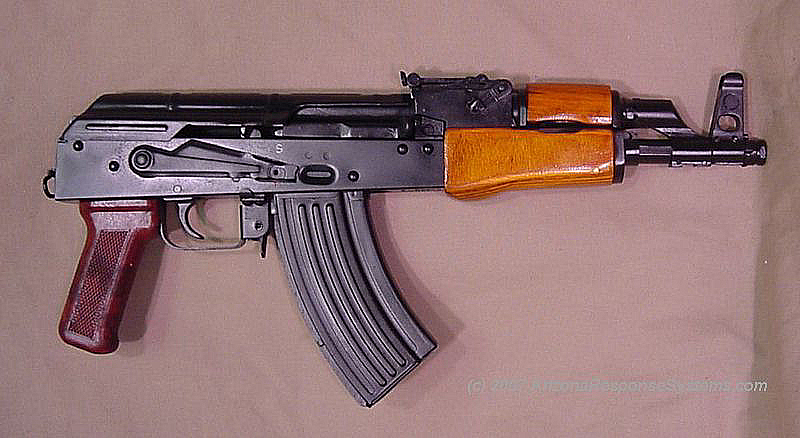
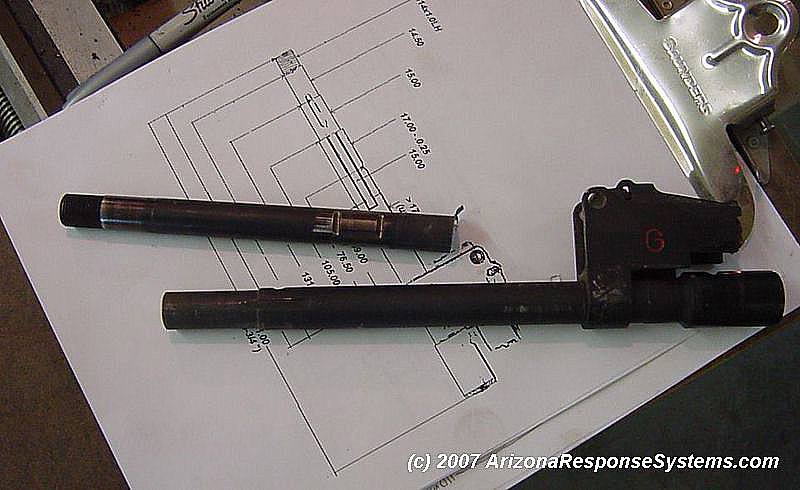
These instructions are for building an AK pistol with 9-3/4″ barrel from a Romanian “G” parts kit, a K-Var Bulgarian (or US copy) 7.62×39 Krinkov Gas piston, and a NoDak Spud NDS-3 AK receiver. Other countries of origin or other calibers have different size and shape barrel components. These measurements are exclusively for the for the Romanian 7.62×39 with the Bulgarian Krink 7.62 piston. All dimensions are based off the gas piston length.
Legal Issues

It is a violation of the National Firearm Act (NFA) to manufacture a rifle with a barrel shorter than 16″ without paying a tax. The Short-Barreled Rifle (SBR) manufacturing tax for an unlicensed home-builder is $200. Some states do not permit SBRs.
It is a violation of the NFA to manufacture a handgun with a front pistol grip without paying a tax. The NFA classifies such weapons as “Any Other Weapon” or AOW. This category covers firearms that are not machineguns, destructive devices, short-barreled rifles, or short-barreled shotguns. Thus “Any other Weapon. The Short Barreled Rifle (SBR) manufacturing tax for an unlicensed home builder is $200. Some states do not permit SBRs.
While the NFA restricts the minimum length of a rifle barrel to 16″, there is no maximum length for a pistol barrel. Therefore we can manufacture an AK style firearm with a barrel shorter than 16″ so long as it does not have a shoulder stock (SBR) or front pistol grip (AOW).
You must use a virgin receiver or a receiver that was previously a pistol. As the manufacturer – you determine whether it will be a rifle or a pistol. Once manufactured as a rifle, a receiver may not be disassembled and rebuilt as a pistol (but a pistol can be converted to a rifle).
An individual may manufacture legal firearms for personal use. Manufacture of firearms for purpose of resale requires a Type 7 Federal Firearms License.
I have covered the federal laws related to the manufacture of AK pistols. The 1994-2004 Assault Weapons Ban restricted the manufacture of pistols over a certain weight. Some states adopted the federal ban, but kept the laws after the federal ban expired in 2004. Make sure there are no state laws prohibiting your manufacture of an AK Pistol.
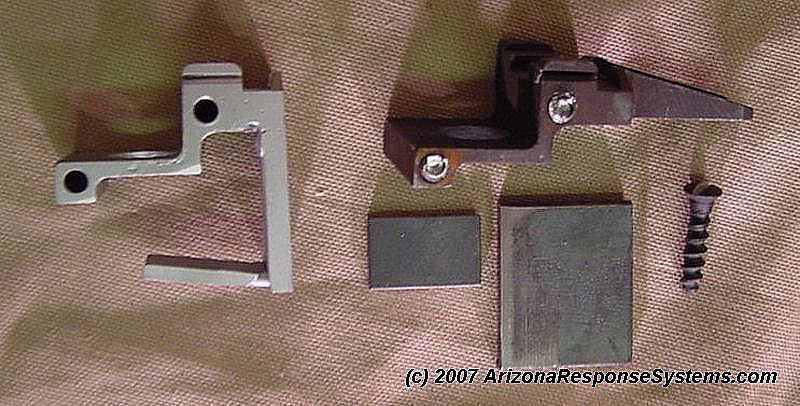
Rear Trunion
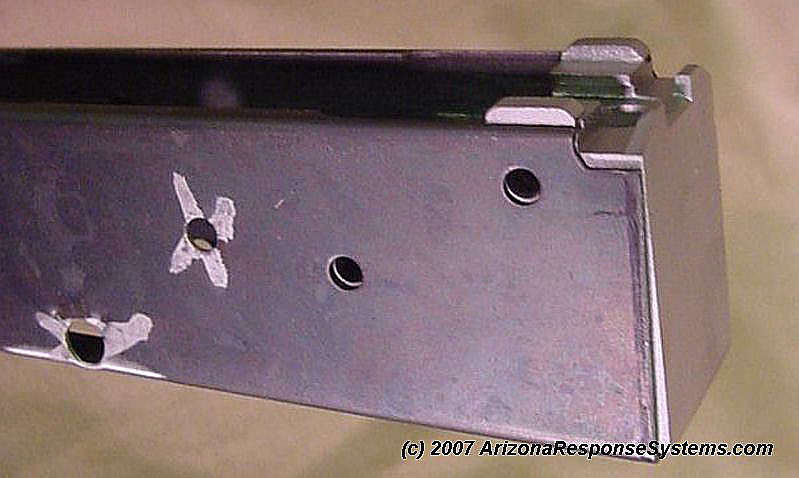
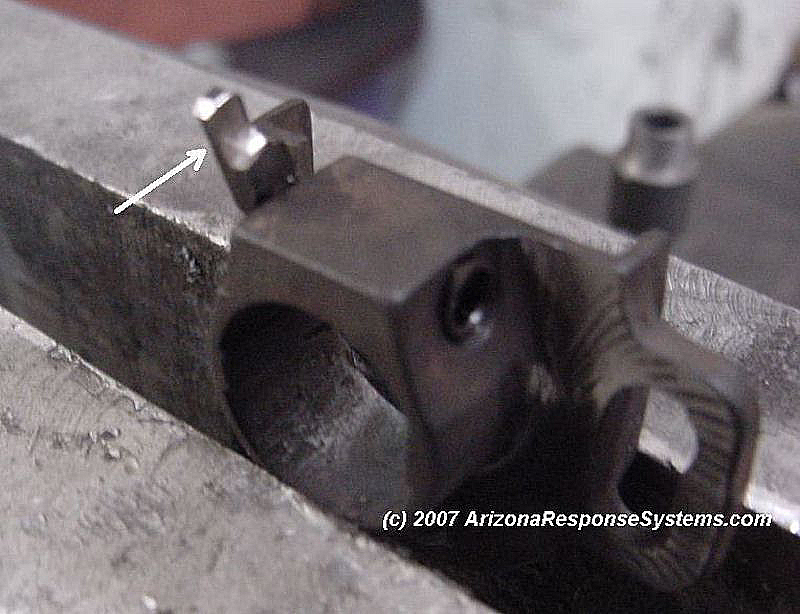
Fabricating a back plate for the trunion. Cut off tang. Cut head off tang screw and weld into hole from underside. Weld back plate onto trunion. File to fit. Weld tab on bottom inside of backplate for 3rd rivet. Bend to 5 degree angle to match bottom receiver contour.
Do not grind back plate to match receiver length until after riveting – it will shift slightly.
Be careful not to alter the width of the trunion when shaping the backplate to fit.
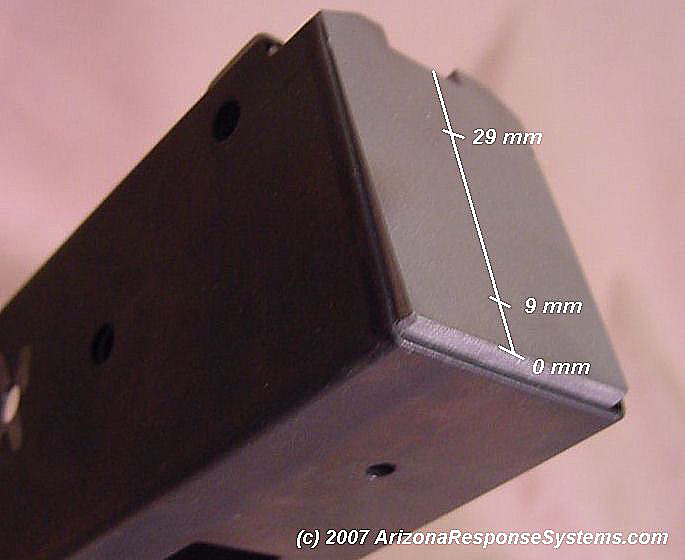
Draw a vertical center line. Mark and center punch 9mm and 29 mm up from bottom (Romanian sling swivels are 20mm between centers). These dimensions are important to avoid the top hole contacting the trunion, which may be too hard to tap. Also, the sling should be centered on the back of the receiver, not centered on the plate. Drill two holes with #29 drill and tap #8×32. Do this prior to riveting in case the tap breaks it is much easier to fix if you can access the hole from both sides.
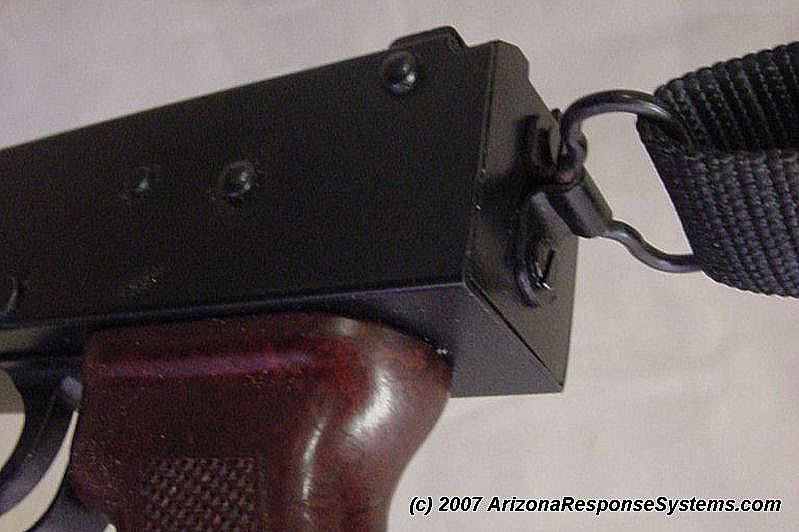
After the pistol trunion is riveted, grind the backplate flush with the rear of the receiver and mount the sling swivel with two #8×32 v-neck machine screws.
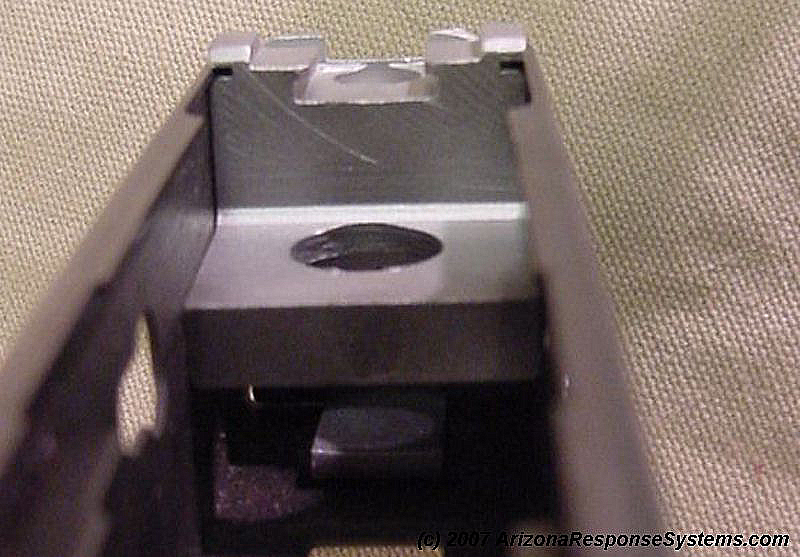
NDS-3 receivers have a small locating hole on the underside rear. I enlarged this hole and drilled through the tab for a third rivet. This third rivet may be redundant, but I want to make sure that the backplate won’t flex when the pistol is thrust forward against the sling. Using a rotary tool, grind a half-circle on the inside rear of the pistol grip to clear the bottom rivet head.
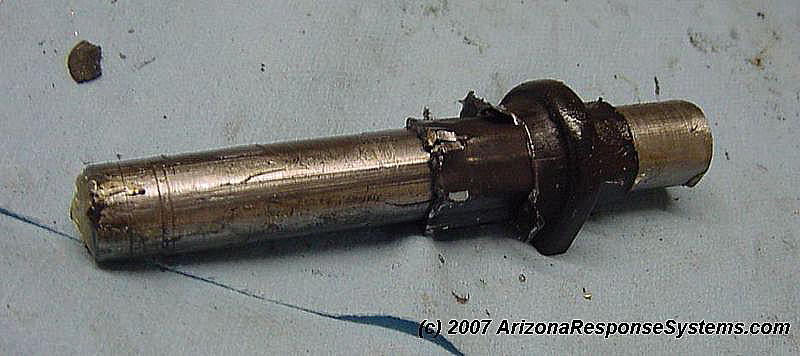
Barrel
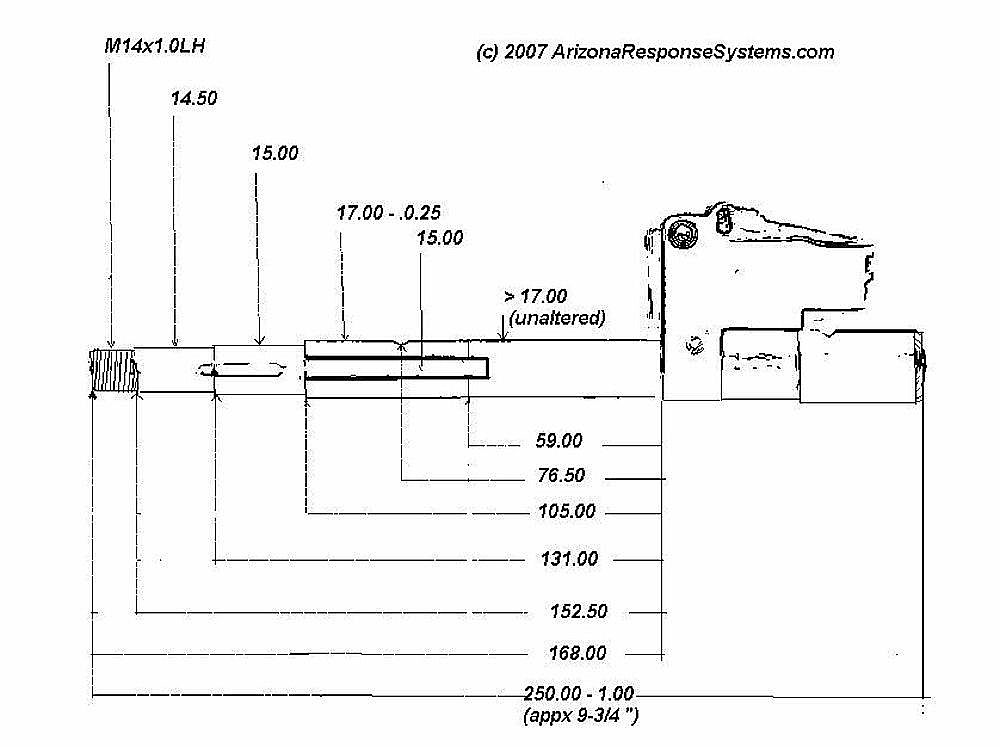
Barrel dimensions. Note that the steps are relative to the front of the rear sight block, not the chamber face.
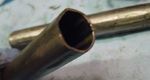
Cut barrel at 9-7/8″. Square the end and chamfer. You will shorten it to 9-/34″ as a final step. You may mar the crown during machining and starting a little long will allow for refacing and crowning.
Mark the points on the barrel where the steps will be
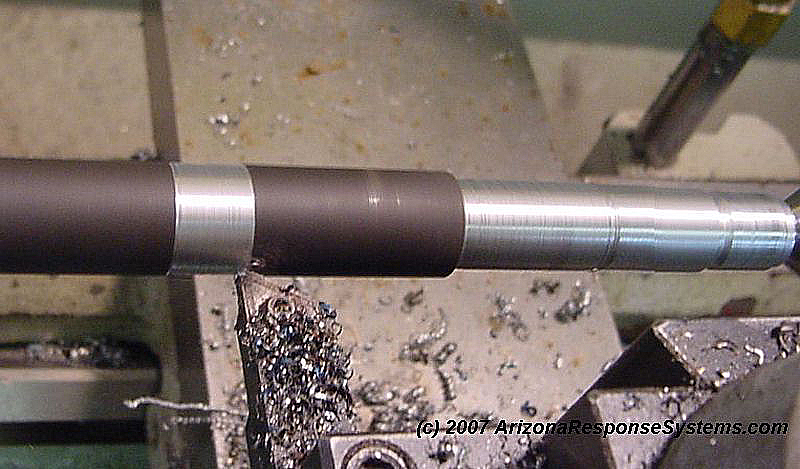
Starting at the muzzle end, turn to 14mm diameter. This is not a critical dimension. Anything between 13.80 and 14.00 will work fine, with slightly under 14.00 mm being much easier to thread. Cut a relief on both sides.
The 14.50mm front sight step is a critical dimension. On critical dimensions, you may find it safer to cut 0.01-0.05mm oversize and finish with emery cloth. Cut a small channel at the shoulder. This serves two purposes. It gives a 90 degree shoulder even with a cutting tool having a slight radius at the point, and it gives a place for low-temp solder or Locktite to hold a loose-fitting front sight in place while drilling for the pins.
The 15.00 mm gas block step is a critical dimension. Cut a small grove at the shoulder.
Cut the handguard retainer step at 17mm. This is not a critical dimension. Anywhere from 16.75mm to 17.00 mm will work fine.
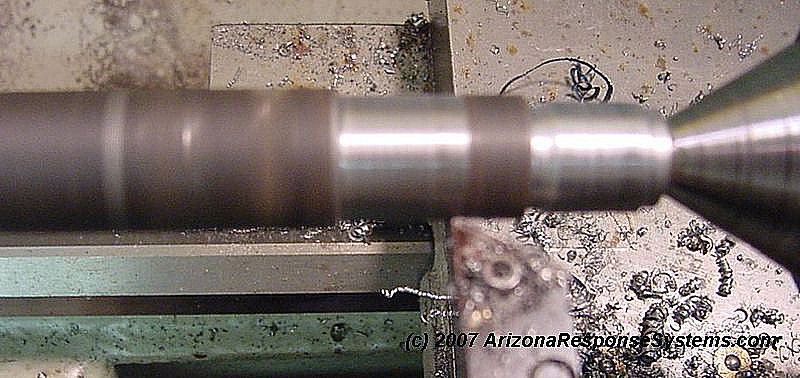
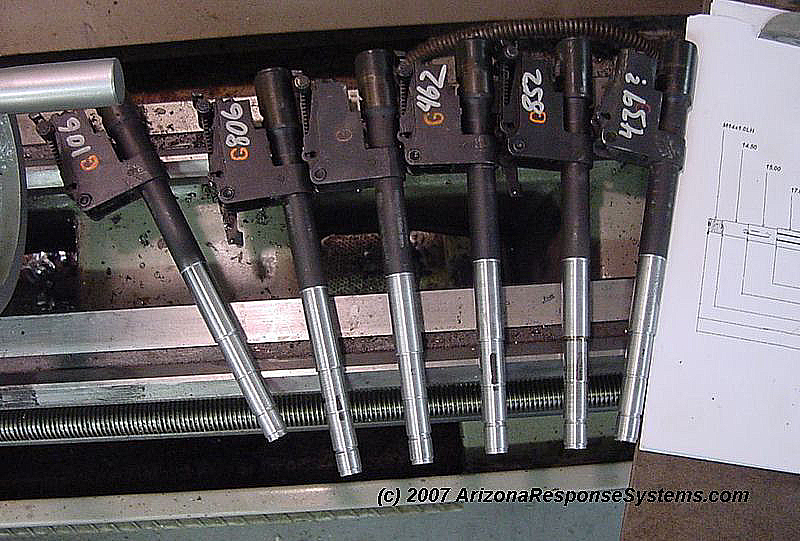
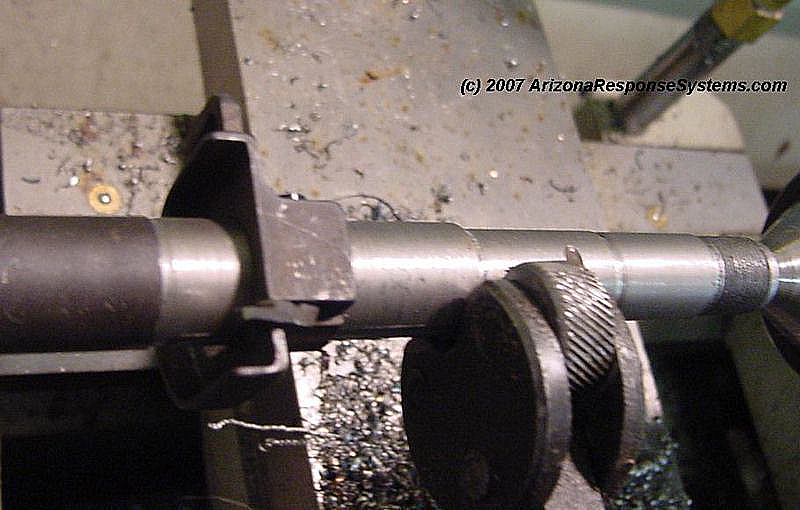
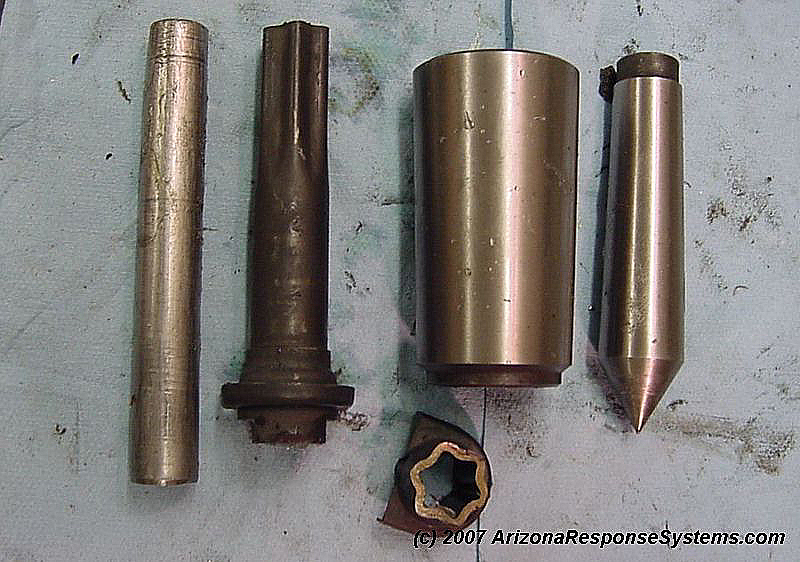
A batch of barrels after lathe turning
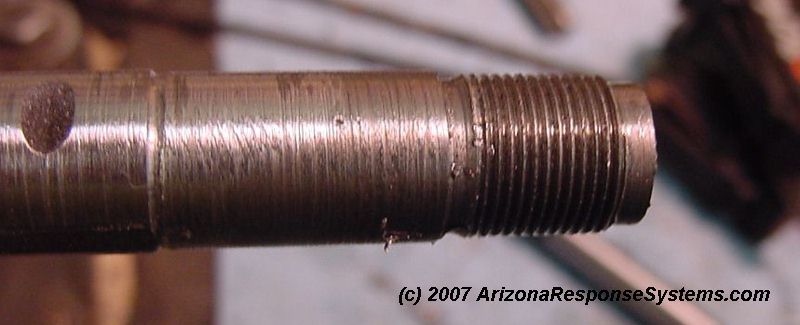
I found it easier to thread by hand than to change my lathe gearing over to left-hand metric. I used the cut-off barrel section and rod to pilot the threads off the bore.
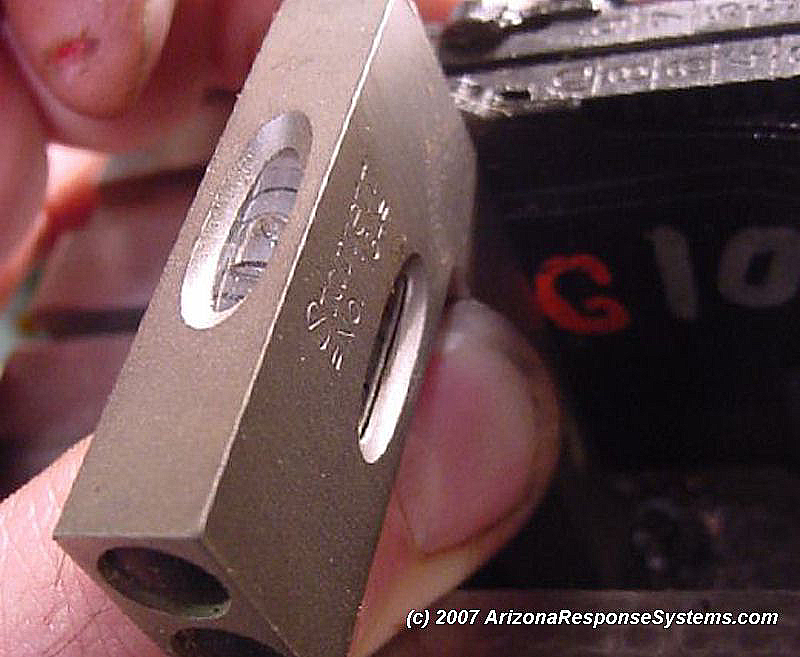
Romanian lower handguard retainers have two keys on the inside. You may remove the keys and skip the next step. I prefer to keep the keys because they give the lower handguard more rigidity.
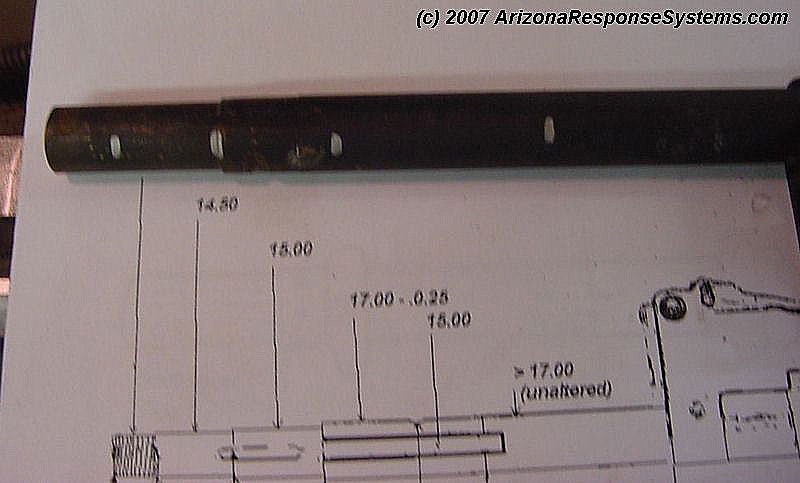
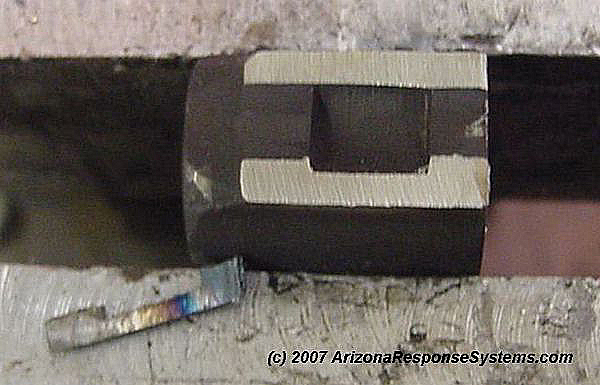
Level the barrel horizontally and vertically in the mill
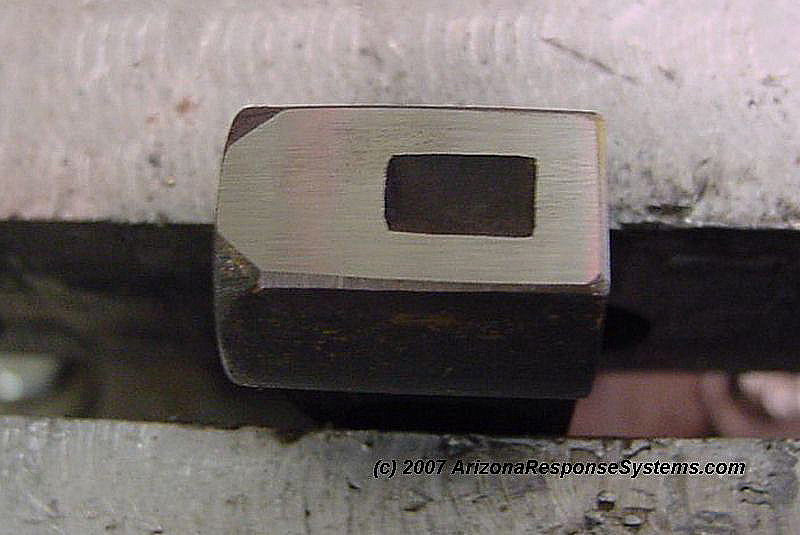
Cut keyways to a depth leaving 15.00mm inside width
Test fit handguard retainer
Cut groove for handguard retainer lever at 76.50mm. It is better for the groove to be too far to the rear than too far forward, as you can enlarge the groove forward with a round file for a snug fit. Too far forward and the handguard will be loose.
There is no room on a pistol for a cleaning rod or bayonet
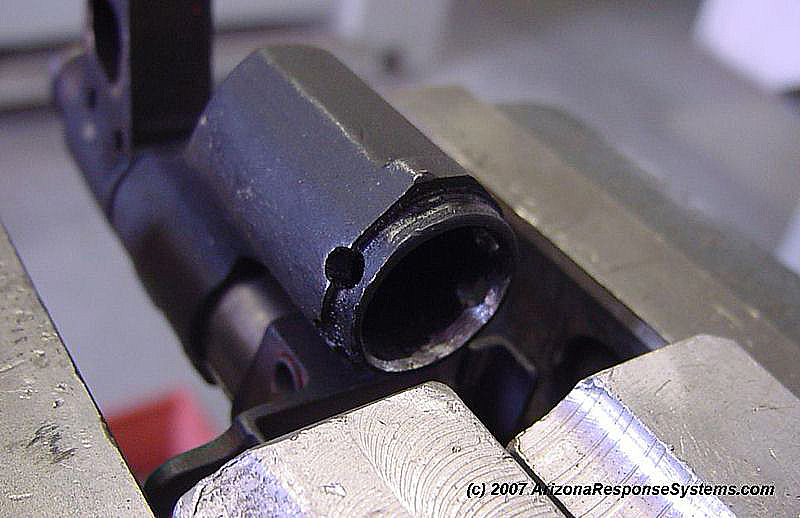
Cut off bayonet mount/cleaning rod guide
Sand/file flat with a chamfer on sharp edges
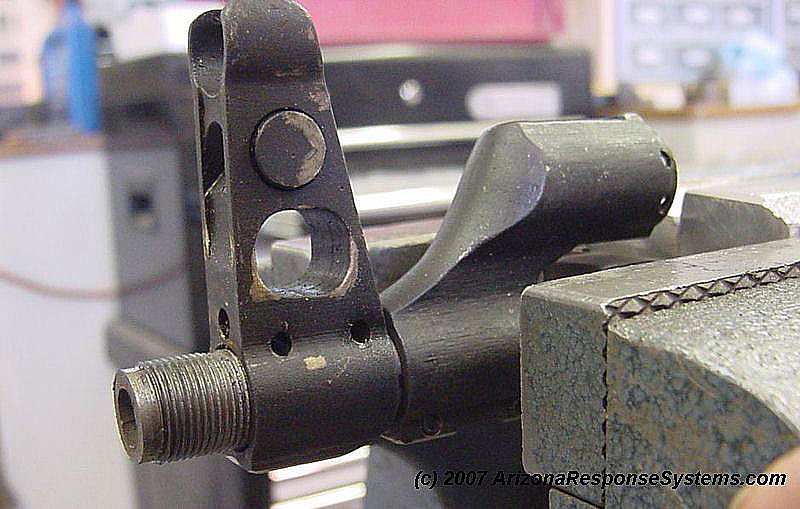
There is no room on a pistol for a cleaning rod
Remove cleaning rod retainer from front sight
File and sand flat, chamfer sharp edges.
Copper or brass backing plate for filling cleaning rod hole in handguard retainer
Weld in cleaning rod hole
Shorten handguard retaining cam lever to clear the gas block.
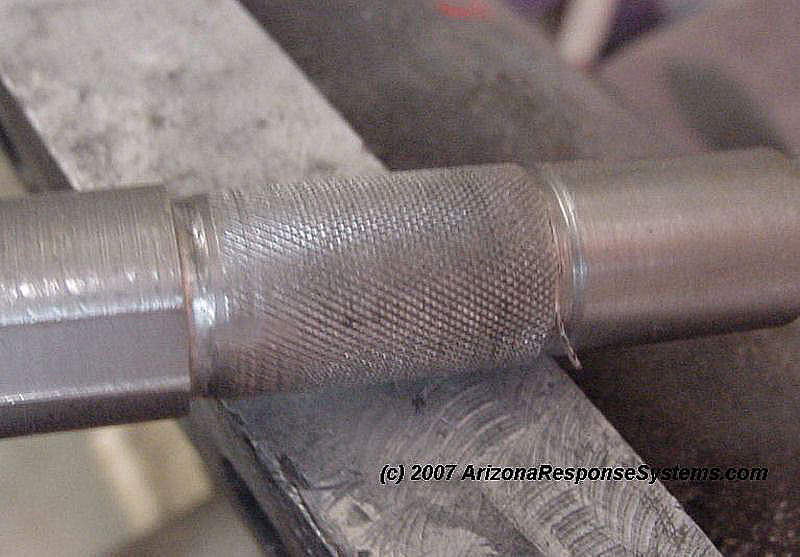
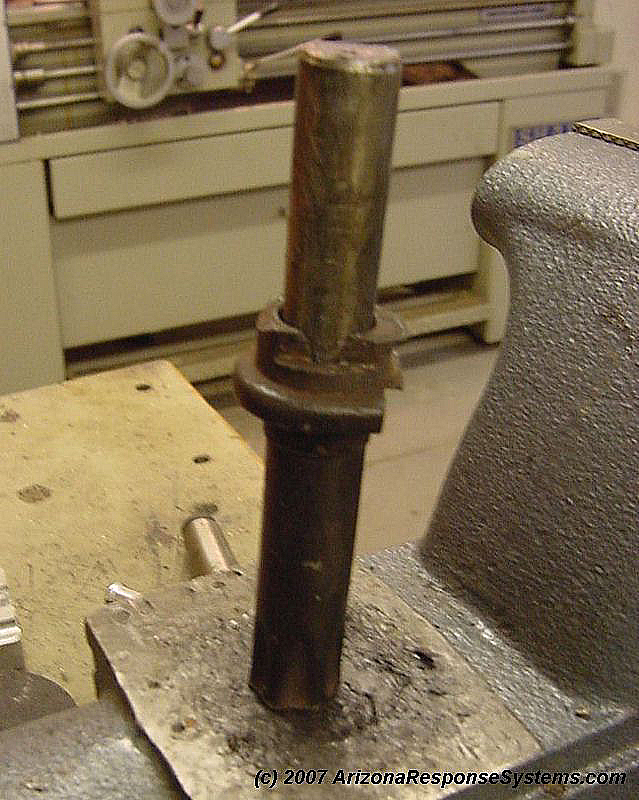
An undersized step in the barrel can be enlarged slightly by knurling.
Sometimes knurling is not enough to keep the gas block (or front sight) from shifting during drilling and pinning. In such an instance, low temperature (400 F) tin solder the part to the barrel. The small channel at the shoulder gives a place for solder to flow.
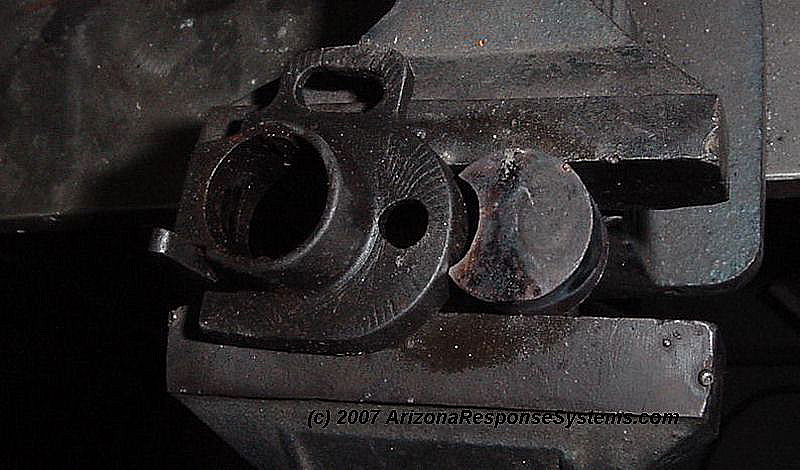
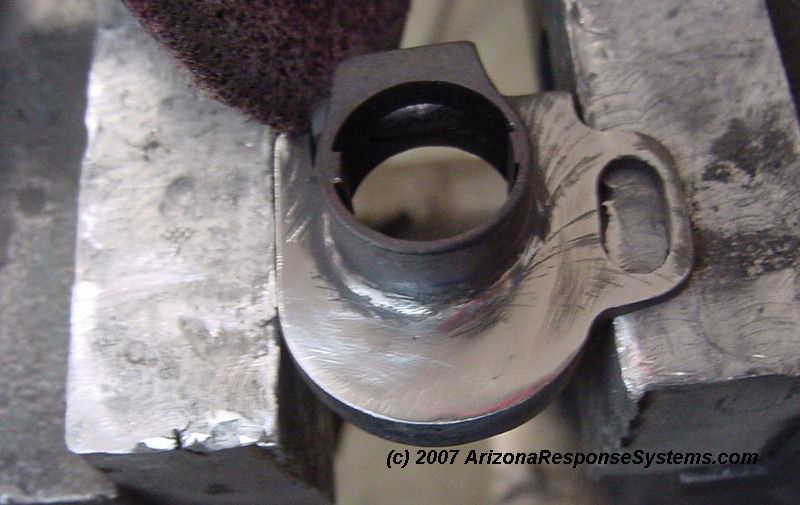
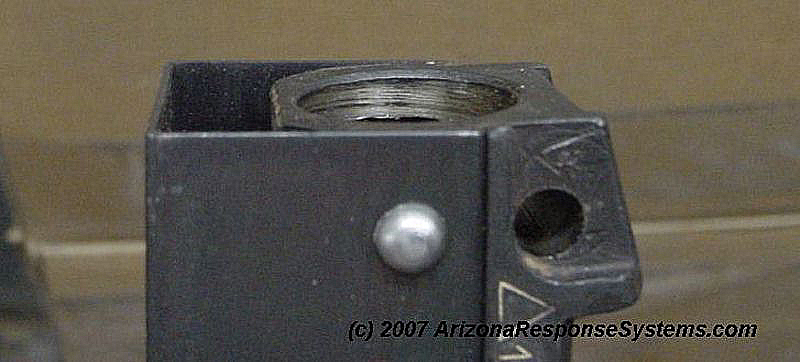
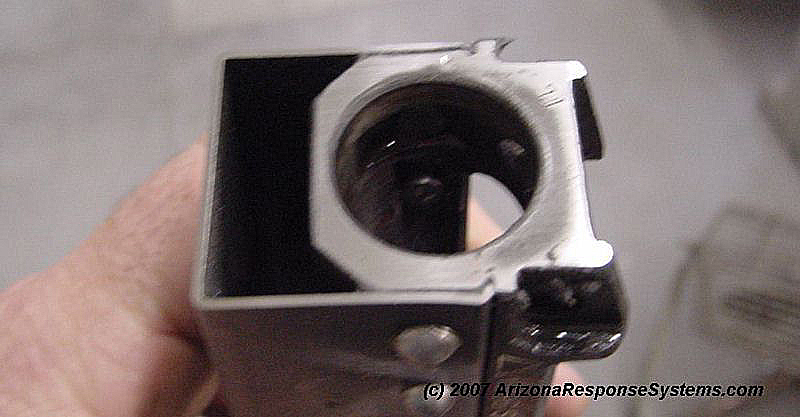
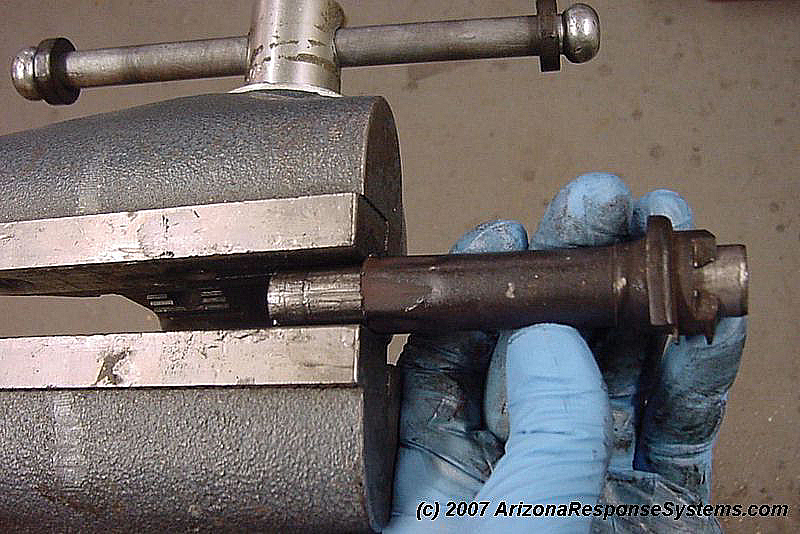
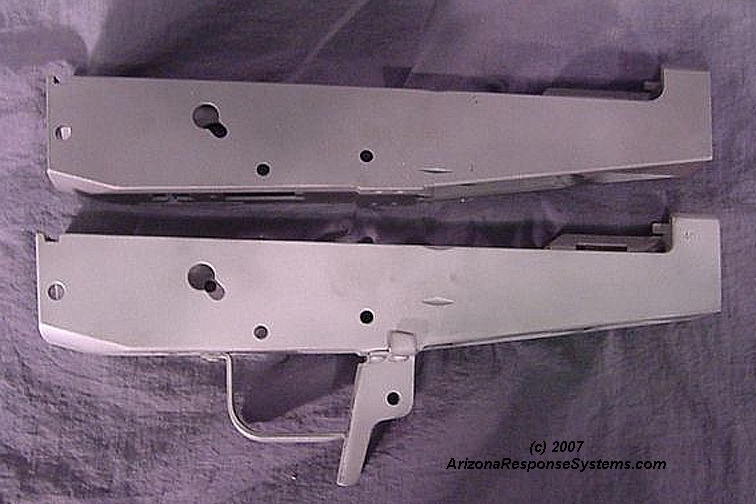
Examine the front of the receiver relative to the trunion angle.
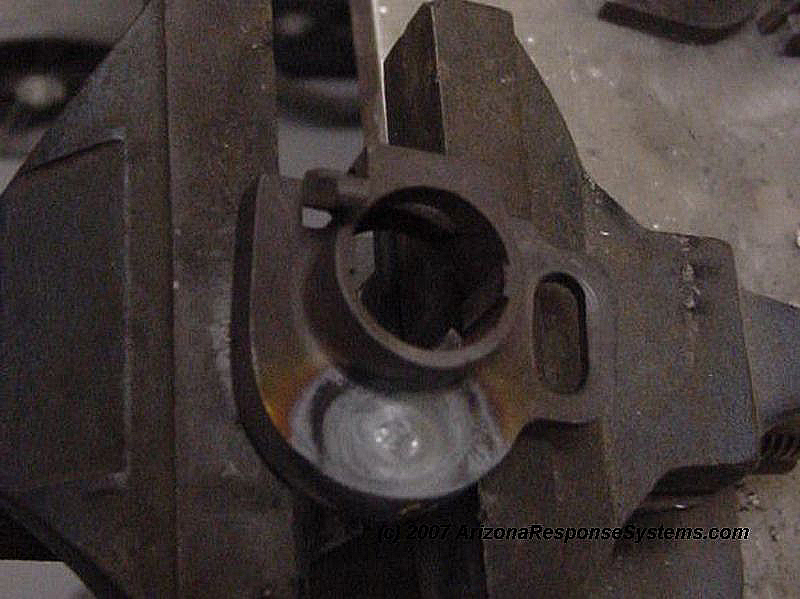
Face off the receiver to match the trunion angle. This will prevent a gap between the lower handguard and the receiver.
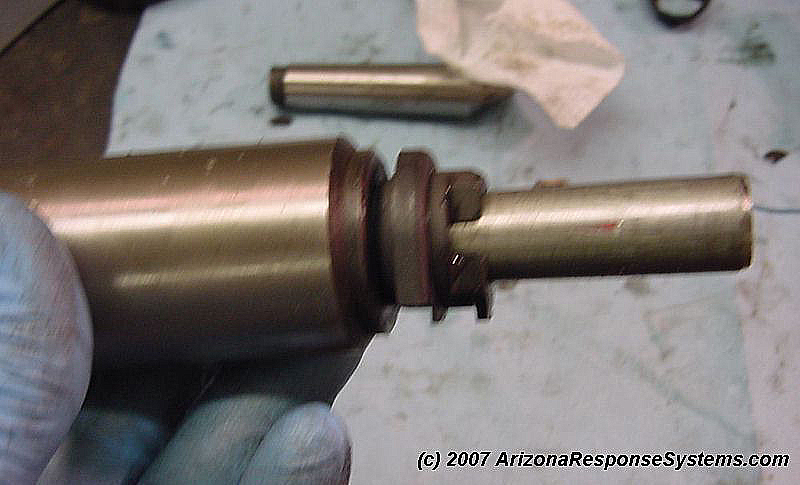
A slight chamfer inside the gas block will help guide the piston.
Alignment of the gas block and front sight to the rear sight is made more critical by the short sight radius. I use a pointer on my mill and traverse the table. When the pointer is centered on all components, I drill for the pins. After pinning the block, I use an extended length cobalt 3.5mm drill bit and I drill the gas port through the gas block and into the barrel. Keeping a cleaning rod in the barrel will prevent over-penetration.
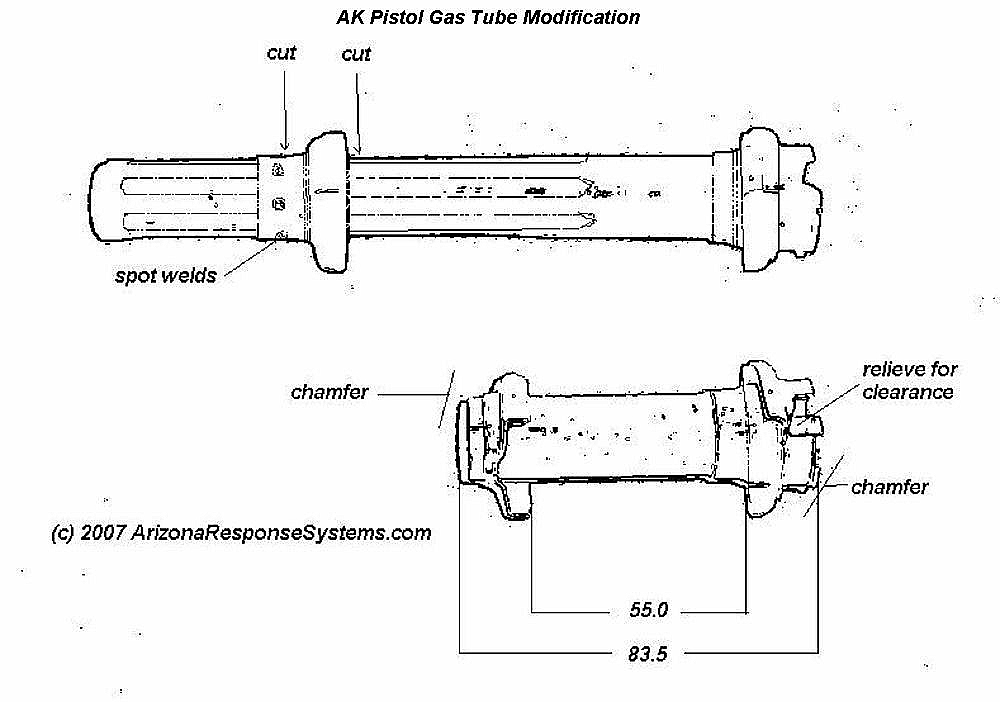
Gas Tube and Upper Handguard
Cut gas tube on both sides of front upper handguard retainer. Do not remove front handguard retainer from the gas tube. Leaving it on the tube will reduce the chance of the thin portion on the underside splitting during the swaging step. The finished overall length is 83.5mm. Make sure you leave a bit of excess material when you cut. The end will get dented up during swaging and may even crack. Have enough material to trim it back to finished length after soldering.
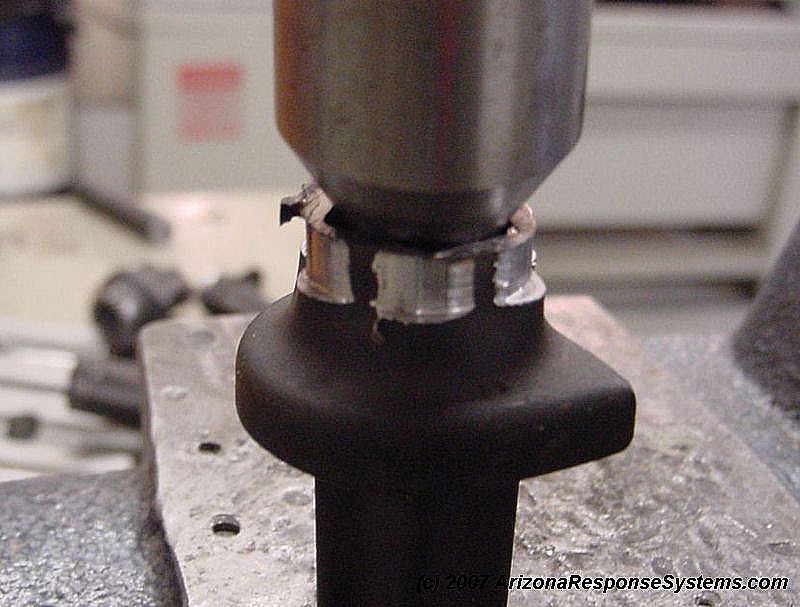
Fabricate a tapered cylinder to swage ribs out of gas tube. An old Morse-taper center was a convenient tool for expanding the end.
Expand the flutes enough to insert your tapered swage.
After you have pressed out the ribs, separate the retainer from the tube.
The same procedure for expanding the ribs on the rear section. I found lubing the swage with heavy grease reduced the chance of the tube cracking.
Driving the swage through. One could use a hydraulic press, but I found an air hammer work just as well and was faster and allowed more control.
I found by accident that the pictured Morse-taper adaptor is a perfect tool – the gas tube slides in and is prevented from over expansion.
Gas tube after expansion. You may need to slightly chamber the edge to slide the front upper handguard support into place for soldering.
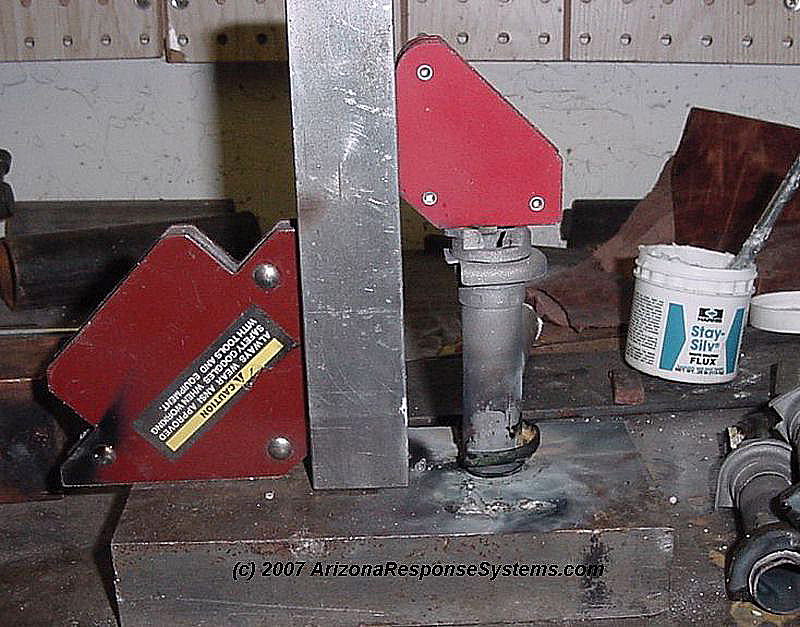
After having a couple front upper handguard supports shift while soldering, I started to put a tiny tack weld on the underside to hold in place during silver-soldering. The red angles are magnetic and make light duty fixturing easy.
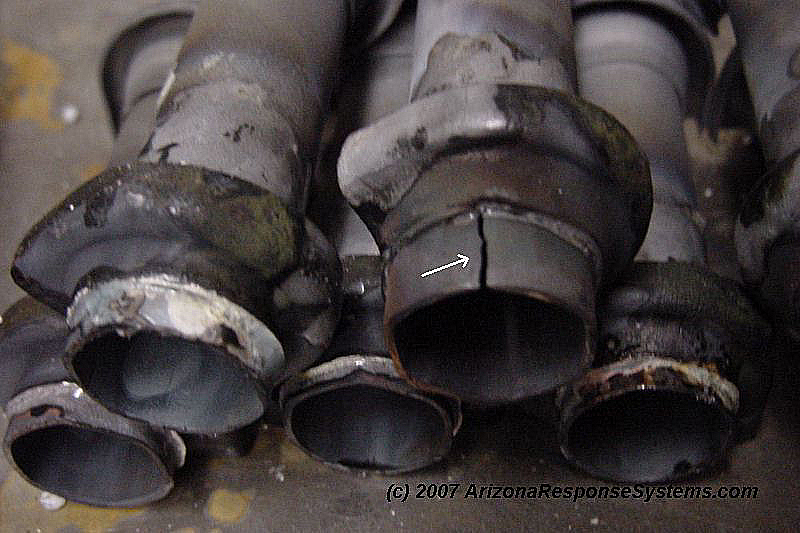
A small crack from swaging the ribs expanded under heat. This may be weld-repairable.
If the gap is too tight for the upper handguard wood, or the retainers are not parallel, you can true the surfaces carefully on the lathe.
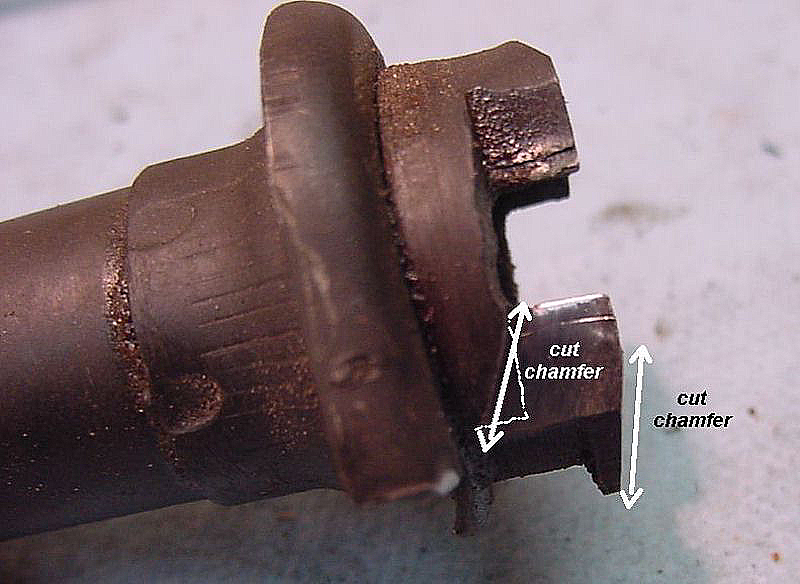
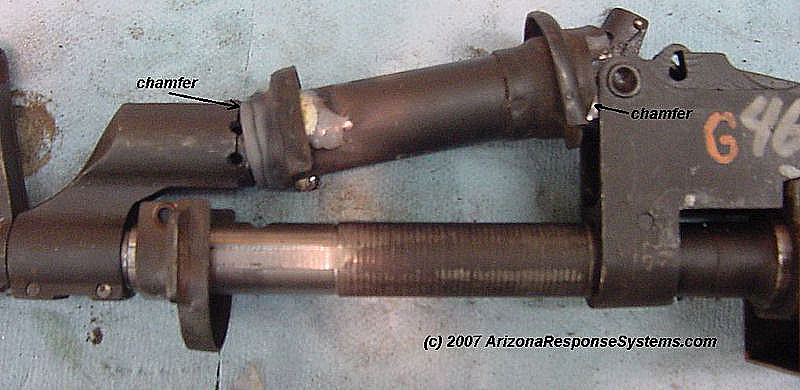
Chamfer the back of the tube both on the surface that contacts the rear sight block and on the bottom sides to clear the sides of the rear sight block.
Test fit. It is better to have the gas tube too tight than too loose. Lightly sand the inside of the tube to make sure it is round and will match the gas block. Slowly reduce the length of the tube until it will drop into place. Camming the retainer lever down will push the tube forward slightly and tighten it. The lever is spring steel and forcing it into position may break it off.
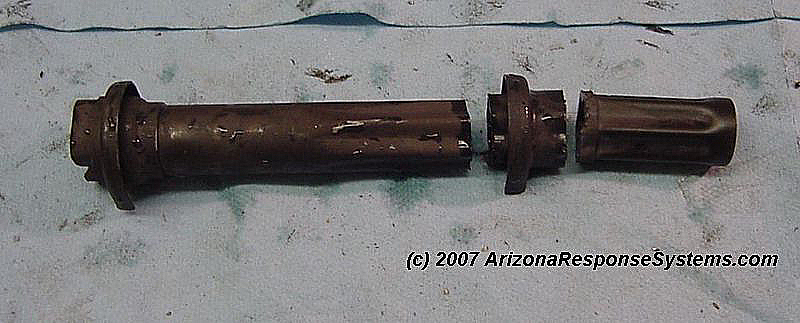
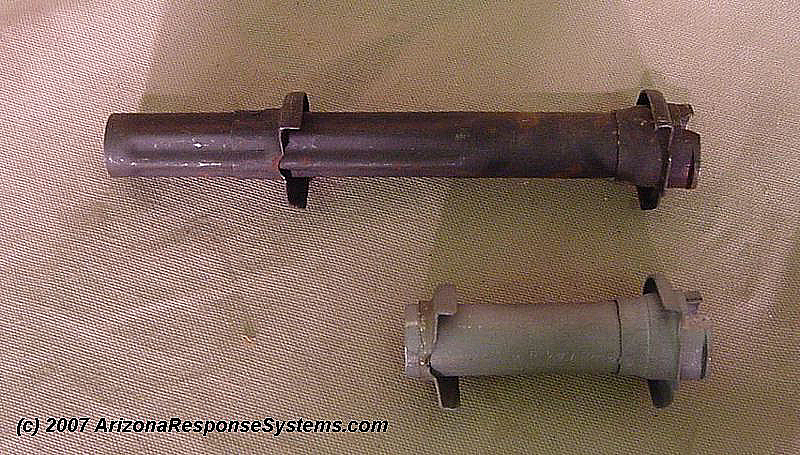
Standard Romanian gas tube with finished pistol gas tube for comparison.
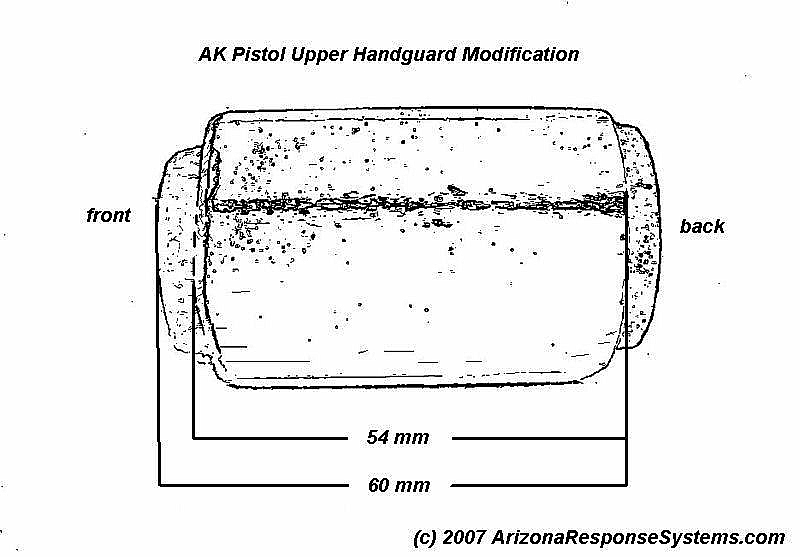
Upper Handguard
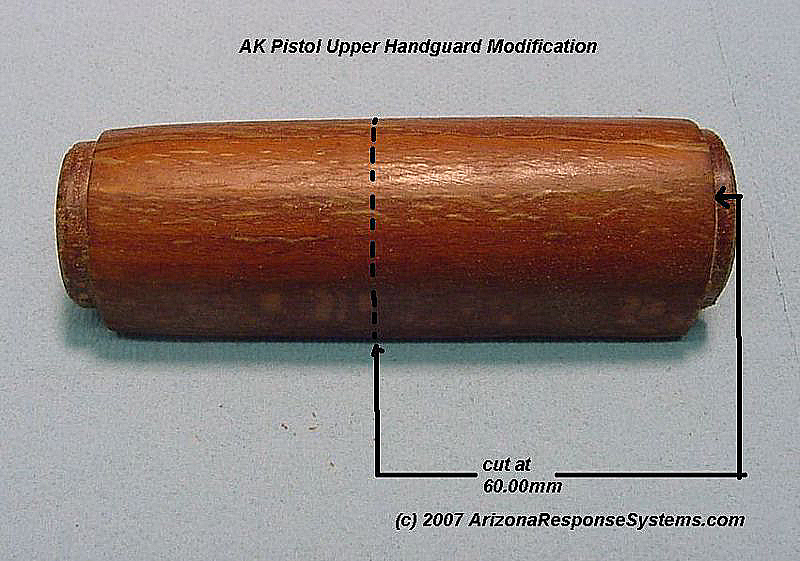
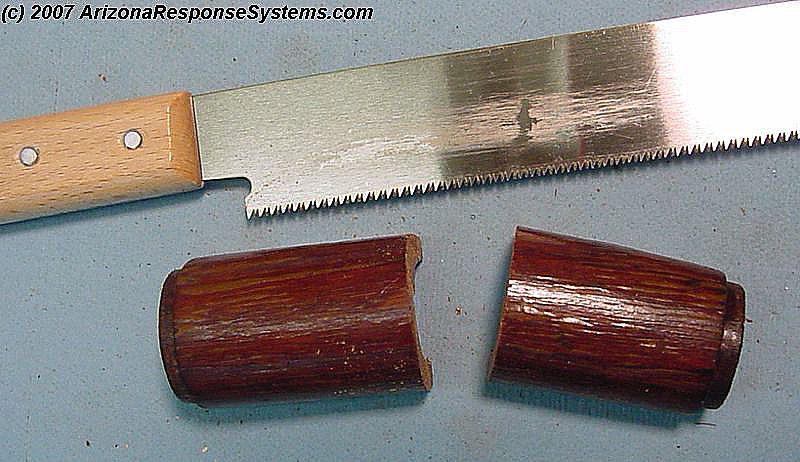
I have had poor results chemically stripping the upper handguards. They tend to warp and crack, so I recommend against it. Mark upper handguard as indicated and cut. They can be fragile, so a fine-tooth saw works better. Note the 60mm measurement if from the back shoulder, not from the end.
I prefer the Japanese style saw because it cuts on the draw stroke rather than the push stroke.
Mark upper handguard and cut to size. Double check dimensions on your gas cylinder. There may be some adjustment to my dimensions based on how you soldered the upper handguard retainer to the gas tube. Note the measurement is from the back shoulder and not the back end. I chose dimensions about 1mm long as it is easy to shorten during final assembly.
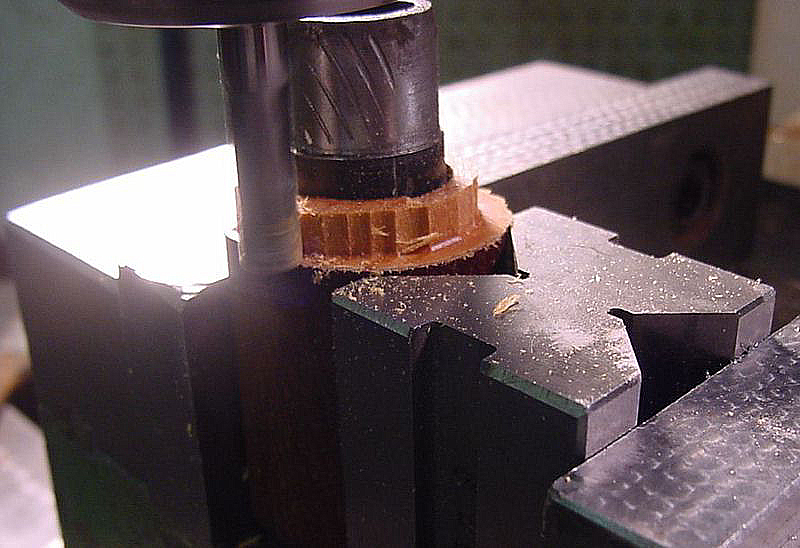
I use a mill to rough out the shoulder. I have the outside supported with a V block and the inside supported by a section of 1/2″ black iron pipe.
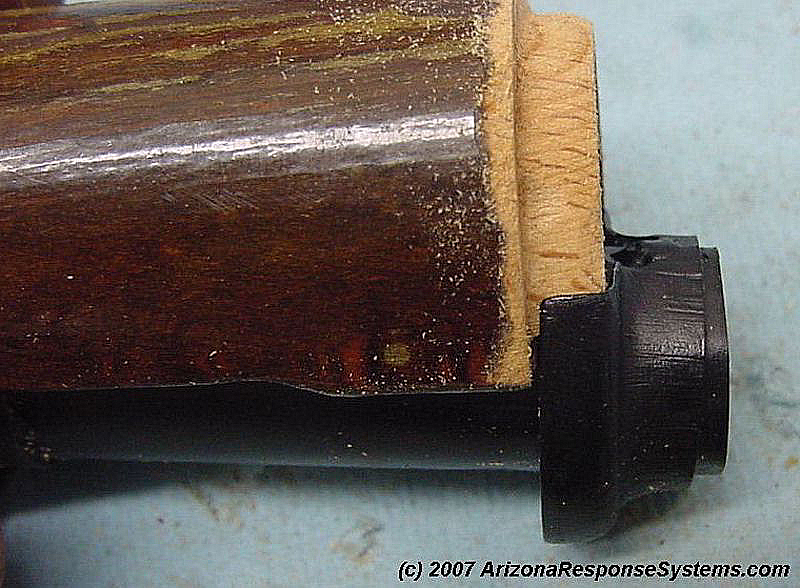
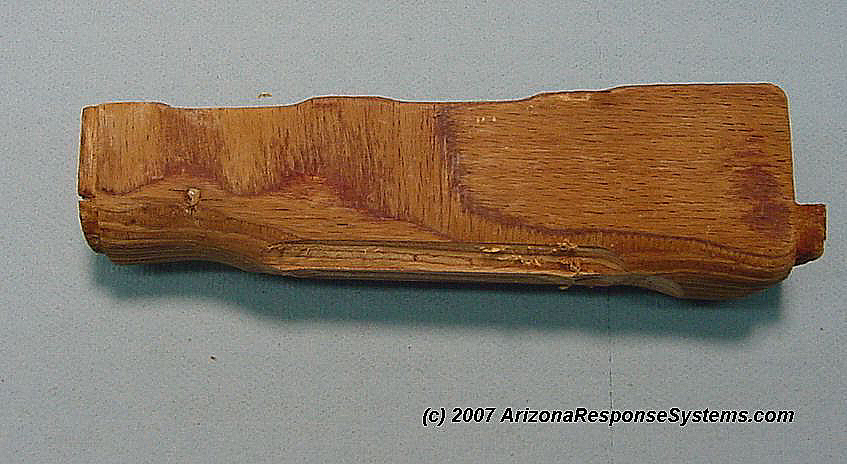
Finish with a file and bevel the edges.
Test fit to gas tube, then sand and refinish.
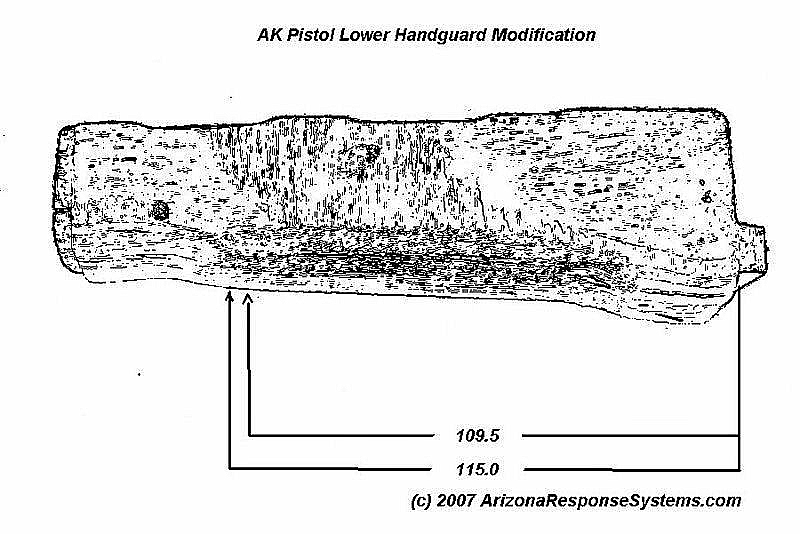
Lower Handguard
I chemically stripped the lower handguards. I used a table saw to cut off all the Romanian front pistol grips. It wouldn’t be worth the set-up time, except I was doing 300 of them. The cut is at a slight angle. I then put them in the mill with a 5 degree angle block to rough them out with a 2″ ball end mill.
Note that the underside of the handguard is NOT parallel to the top. Keep the angle on it or you will break through to the cleaning rod hole.
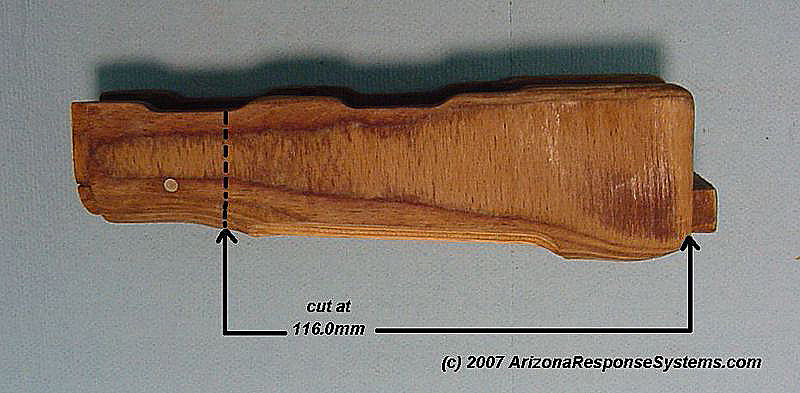
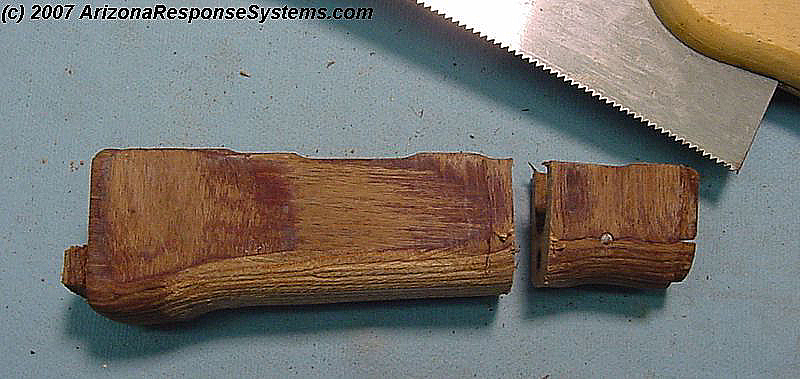
Cut as marked. This is a few millimeters longer than the final length for a margin of safety – its always easier t make it shorter than to make it longer.
The lower handguard is more robust than the upper, I had no problem using a box saw. I prefer the more ridged blade than that found on a hack saw.
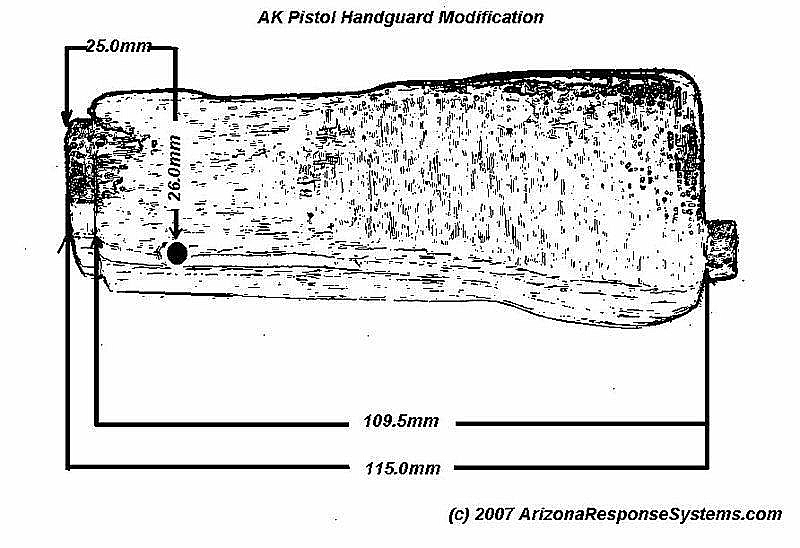
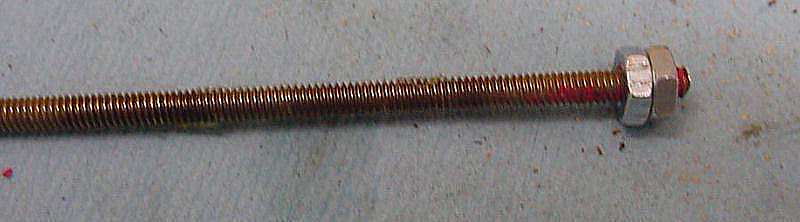
Mark for final length and length of the front lower handguard support step. Mark for the reinforcement metal. This will pass through the existing cleaning rod hole. Drill hole for all-thread reinforcement. a #29 is the specified drill size for tapping a #8×32 thread, but will cause the brass rod to seize and break. I use a #28.
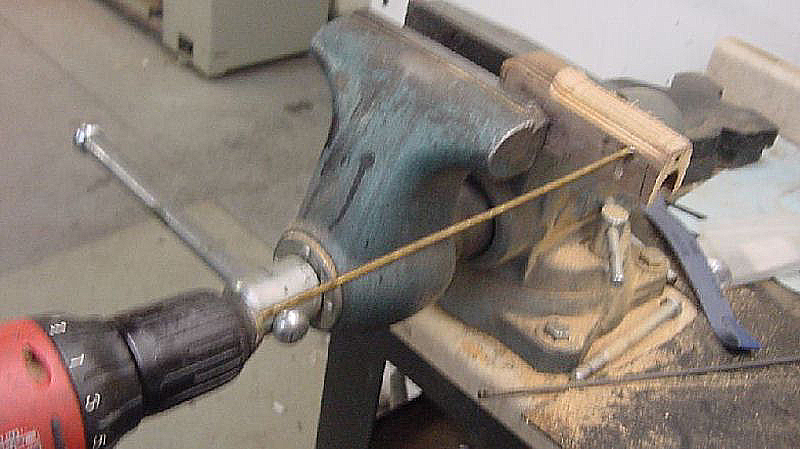
Using two nuts on the all thread allows me to drive it using a power-drill or socket wrench.
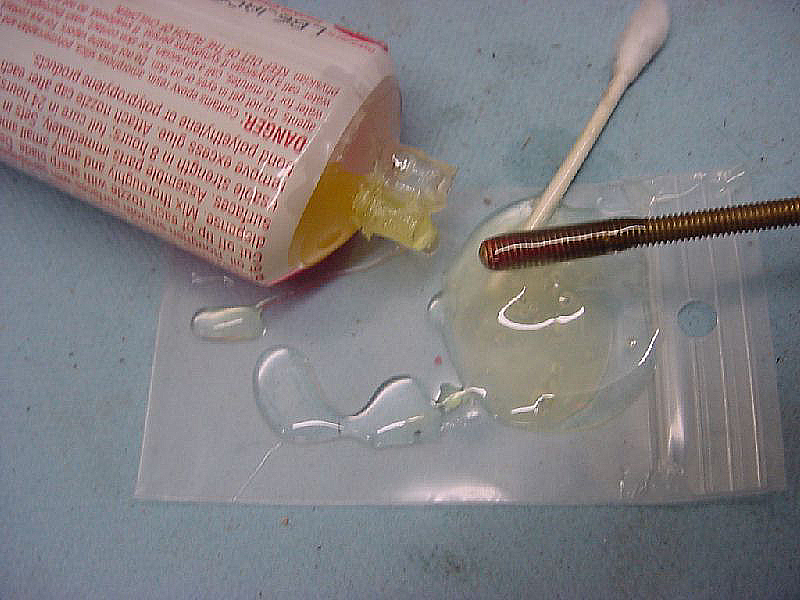
I coat the threads in 5 minute epoxy.
Screwing the brass all-thread reinforcement into the laminated wood lower handguard.
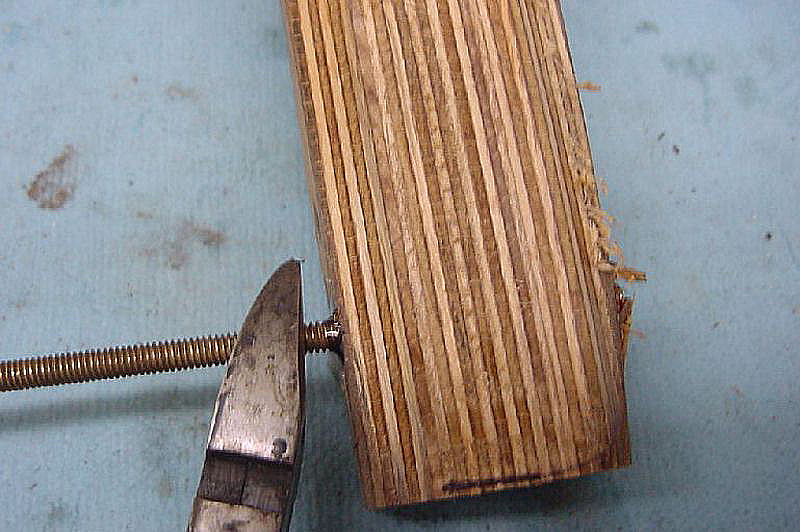
Cut off extra all-thread.
A simple fixture for shaping the lower handguard wood. (1) 1/2×13 nut, (2) 1/2×13 all-thread couplers, (3) 1/2″ fender washer (4) 1/2×13 threaded rod, (5) 3/4″ fender washer, (6) 1/2″ copper tubing, (7) masking tape, (8) spacer.
Lower handguard mounted in shaping fixture showing masking tape wrapped to appropriate diameter.
Lower handguard ready for shaping
Mounting fixture in a vise, shape the lower handguard with rasps, files, and sandpaper.
Cut front lower handguard retaining profile using appropriate tools. A coping saw and file works well. I use a mill with a 5/8″ 4-flute HSS cutter at 1200 RPM
Check your final fit with a lower handguard retainer.
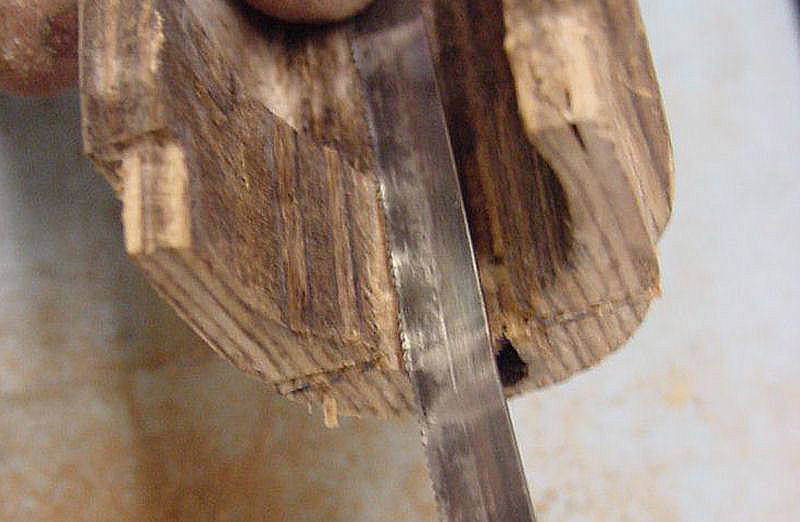
Cut channel to clear small hack-saw blade. Draw line at indicated height.
Make slit to depth of shoulder
Continue slit to inside wall of lower handguard
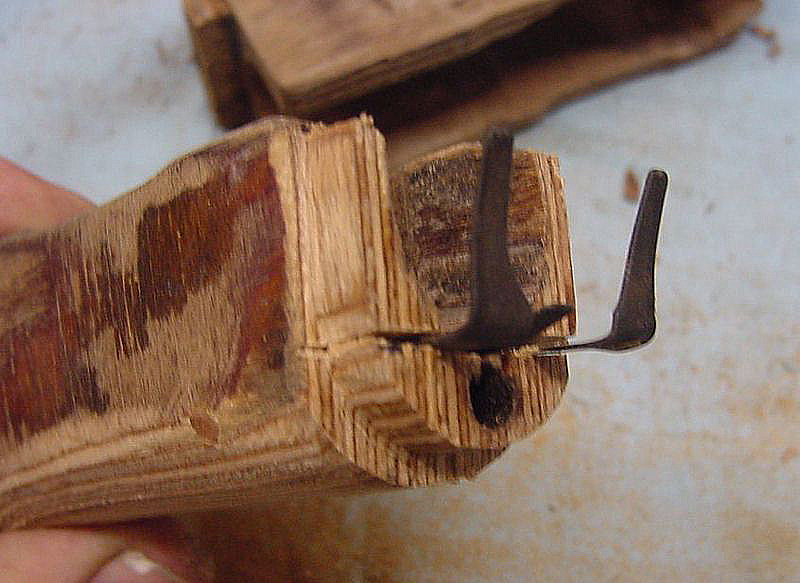
Test-fit spring tensioner.
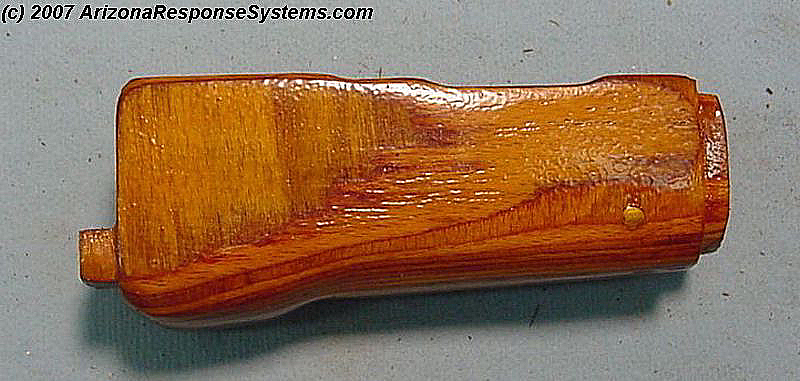
Finished lower handguard, right side view. I sanded to 220#, bleached, neutralized in vinegar, and then applied 4 coats of Bullseye Amber Lacquer. Allow several days drying time – I like a minimum of 4 days and prefer a whole week. I will finish with a slight buffing with 0000 steel wool to remove the gloss. If I want a glossy finish, I do just 3 coats of lacquer.


Leave a Reply
You must be logged in to post a comment.