AK Tutorial: Troubleshooting select issues
- rake of receiver when folded
- height of receiver rails
- angle of bolt carrier rail
- length of bolt carrier rail
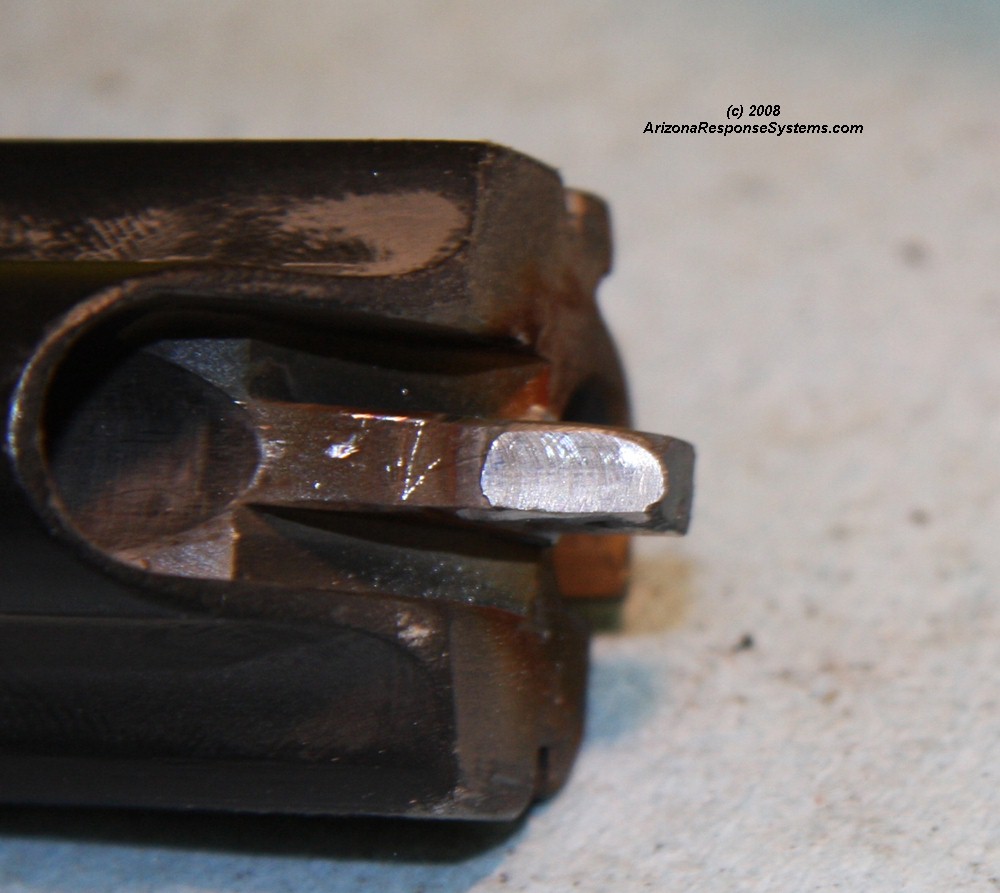
- relative height of bolt carrier tail
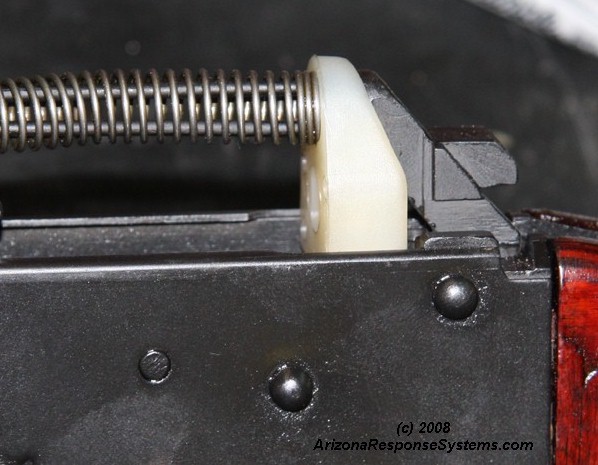
- size or recoil spring guide under spring
- height of recoil spring guide
- height of rear trunion in receiver
- depth of keyway in rear trunion.
I believe the primary cause is the rake of the receiver flat when folded. The AK receiver bottom is at an angle relative to the top. The slightest variation in this angle from original specification, multiplied by the length of the receiver, will result in a statistically significant increase in the height of the rear trunion relative to the front. Combined with possible variations in the receiver rail height, and their relative position to the rear trunion, and the bottom line is the recoil spring guide sits too high.
The recoil spring guide serves a dual purpose. Not only does it center and contain the recoil spring, but it acts against the rear of the bolt carrier to keep the bolt carrier pressed down against the receiver rails. It is failure of this latter function that is the main cause of bolt carrier jump.
Since the inward fold of the receiver set the rear trunion height by aligning with the rear trunion grooves, and we cannot alter the rake of a folded receiver, and it is impractical to cut out and change the position of the receiver rails, we have to accept those dimensions is fixed. We can alter the bolt carrier and the recoil spring guide.
Repeated heavy impact with the rear trunion can work the rear trunion rivets loose over time. I have only seen it once, and that on a heavily used competition gun with the Bulgarian Krink 4-piece brake. This brake creates the most back-pressure of any design – it was made for short-barreled guns that needed the extra pressure to cycle reliably. With the full length barrel, it slammed the carrier back against the trunion. Changing the brake to one that redirected the gasses sideways instead of back, and replacing the factory recoil spring with aWolff +15% Power Recoil Spring stopped the heavy impact.
There are two concerns against using the buffer. One is valid, the other a myth. The valid concern is that the buffer essentially extends the rear trunion forward. In a rifle where the bolt carrier does not contact the rear trunion, adding a buffer will make it hit the buffer. Is this a problem? I can see where one might think it is, but I don’t think so. I can’t think of a way to test for it other than to see if a gun with a buffer will still batter the rear trunion rivets – I’ve never seen or heard of it happening, but I can’t rule out the possibility.
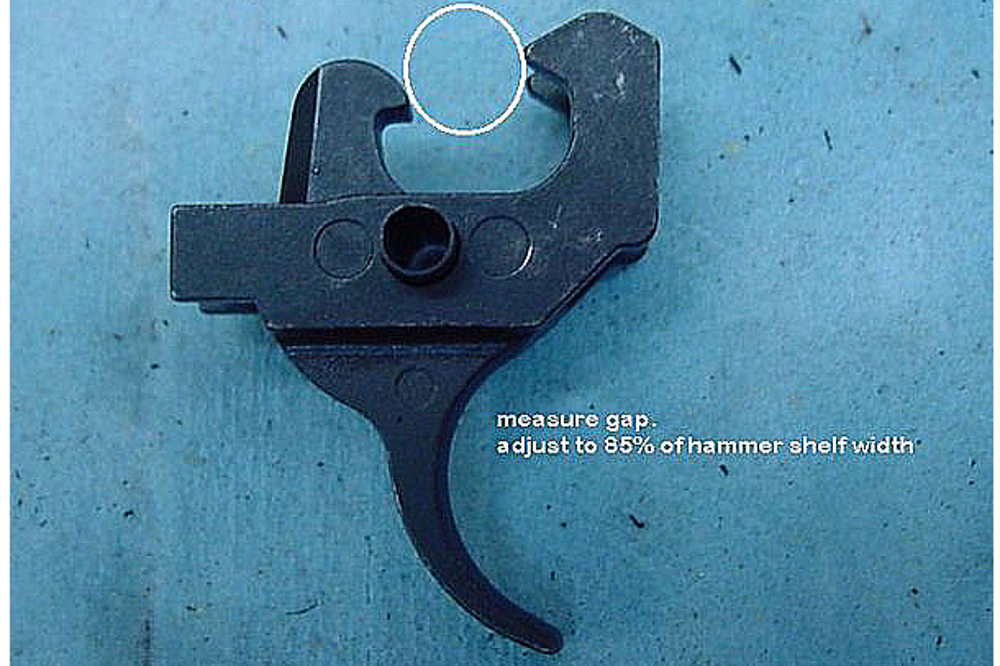
The other concern, which I will demonstrate to be a myth, is people who claim adding the buffer causes their rifle to double or to have hammer- follow. I assert that their trigger group is adjusted improperly and will double with or without the buffer. It is only because the slightly shorter bolt travel makes the cycling faster that the potential for doubling manifests. A different person with more sensitive trigger control could make the gun double without the buffer.
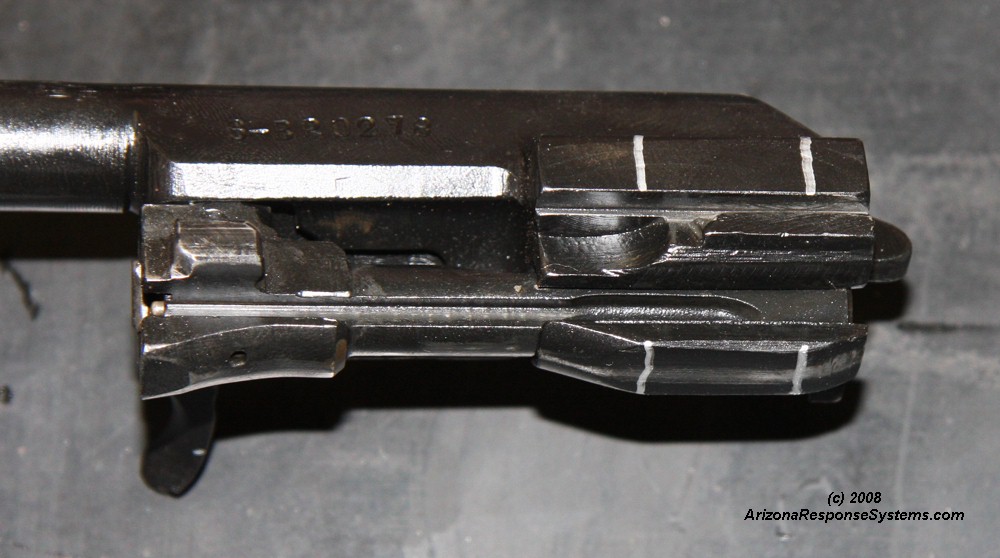
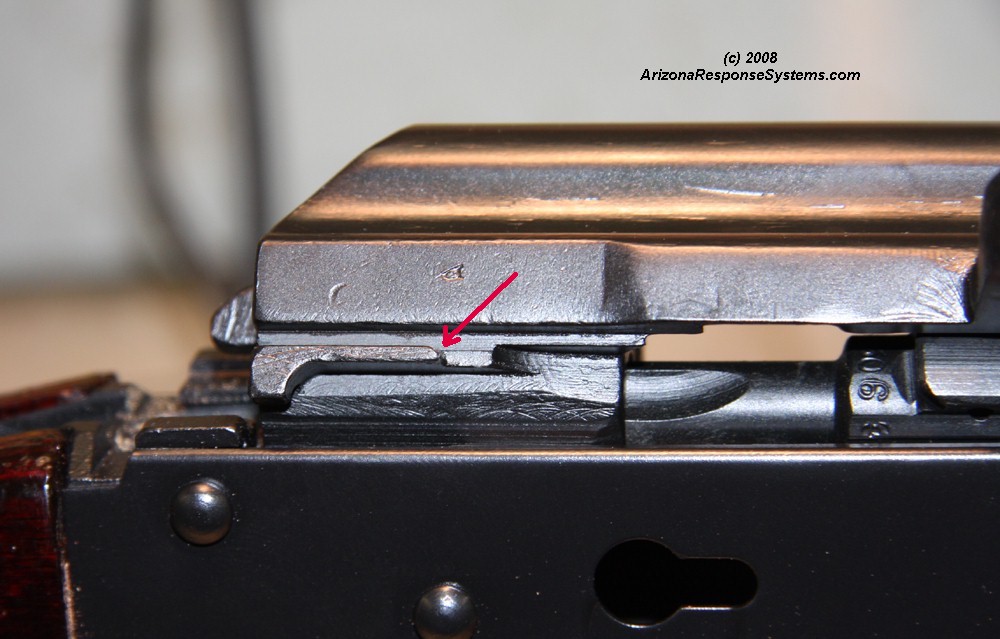
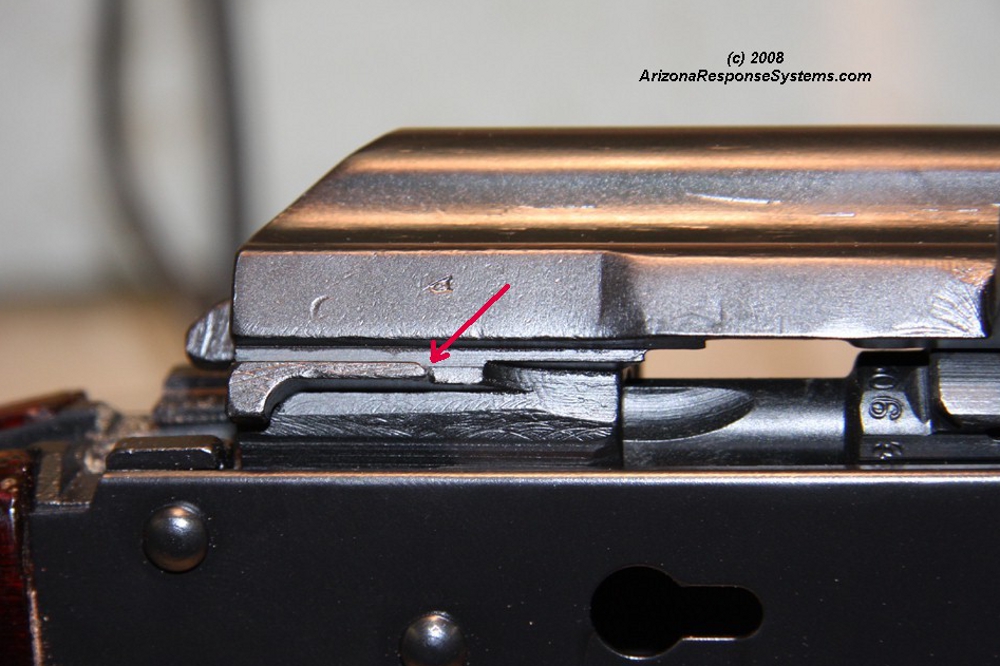
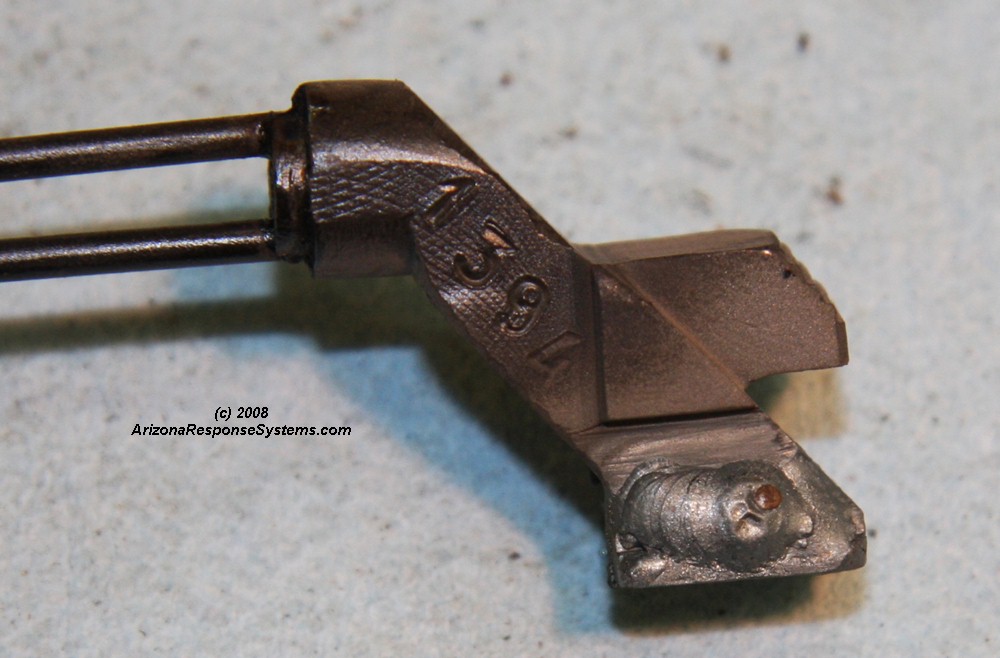
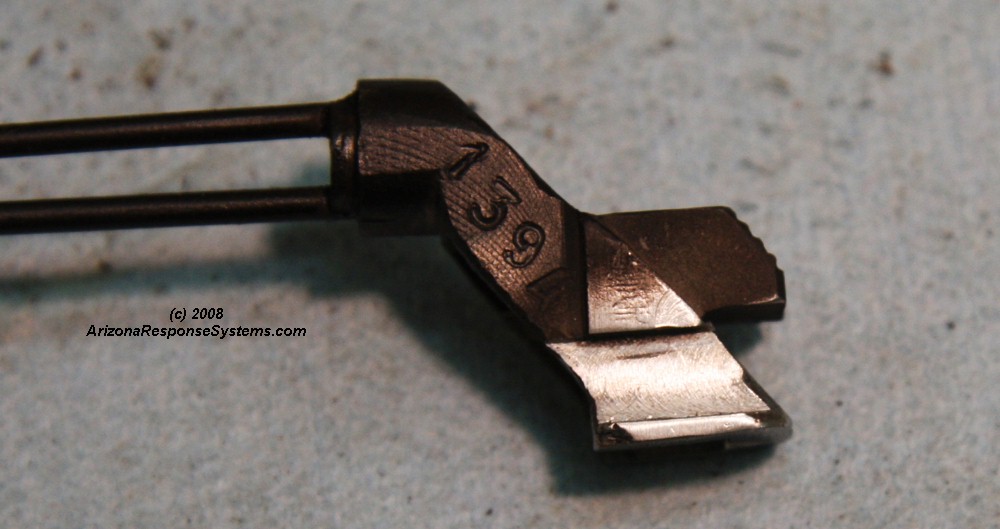
Because it is the most simple, the first thing I address is the angle of the bolt carrier rail. One thing I have learned about AKs is there is nothing random about it. If there is a minute machining operation, it is there for a good reason. While I may not always understand the reason, I have come to trust that there is one. Note in this image that there is a ramp on the leading edge of the bolt carrier rail. While it is on both sides, the right side is more critical because charging the rifle tends to not only pull the carrier back, but also up and toward centerline – perfect for jumping the rail. This is why a rifle that can be made to jump the rail on charging, may not do so in cycling, where there is no radial force.
While the design is sound, sometimes the bolt carriers are not machined perfectly. I have found that many of the rifles exhibiting this malfunction have this ramp cut sloppily – either not to full depth, or at insufficient angle. A careful slice with the side of a small rotary tool cut-off wheel may fix it.
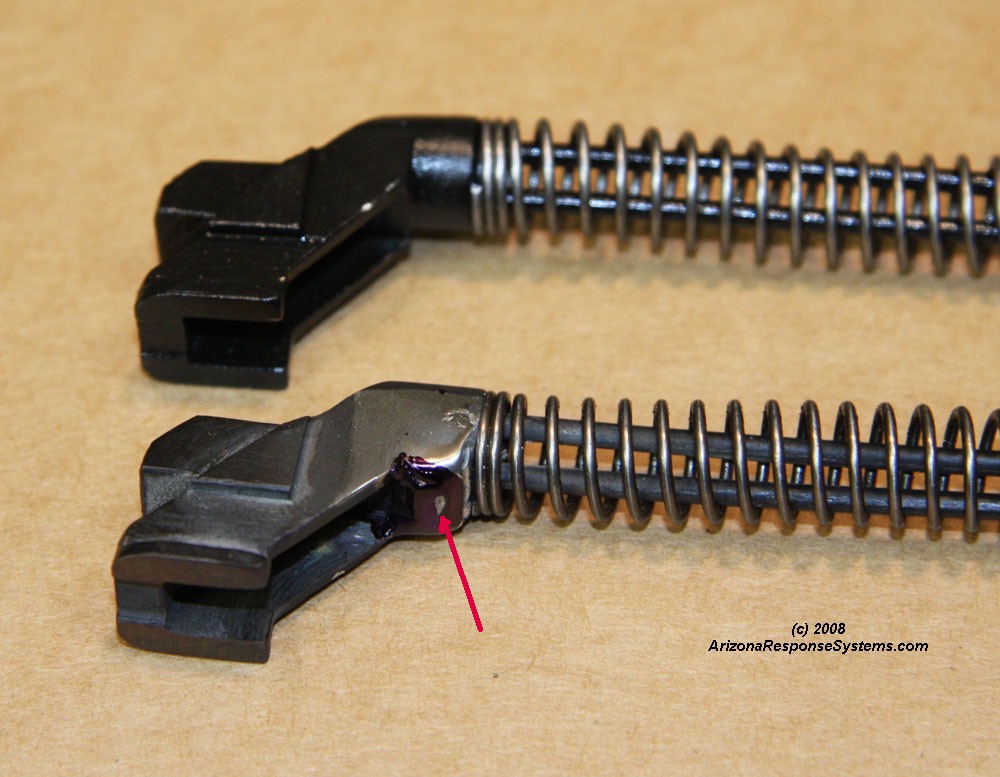
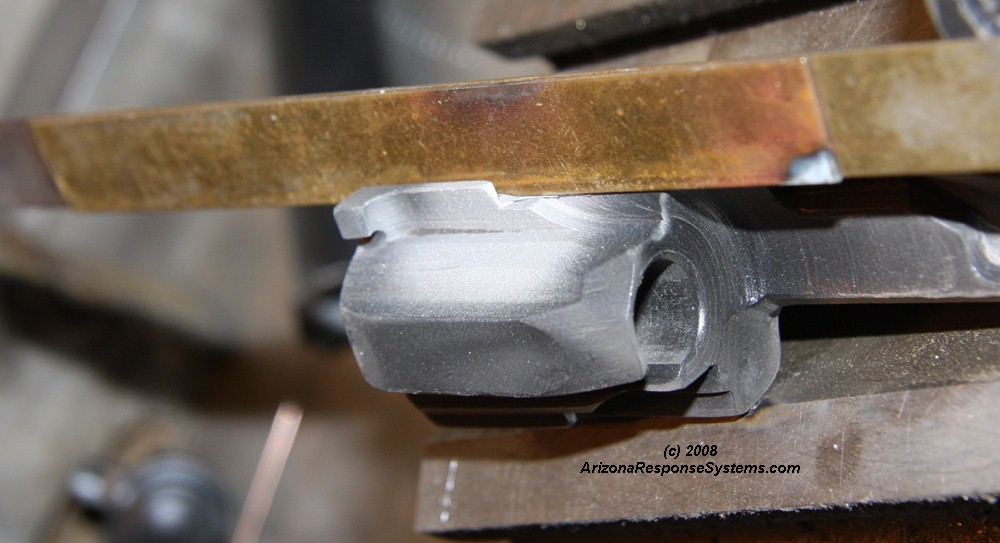

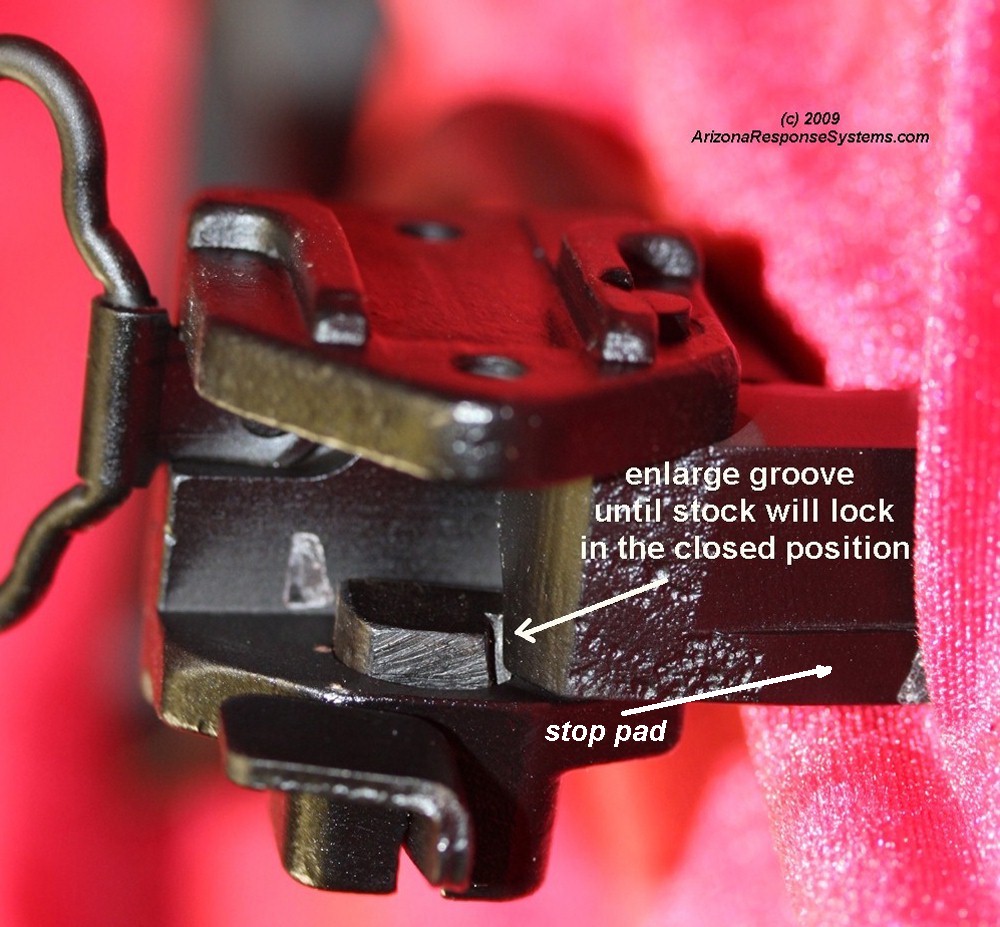
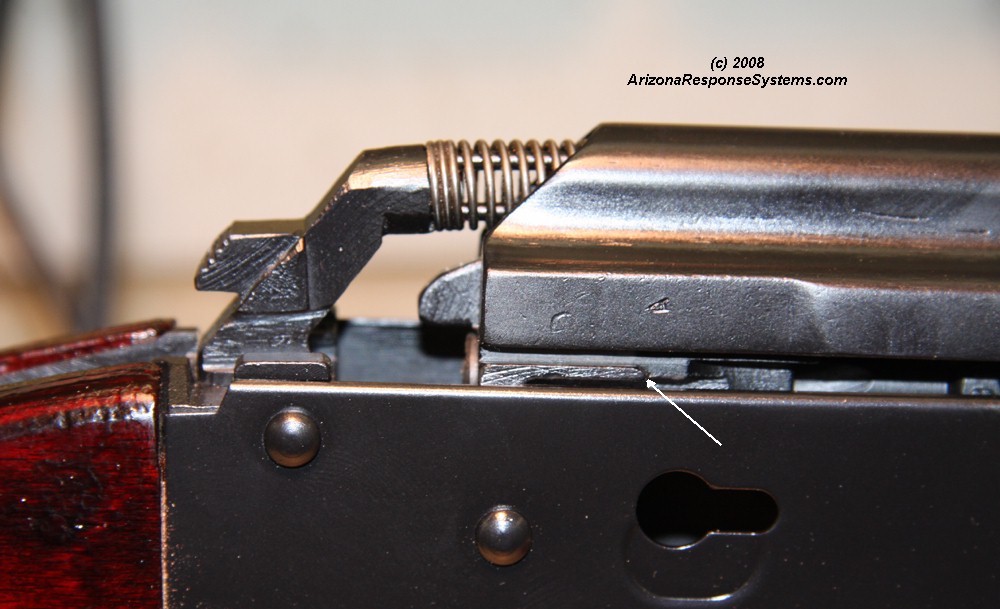
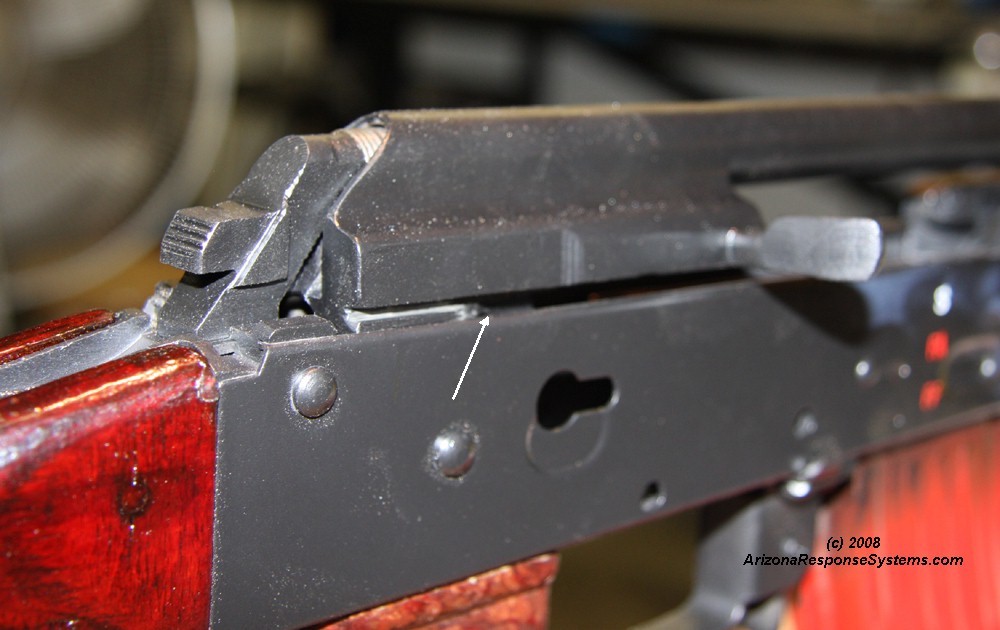
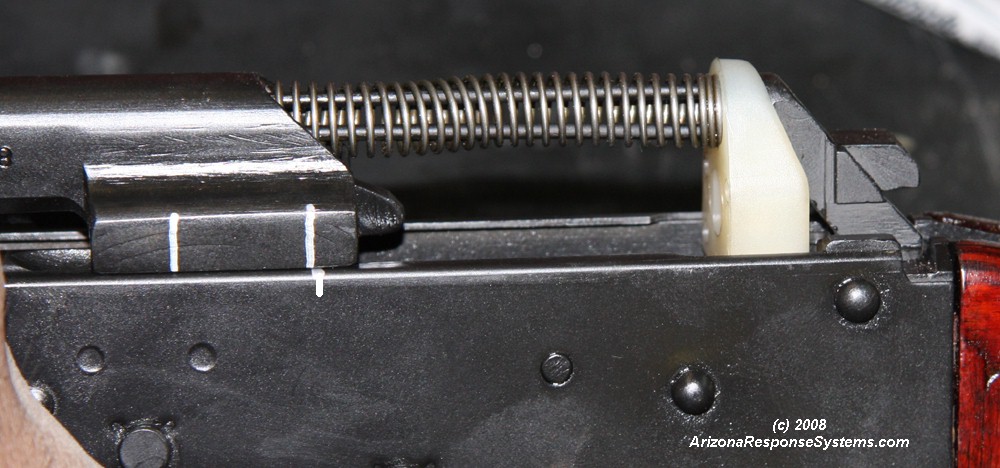
If the stock will not latch in the open position, you can increase the travel by reducing the height of the stop pad, as indicated in the photo.
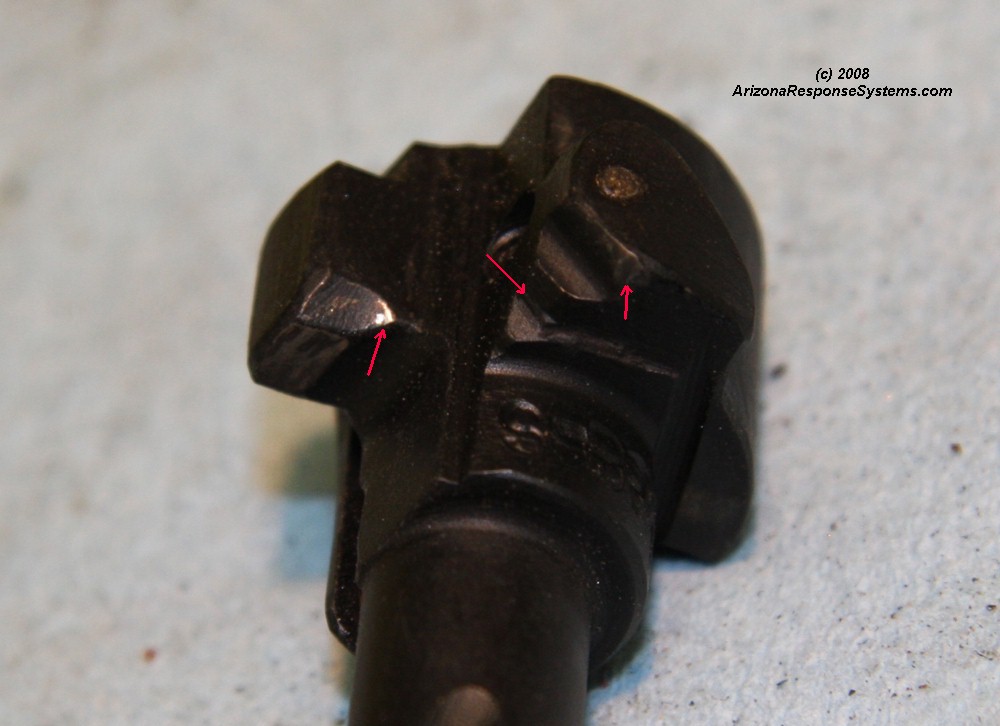
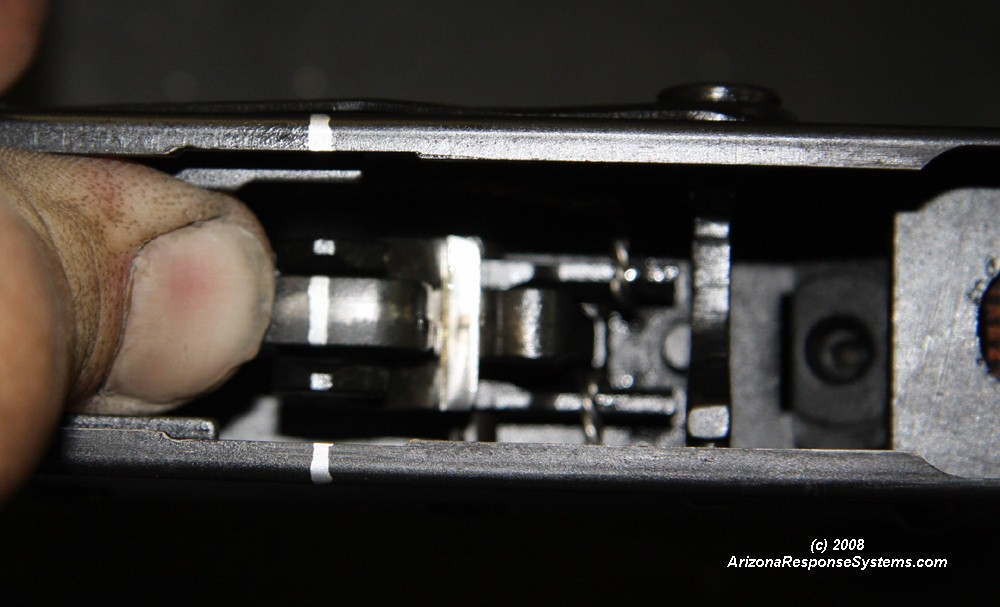
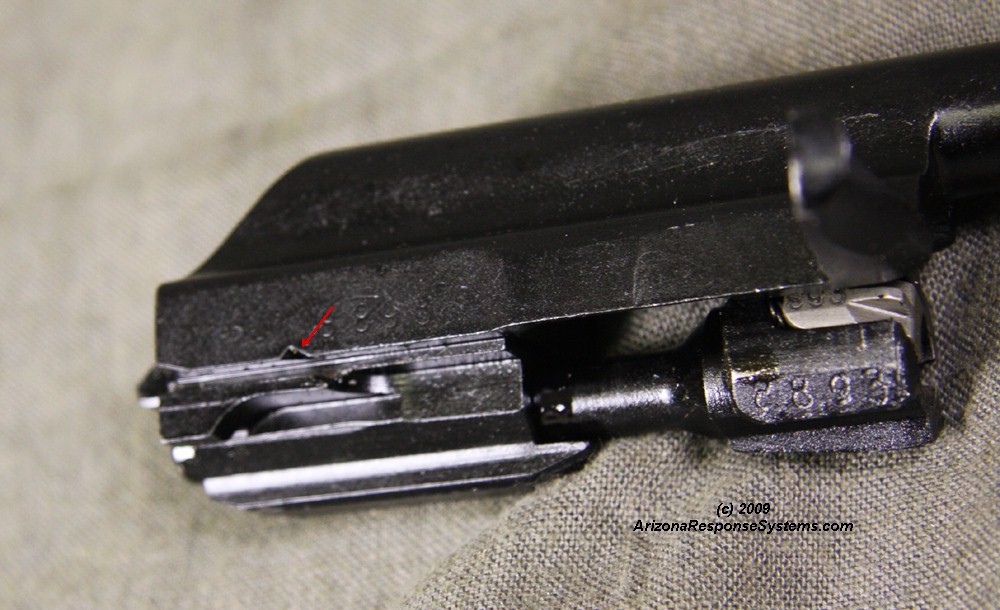
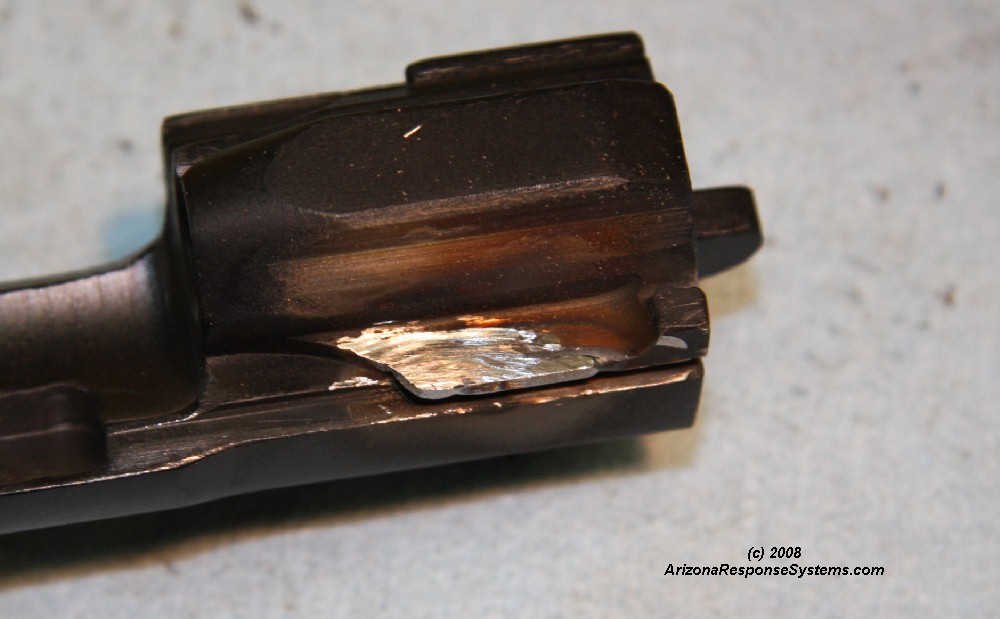
There are strategically placed angles on the bolt to initiate the rotation for locking and unlocking. I have found numerous AK bolts, particularly on new, unissued parts kits, where the angles are rough or of incomplete depth – perhaps caused by a worn edges on the cutter. Work the bolt several times and look for contact marks. You can polish the transitions between the angles and extend the cuts slightly toward centerline. Do not change the angles. Do not alter the rear surfaces of the bolt head, as these control headspace.
Leave a Reply
You must be logged in to post a comment.